
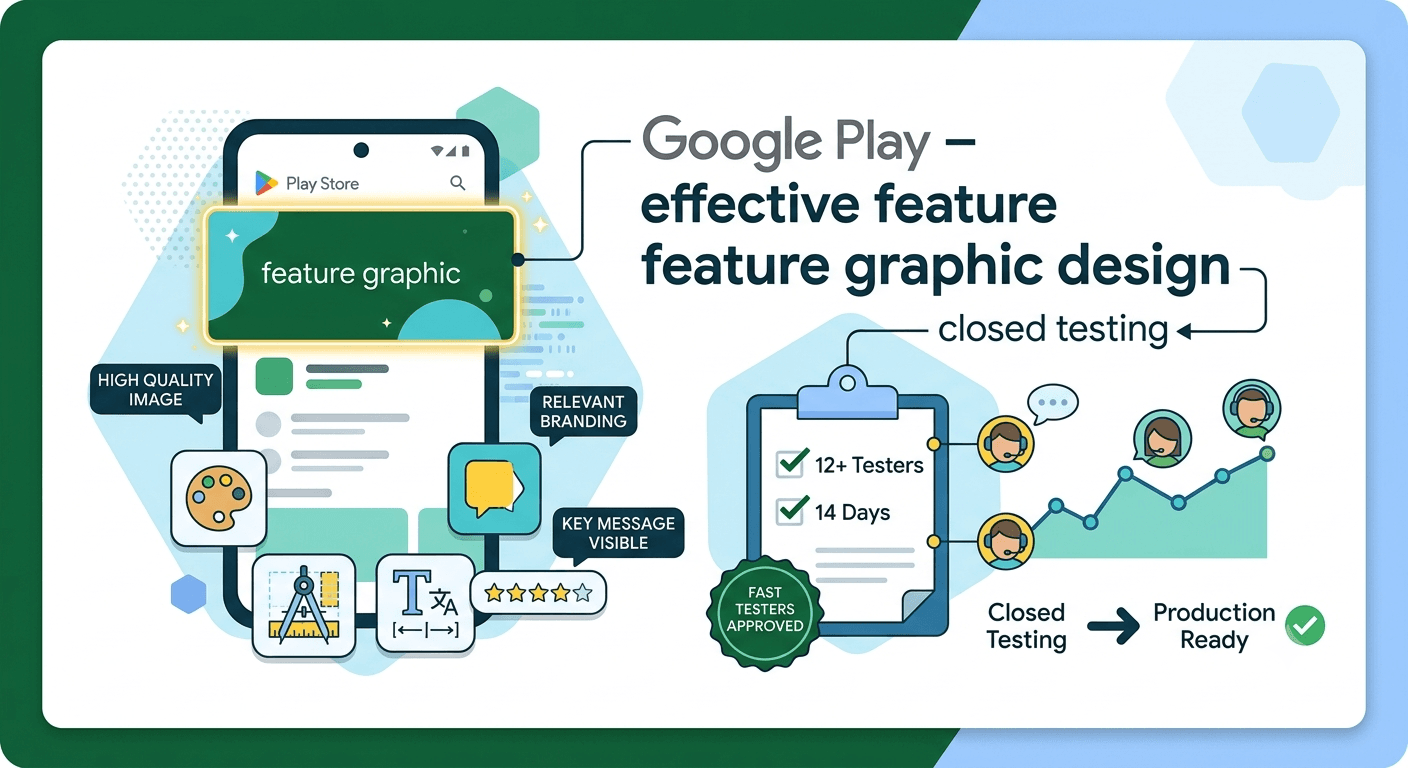
Google Play closed testing has officially become a mandatory gateway for new independent Android developers. This strategic guide covers everything you need to know about optimizing your feature graphic design, ensuring compliance, and utilizing professional testing solutions to launch your production app efficiently.
Crucial Update: Personal developer accounts created after November 2023 must run closed testing tracks with a minimum of 12 to 20 testers for 14 consecutive days before requesting full production access. Missing this requirement delays app deployment cycles significantly.
Why Google Play Feature Graphics Matter in Closed Testing
Even though a closed testing track is only visible to invited users, your Google Play store listing metadata, including your feature graphic, must be complete. Google's review algorithm evaluates your app's visual identity during initial testing submission stages. A bad graphic can flag account review friction early on.
Technical Specifications for Feature Graphics
When uploading assets to the Google Play Console, your feature graphic must adhere to exact design parameters to pass initial publishing compliance:
Core Rules for High-Converting Graphics:
- The Safe Zone Principle: Place prominent focal elements, titles, and branding items inside the middle 85% safe boundary box shown above. Google cuts outer edges dynamically on different screen form factors.
- Avoid Text Stacking: Keep descriptions short. Your feature graphic works together alongside your app icon, not in competition with it.
- High-Contrast Assets: Use vibrant palettes. The graphic must pop elegantly on both dark mode and light mode devices inside the Play Store ecosystem.
What Google Strictly Audits During Closed Testing
Google verifies engagement data metrics systematically. The platform ensures real human testers opt into your private track link, process installs securely, and leave active, un-sideloaded installations intact throughout the window.
Using emulator farms, bot-driven installs, or programmatic setups will result in rapid production track application rejections.
Step-by-Step Closed Testing Track Workflow
- Build Upload: Bundle your application package into a release file and send it directly to the Closed Testing segment inside your Play Console.
- Store Asset Setup: Fill out descriptions, attach your optimized feature graphics, and provide layout screenshots.
- Collect Opt-In Links: Acquire your unique internal or web invitation testing URL strings from your console's tester management panel.
- Onboard Real Testers: Gather authentic physical testing testers (Fast Testers matches you instantly with verified human profiles within 60 minutes).
- Maintain Track Consistency: Keep consistent operational testing running concurrently without intervals for exactly 14 full days.
Critical Mistakes to Avoid During Your 14-Day Cycle
- Misidentifying Internal Setup: Mixing up internal testing tracks with closed testing. Internal tracks do not qualify for production approval benchmarks.
- Dropping Count Mid-Way: Letting your group dip below 12 active users. Keep a baseline buffer of 15+ devices to offset variance.
- Premature Application Filing: Submitting production conversion forms prior to crossing the actual 14-day threshold.
Streamlining App Approvals with Fast Testers
Instead of manually source-recruiting test panels across dev forums, Fast Testers supplies a flat, structured execution service. For a single payment of $15 per application, developers bypass structural friction and access ready testing loops immediately.
- Instant Scale: Secure 15 professional, distinct Android tester assignments inside an hour.
- Analytical Framework: Track retention variables natively via interactive, clean progress logs.
- Proven Deliverables: Enjoy a 99.9% success rate across more than 1,500 successfully deployed Android applications.
Frequently Asked Questions
Yes. Although closed tracks use invite systems, Google's policy team evaluates asset completion quality directly when analyzing your request to graduate into standard production.
Testers typically begin joining your track inside one hour after submitting your valid Play Store opt-in web links.
Yes. Google's program explicitly encourages utilizing managed external user testing groups to collect actionable real-world stability feedback ahead of scale deployments.
Launch Your Application On Schedule
Skip weeks of troubleshooting and coordinating developer networks. Access 15 high-quality, continuous testers instantly for a single, straightforward price.
Start Closed Testing NowValidate your feature graphic during the window
The mandatory closed-testing period — 12 testers opted in for 14 continuous days before production for new personal accounts — is the perfect time to finalize and pressure-test your feature graphic, because you cannot launch until it completes anyway. While the clock runs, show your candidate graphics to your testers and ask which communicates your app's value at a glance. Real reactions from a dozen people beat your own bias about which design "looks best." See our closed testing guide and store listing optimization.
Because your listing assets are among the tasks you should complete in parallel with the window, use the 14 days to iterate: draft, gather tester reactions, refine, and lock in the winner before you request production. If you need a group of real testers to give this kind of feedback, you can submit your app. See screenshot and video assets.
Principles that make a feature graphic work
A feature graphic must read instantly at small sizes and communicate one clear idea, not a cluttered collage. Keep text minimal and legible, avoid placing critical elements where the play button or UI chrome may overlap, and ensure it works across the surfaces Google displays it on. Strong contrast, a focal point, and brand consistency with your icon and screenshots make the graphic feel cohesive. Follow Google's asset specifications precisely so it is never rejected or cropped awkwardly. See Google's graphic asset requirements.
Design for your audience and market, too. If you target multiple regions, consider localized versions with translated text, since a graphic that resonates in one language may fall flat in another. Testing localized variants with region-representative testers during your window closes this gap. See multi-language app testing.
The graphic as a conversion tool
Your feature graphic is not decoration; it is a conversion lever at the top of your listing. Paired with a compelling title and screenshots, it helps turn a browser into an installer, so treat its design with the same rigor as your onboarding flow. A/B thinking helps: if two candidates both test well, favor the one that most clearly states what the app does for the user. After launch, watch your listing's conversion in the Play Console and iterate on assets if it underperforms. See title and description SEO and post-launch monitoring.
Remember the whole listing works together: graphic, icon, screenshots, and copy should tell one consistent story. Use your closed-testing window to align them so that when you launch, every element reinforces the same clear value proposition. See launch day checklist.
Related guides and resources
- Screenshot and video assets for your listing
- App title and description SEO
- Store listing optimization before launch
- Google Play graphic asset specs
Feature graphic mistakes to avoid
Several recurring mistakes undercut otherwise good graphics. Cramming multiple messages or screenshots into one image dilutes impact; tiny text that is illegible at thumbnail size wastes your headline space; relying on a background that clashes with the play-button overlay makes the graphic look broken; and ignoring Google's exact dimensions risks awkward cropping. Each is easy to catch by previewing the graphic at the small sizes users actually see, which your closed-testing window gives you time to do. See screenshot and video assets and Google's asset specifications.
Another mistake is treating the graphic in isolation from the rest of the listing. If your feature graphic promises one thing and your screenshots or description say another, the inconsistency confuses browsers and lowers conversion. Design the graphic as part of a unified listing, and verify the whole set reads coherently before launch. See store listing optimization.
Brand consistency across the store
Your feature graphic is one touchpoint in a brand system that includes your icon, screenshots, and in-app visuals. Consistent color, typography, and tone across these builds recognition and trust, so a user who sees your ad, your listing, and your app experiences one coherent brand. Establish these brand elements before you finalize the graphic, and reuse them across every asset. A cohesive presentation signals professionalism that raises install intent. See title and description SEO and competitor analysis.
After launch, revisit your graphic if you rebrand or if conversion data suggests it underperforms, treating it as a living asset. The window is where you establish the baseline; ongoing iteration keeps it effective as your app and market evolve. See post-launch monitoring.
Feature graphic FAQ
When should I finalize my feature graphic?
During your closed-testing window, alongside your other listing assets, so it is ready and tested before you request production access.
Should I localize my feature graphic?
If you target multiple language markets, yes. Localized graphics resonate better, and you can validate variants with region-representative testers.
Does the feature graphic affect installs?
Yes. It is a conversion element at the top of your listing, working with your title and screenshots to turn browsers into installers.
What's the most common feature-graphic mistake?
Cramming multiple messages or illegible text into one image. Preview it at thumbnail size during your window to catch this.
Should my graphic match my other assets?
Yes. Consistent color, typography, and tone across your icon, screenshots, and graphic build recognition and raise install intent.
Can I change the graphic after launch?
Yes. Treat it as a living asset and revisit it if you rebrand or if conversion data suggests it underperforms.
Bottom line
A great feature graphic communicates one clear idea instantly, fits Google's specs, and coheres with the rest of your listing — and the mandatory closed-testing window is the perfect time to design and test it. Show candidates to real testers, refine based on their reactions, and lock in the winner before you request production, so your listing converts from day one. If you need a group of real testers to react to your visuals, you can submit your app. See store listing optimization to align every element.
Expanded for topical authority — additional practical sections below. Original guide content above is unchanged.
Quick answer
Feature Graphic Design Tips for Google Play matters because Google Play production access for many new personal developer accounts depends on a successful closed test: at least 12 real testers opted in for 14 continuous days, plus a policy-compliant, stable app. Use this guide to execute the steps correctly, avoid streak-breaking mistakes, and decide whether DIY recruitment or a managed closed testing service is the better path for your deadline.
Key takeaways
- Feature Graphic Design Tips for Google Play should be treated as a practical Play Console workflow, not just theory.
- For many new personal accounts, 12 opted-in testers × 14 continuous days on closed testing gates production access.
- Opt-in + install from Play beats “emails invited” every time — verify counts in Console.
- Use the window for QA, listing, and compliance work so review is the only remaining gate.
- Prefer real testers and a buffer above 12; avoid anything that looks like fake engagement.
Real-world scenarios: who this matters for
The guidance in this article on Feature Graphic Design Tips for Google Play applies across many Android product types. Use these scenarios to map the advice to your situation.
| Developer type | Typical challenge | Practical focus |
|---|---|---|
| Indie / solo | Limited tester network and time | Start closed testing early; keep a buffer above 12 opted-in testers; parallelize listing + Data safety work |
| Startup | Launch deadline vs 14-day rule | Treat the window as fixed; recruit in parallel with QA; avoid last-minute track setup |
| Agency / white-label | Multiple client apps, each needing its own test | One closed test per app; standardize opt-in onboarding; track eligibility dates per client |
| Flutter / React Native | Cross-platform build + Play Console quirks | Ship a signed AAB to closed testing; verify installs from Play, not sideload; watch vitals on mid-range devices |
| Native Kotlin | Device/API fragmentation | Cover API levels and OEMs in your tester mix; fix crashes before requesting production |
| Game / Unity | Performance + retention during 14 days | Keep testers engaged so count never dips below 12; monitor ANRs and battery |
| E-commerce / fintech | Policy + payment flows | Test checkout, permissions, and declarations carefully before production access |
| Healthcare / kids / education | Sensitive policies (Families, data) | Align listing, privacy, and content rating with real app behavior during the test window |
Visual placeholder: Scenario matrix infographic — Indie / Startup / Agency / Cross-platform paths for Feature Graphic Design Tips for Google Play.
Closed testing vs other Play tracks (quick reference)
Context for Feature Graphic Design Tips for Google Play: choose the right track so you do not waste the 14-day window on the wrong workflow.
| Track | Purpose | Counts toward 12×14? | Typical use |
|---|---|---|---|
| Internal testing | Fast private builds | No | Shake out bugs before the counted window |
| Closed testing | Private / invite testers | Yes (for new personal accounts) | Meet production-access requirement + QA |
| Open testing | Public beta | Not a substitute for the closed requirement | Broader feedback after closed eligibility |
| Production | Public release | N/A | After access approved + review |
Visual placeholder: Timeline — Internal → Closed (14 days) → Production request → Staged rollout.
Common mistakes (and how to avoid them)
These mistakes repeatedly show up when developers work through Feature Graphic Design Tips for Google Play:
- Confusing invited vs opted-in testers — Only testers who open the opt-in link and install from Play count toward 12. Check the opted-in number in Play Console, not your email list.
- Recruiting exactly 12 with no buffer — One uninstall can break continuity. Aim for ~15 active opted-in testers.
- Starting the counted clock late — Listing assets, Data safety, and privacy work should run during the 14 days, not after.
- Using sideloaded APKs or fake installs — They do not satisfy Play’s closed testing expectations and can create account risk.
- Ignoring tester feedback until day 14 — Crashes that drive uninstalls threaten your streak and your review outcome.
- Requesting production access before the continuous streak completes — Eligibility checks fail even if calendar time has passed.
Action checklist
Use this checklist alongside the rest of this guide on Feature Graphic Design Tips for Google Play:
- ☐ Closed testing track created with a signed release (AAB)
- ☐ Opt-in link tested on a fresh Google account
- ☐ At least 12 testers opted in (prefer ~15)
- ☐ Daily check that opted-in count stays ≥ 12 for 14 continuous days
- ☐ Core flows exercised (login, main feature, permissions, offline/online)
- ☐ Crashes / ANRs triaged from tester reports and vitals
- ☐ Store listing, screenshots, and feature graphic drafted
- ☐ Privacy policy + Data safety + content rating aligned with real behavior
- ☐ Production access requested only after eligibility is green
- ☐ Staged rollout plan ready for first public release
Additional FAQs developers ask about Feature Graphic Design Tips for Google Play
Quick answer: what should I do first?
Confirm you are on a closed testing track with real opted-in installs, keep 12+ testers for 14 continuous days, and fix policy/stability issues in parallel. Then use the detailed sections above for Feature Graphic Design Tips for Google Play.
Does this apply to organization (company) accounts?
The classic 12×14 closed testing gate is primarily associated with new personal developer accounts. Always verify your account type and current Play Console eligibility messaging for your app.
Do friends and family count as testers?
Yes — if they opt in via your closed testing link and install from Google Play. They only help if they stay opted in for the continuous period.
Can I update the app during the 14 days?
You can usually push updates on the closed track, but unstable releases that cause uninstalls can threaten your tester count. Prefer polishing via internal testing first when possible.
What if production access is still rejected?
Read the exact reason. Incomplete testing is only one category — policy, Data safety mismatches, and crashes are common. Fix the cited issue fully before reapplying.
Is paying for testers allowed?
Using real people who install from Play is what matters. Avoid fake install farms. A one-time managed service that supplies real closed testers is a practical option when DIY recruitment is too slow.
How is Fast Testers different from free communities?
Free communities trade time and mutual availability. Fast Testers assigns about 15 real testers after you submit a valid closed testing link (one-time $15 per app) and includes a production access guarantee under its refund terms.
Where should I go next?
Review the related guides below, then either finish DIY recruitment or start closed testing if you need speed and continuity.
Sources, updates, and how to use this guide
This article on Feature Graphic Design Tips for Google Play is maintained for Android developers preparing Google Play closed testing and production access. Always cross-check eligibility text inside your own Play Console, because Google’s UI labels and account rules can vary by account type and date.
- Primary official references: Google Play closed testing help, Developer Program Policies, and Play Console eligibility messaging for your app.
- Practical experience lens: guidance here reflects common failure modes indie developers and agencies hit when recruiting testers, maintaining the 14-day streak, and recovering from production-access rejections.
- Last reviewed focus: 12×14 closed testing continuity, real vs fake testers, and parallel listing/compliance work during the window.
Related guides and next steps
Continue building topical depth around Feature Graphic Design Tips for Google Play with these Fast Testers resources:
- Ad Supported Apps And Google Play Ad Policy Testing
- Agency Guide Testing Client Apps On Google Play
- Android Tv Apps And Google Play Testing Tracks
- App Rejected Google Play
- App Title And Description Seo For Google Play
- Buy Google Play Testers Is It Safe
- Case Study Recovering From Google Play Rejection
- Closed Testing Vs Open Testing On Google Play
- Pricing — $15 closed testing
- How Fast Testers works
- FAQ
- Developer reviews
- Case studies
- Submit your app / start closed testing
Need reliable testers so your 14-day streak does not stall? Educate first with the guides above, then start when you are ready — one-time pricing, real Play installs, dashboard tracking.
Further expansion — case study, decisions, and expert recommendations. Prior sections remain unchanged.
Case study: first Play launch planned around the closed testing window
Problem: A small SaaS team treated Google Play publishing like iOS TestFlight — they expected to upload and go public the same week. They discovered the personal-account closed testing gate mid-sprint.
Solution: They reframed the sprint around Feature Graphic Design Tips For Google Play: internal testing for crash triage first, then closed testing with a buffer of testers, while design finished screenshots and legal finished privacy/Data safety in parallel.
Result: The 14-day requirement stopped feeling like “dead time.” When eligibility flipped green, listing and declarations were already ready, so production review was the only remaining gate.
Lessons learned:
- Start the closed track as soon as the build is stable enough to keep installed.
- Parallelize compliance work inside the window.
- Protect the streak like a production SLA.
Decision guide: what should you do next?
Use this decision path when applying Feature Graphic Design Tips For Google Play:
- Is your account a new personal developer account that still needs production access?
If yes, plan for closed testing with 12+ opted-in testers for 14 continuous days. If no, still test — but confirm the exact eligibility text in Play Console. - Do you already have 12+ reliable people who will install from Play and stay for two weeks?
If yes, DIY can work — add a buffer and monitor daily. If no, use community exchange or a managed closed testing service. - Is your build stable enough that testers will not churn?
If no, run internal testing first. Entering the counted window with crash loops is how streaks die. - Are Data safety, privacy policy, permissions, and listing aligned with real behavior?
If no, fix during the window so production review does not bounce you after the clock. - Has production access been rejected?
Classify: eligibility vs policy vs declarations vs stability. Fix that category completely, then re-test / re-request.
Visual placeholder: Decision tree diagram for Feature Graphic Design Tips For Google Play (DIY vs managed vs fix-and-retry).
Expert recommendations
- Instrument the streak: Check opted-in count daily for the first week; replace dropouts same day.
- Brief testers once: Send a short checklist (install from Play, open app daily, try core flow, report crashes). Silent testers still count if opted in — engaged testers protect quality.
- Never “solve” recruitment with fake installs: It fails the intent of closed testing and can create account risk.
- Ship a boring-stable build to closed testing: Save experimental features for internal tracks.
- Educate first, then accelerate: If your blocker is simply finding real testers fast, a one-time managed option (Fast Testers: 15 testers, $15/app) is often cheaper than slipping a launch.
For hands-on setup after reading about Feature Graphic Design Tips For Google Play, see how it works and pricing, or submit your closed testing link when you are ready.
Related: Also see Government App Distribution on Google Play for more detail on this topic.
Internal navigation hub — added to strengthen topical connections. Original article content above is unchanged.
Continue learning
- App Title and Description SEO for Google Play — Learn about Play Store ASO for Google Play closed testing. Complete guide for Android developers publishing on.
- First App on Google Play: Complete Checklist — Learn about first-time publishing for Google Play closed testing. Complete guide for Android developers publis.
- Google Play Approval Time: How Long Does It Take? — How long does Google Play approval take in 2026? Realistic timelines for closed testing, production review, an.
- Google Play Console Beginner Guide — A beginner guide to Google Play Console: create your account, set up your first app, understand testing tracks.
- Google Play Review Process Explained — How the Google Play review process works: what reviewers check, how long it takes, why apps get flagged, and h.
- Google Play Store Submission Guide — A step-by-step Google Play Store submission guide: create your app, upload the bundle, complete forms, run clo.
Next steps
- Ready to run closed testing with real Android testers? Submit your app or see pricing ($15 one-time).
- Compare options on our testing service comparison page, or read developer reviews and case studies.
- Still deciding? Review how Fast Testers works and the FAQ.