
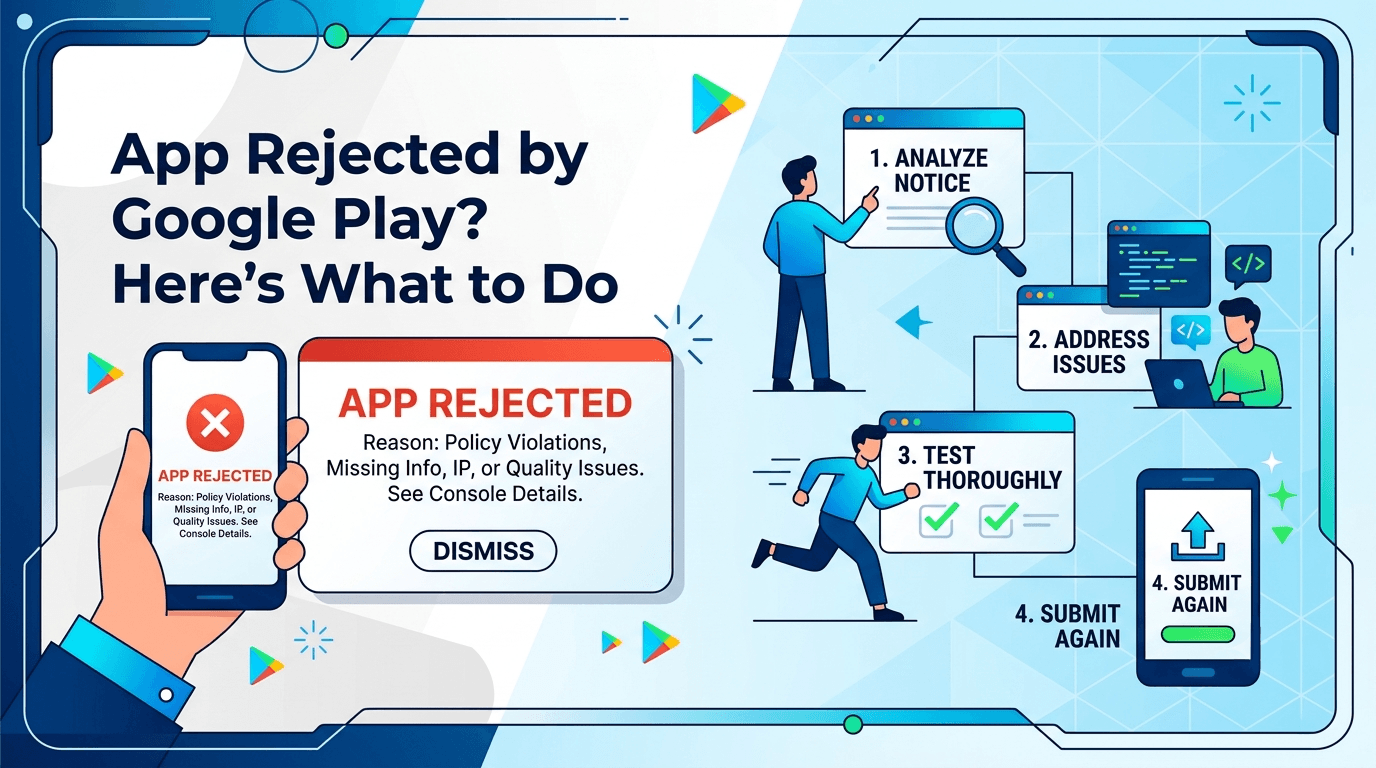
Getting your mobile application rejected by Google Play can be an incredibly frustrating and costly roadblock. After months of intensive design, architectural coding, and testing loops, seeing a sudden "Rejected", "Removed", or "Suspended" status in your Google Play Console can stall marketing plans, pivot development allocations, and alarm stakeholders.
However, an app store rejection is not a death sentence for your product. It simply indicates that a compliance layer of your software framework or your product identity does not fully align with Google's strict, dynamically shifting developer ecosystem rules. This actionable technical guide serves as an operational reference manual for mobile engineers, product managers, and publishers aiming to decipher Google's rejection notices, apply precise fixes, and build bulletproof deployment pipelines.
1. Deep Dive: Decoding the Core Reasons for Rejection
Google evaluates your application through a sequence of static code compilation analysis, sandboxed automated runtime behavior tracking, and physical manual human reviews. To resolve a rejection efficiently, you must diagnose exactly where your application ran afoul of the guidelines.
| Ecosystem Area | The Common Violation Trigger | The Production Remediation Path |
|---|---|---|
| Data Privacy & Permissions | Accessing background locations (ACCESS_BACKGROUND_LOCATION), reading fine device telemetry, or requesting broad SMS/Call log access scopes without an explicit, structural app feature necessity. |
Strip unnecessary permissions from the AndroidManifest.xml. Build clear, native inline modal dialogs explaining why data is collected before the actual system runtime prompt triggers. |
| App Stability & Utility | Immediate crashes during review initialization on contemporary Android SDK baselines, unhandled exceptions, zero-state offline screens, or simple web-view wrappers of websites. | Analyze crash reports using local Android Profiler suites. Integrate offline network connection listening architectures and confirm your application delivers distinct native value. |
| App Access & Walled Systems | Reviewers cannot pass authorization gates due to active multi-factor authentication (MFA), strict Geo-fencing blockades, or missing credentials. | Generate a globally accessible, recurring test account profile. Fill out all required login paths in the Play Console under App Access options. |
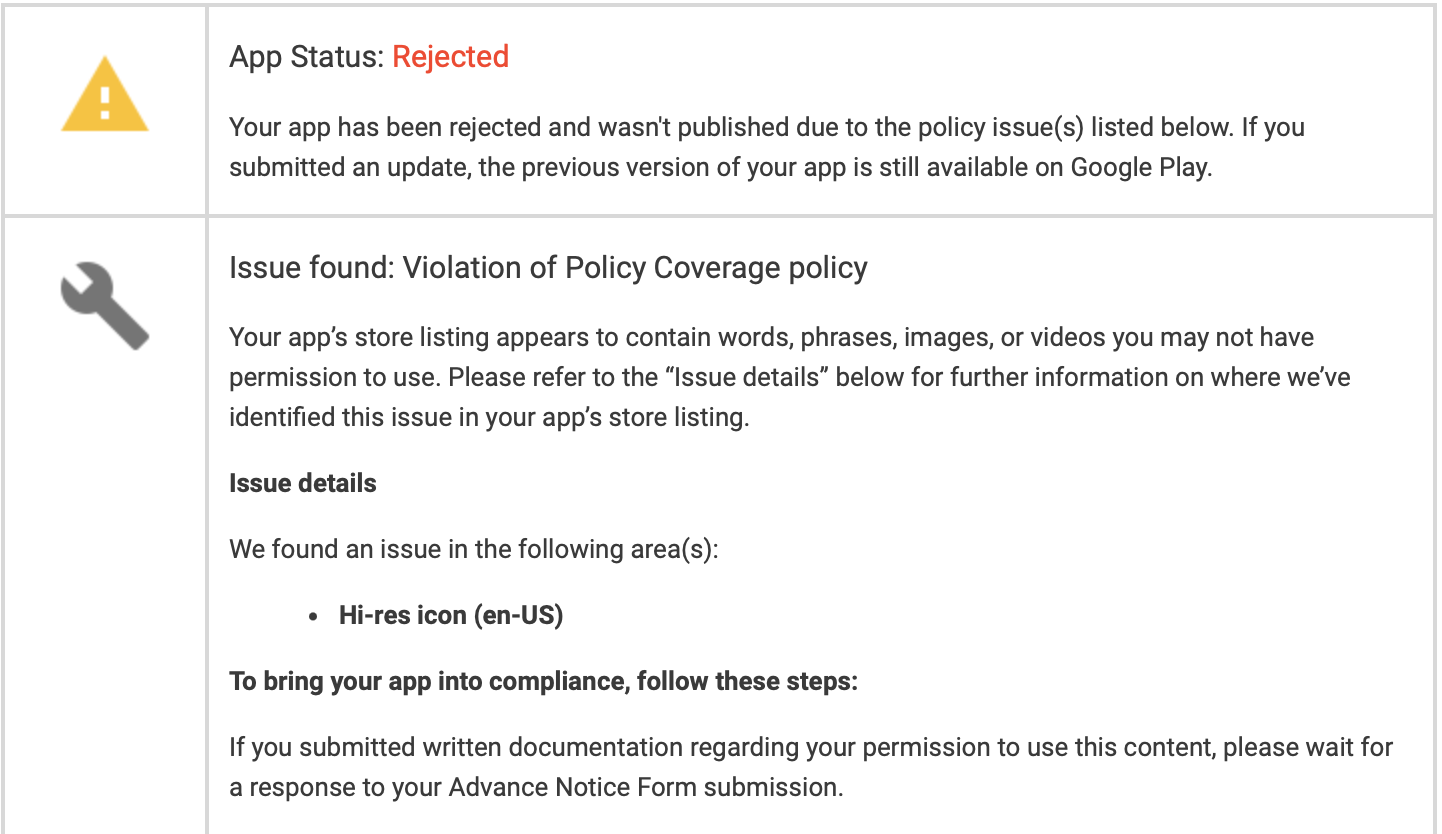
| Intellectual Property & Impersonation | Using trademarked taglines, brand names, protected keywords in listings, or game assets without explicitly verified platform documentation. | Execute a full metadata cleanup. File official distribution contracts or intellectual property certificates to Google via the advance notice dashboard tool before uploading. |
| Financial & Billing Systems | Bypassing Google Play Billing API for digital content access, subscriptions, or unlockable tiers using arbitrary third-party payment rails. | Integrate the official com.android.billingclient SDK package for all virtual goods, and leave alternate rails exclusively for tangible real-world commerce items. |
2. Step-by-Step Technical Recovery Pipeline
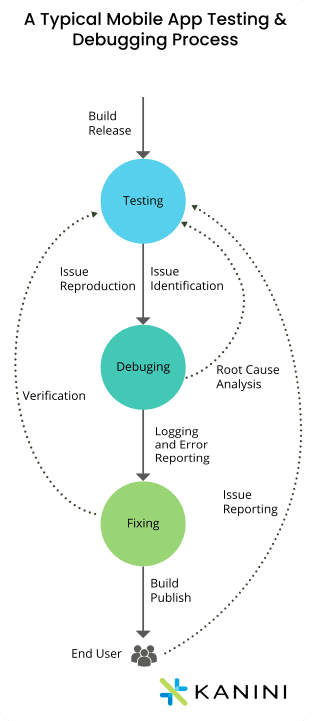
If your build has been rejected, do not randomly modify lines of code and immediately press upload. Treat recovery like systemic debugging by executing this ordered sequence:
Analyze the specific rejection notification email. You must classify whether the policy violation is structural to your **Store Listing Content** (such as screenshots, text descriptions, keyword abuse) or your **Compiled Application Binary (APK/AAB)**.
Log in to your Play Console and evaluate the **Quality > Pre-Launch Report**. Review screenshot galleries, memory logs, and stack traces compiled across diverse physical Firebase Test Lab test devices. This exposes device-specific layout corruptions or API level crashes.
Ensure that the Privacy Policy link deployed inside your Google Play Console store listing is identical to the policy hosted inside your actual app container layout. If you request sensitive user information, explicitly map out your exact data deletion request structures for users.
Never submit fixes directly to the Production release track. Push the corrected code update into your **Internal Testing Track** or closed internal environments first. This lets the automated system run its pre-approval scans safely before human eyes evaluate it.
Do not repeatedly submit identical or minimally changed packages in hopes that a different reviewer will look past the issue. Google tracks historical submission metadata closely. Accumulating multiple rejections back-to-back can escalate to an official App Suspension, and a history of suspensions can permanently terminate your legal corporate Google Play Developer Entity.
3. Understanding the Appeals Framework: When to Fight Back
Automated algorithms occasionally trigger false-positive rejections. If you are entirely certain that your product functions within policy limits and that the review team misunderstood your core app behavior, you have the right to file an official appeal.
- Be Objective and Concise: Avoid frustrated language. Quote specific sections of Google's Developer Program Policies to demonstrate how your application satisfies their criteria.
- Provide Rich Visual Context: Attach a clean, unedited video demonstrating the runtime workflow or clarifying your permission use-cases on a live physical device.
- Detail App Architecture: If flagged for API violations, explain the server-side infrastructure components to prove why local file storage or specific background sync services are essential.
4. Proactive Maintenance & Prevention Checklist
To avoid publishing roadblocks and maintain a clean continuous deployment channel, integrate these three security and operational review rules into your build lifecycles:
Maintain Constant SDK Architecture Health
Google requires all active updates to target contemporary Android API frameworks each year. Audit your dependency graph regularly using the terminal command ./gradlew dependencyReport to spot out-of-date, deprecated third-party SDK packages that could expose security vulnerabilities or use forbidden tracking hooks.
Enforce Stringent User-Generated Content (UGC) Safeguards
If your platform includes chat rooms, forums, direct photo sharing, or custom profiles, it falls under the UGC policy banner. To prevent rejections here, your application must provide: unskippable Terms of Service agreements, a built-in automated profanity and image filter system, and a robust 1-tap user blocking and content reporting mechanic.
Design For Data Transparency and User Autonomy
Modern store regulations prioritize user choice. Do not use dark UX patterns to obfuscate subscription choices or permissions. If your application creates custom user accounts, you are legally required to provide a clear, intuitive link or functional system within the app settings allowing users to delete their entire account and associated personal data instantly.
How the testing window prevents rejections
Many rejections stem from issues a proper closed test would have caught, so the mandatory requirement — 12 testers opted in for 14 continuous days before production for new personal accounts — is actually your first line of defense against rejection. Used well, the window surfaces crashes, broken flows, and behavior that violates policy or contradicts your declarations, all before you submit for production. Developers who treat the window as genuine QA reject far less often than those who rush through it. If a rejection brought you here, the window is also where you prevent the next one. See our closed testing guide and common rejection reasons.
Real, device-diverse testers are central to catching issues before Google does. If assembling them is your bottleneck, you can submit your app. See real vs fake testers.
The main categories of rejection
Rejections generally fall into a few buckets. Policy violations — prohibited content, misleading functionality, intellectual-property issues, or unjustified sensitive permissions — require changing the app itself. Declaration mismatches — a Data safety form or content rating that does not match your app's actual behavior — require correcting the declaration to match reality. Eligibility issues — an incomplete closed test — require finishing the testing requirement properly. And metadata problems — keyword stuffing, misleading titles, or policy-violating listing content — require cleaning up your listing. Knowing which bucket you are in tells you exactly what to fix. See closed testing completed but still rejected and app not eligible for production access.
The most common hidden cause of declaration rejections is undeclared data collection by third-party SDKs, which developers forget to include. Audit every SDK so your declarations match what your app truly does. See SDK testing and the Data safety form guide.
Diagnosing and fixing a rejection
Recovery starts with reading the rejection message carefully, since Google usually cites the specific policy or requirement at issue. Match the message to its category, then fix the root cause completely rather than superficially: bring the app into compliance for a policy issue, correct your declarations for a mismatch, or complete the testing requirement for an eligibility issue. Document what you changed to clarify your process and support any appeal. Then resubmit and allow for another review period. A precise, thorough fix passes; guessing and blind resubmission waste review cycles. See recovering from a rejection and Google's app status and appeals.
If the reason is unclear, use Google's appeal or support channels for clarification before acting, so you fix the right thing. Understanding the true cause is worth the short wait. See privacy policy requirements.
Preventing future rejections
The durable fix is prevention. Before submitting, run a thorough closed test to catch crashes and broken flows; audit your app against Play policies; make your Data safety form, privacy policy, and content rating accurate and consistent; and clean up your listing metadata. Doing this work during the mandatory window means every gate is cleared before you request production, so rejection becomes something you designed out rather than a surprise. Developers who build these habits rarely see repeat rejections. See the first-app checklist and account safety.
Keep declarations current after launch too, since a future update that adds undeclared data collection or violates a policy can trigger the same kind of rejection later. Compliance is ongoing. See updating after release.
Related guides and resources
- Common reasons apps get rejected
- Closed testing completed but still rejected
- Recovering from a rejection
- App status and appeals (Google)
App rejection FAQ
What's the first step after a rejection?
Read the rejection message and identify the exact cited cause — policy, declaration, eligibility, or metadata — before changing anything.
What most often causes declaration rejections?
Undeclared data collection by third-party SDKs. Audit every SDK so your Data safety form and privacy policy match your app's real behavior.
How do I prevent rejections?
Run a thorough closed test, audit for policy compliance, make declarations accurate and consistent, and clean up metadata before requesting production.
Bottom line
App rejections fall into policy, declaration, eligibility, or metadata categories, and each has a clear fix once you read the cited reason. Diagnose precisely, fix the root cause completely, document it, and resubmit — but better still, prevent rejections by using your closed-testing window as genuine QA and compliance verification. To catch issues with real testers before Google does, you can submit your app. See common rejection reasons to get ahead of them.
Expanded for topical authority — additional practical sections below. Original guide content above is unchanged.
Quick answer
App Rejected by Google Play? Here's What to Do matters because Google Play production access for many new personal developer accounts depends on a successful closed test: at least 12 real testers opted in for 14 continuous days, plus a policy-compliant, stable app. Use this guide to execute the steps correctly, avoid streak-breaking mistakes, and decide whether DIY recruitment or a managed closed testing service is the better path for your deadline.
Key takeaways
- App Rejected by Google Play? Here's What to Do should be treated as a practical Play Console workflow, not just theory.
- For many new personal accounts, 12 opted-in testers × 14 continuous days on closed testing gates production access.
- Opt-in + install from Play beats “emails invited” every time — verify counts in Console.
- Use the window for QA, listing, and compliance work so review is the only remaining gate.
- Prefer real testers and a buffer above 12; avoid anything that looks like fake engagement.
Real-world scenarios: who this matters for
The guidance in this article on App Rejected by Google Play? Here's What to Do applies across many Android product types. Use these scenarios to map the advice to your situation.
| Developer type | Typical challenge | Practical focus |
|---|---|---|
| Indie / solo | Limited tester network and time | Start closed testing early; keep a buffer above 12 opted-in testers; parallelize listing + Data safety work |
| Startup | Launch deadline vs 14-day rule | Treat the window as fixed; recruit in parallel with QA; avoid last-minute track setup |
| Agency / white-label | Multiple client apps, each needing its own test | One closed test per app; standardize opt-in onboarding; track eligibility dates per client |
| Flutter / React Native | Cross-platform build + Play Console quirks | Ship a signed AAB to closed testing; verify installs from Play, not sideload; watch vitals on mid-range devices |
| Native Kotlin | Device/API fragmentation | Cover API levels and OEMs in your tester mix; fix crashes before requesting production |
| Game / Unity | Performance + retention during 14 days | Keep testers engaged so count never dips below 12; monitor ANRs and battery |
| E-commerce / fintech | Policy + payment flows | Test checkout, permissions, and declarations carefully before production access |
| Healthcare / kids / education | Sensitive policies (Families, data) | Align listing, privacy, and content rating with real app behavior during the test window |
Visual placeholder: Scenario matrix infographic — Indie / Startup / Agency / Cross-platform paths for App Rejected by Google Play? Here's What to Do.
Comparison: rejection / eligibility categories
Problems related to App Rejected by Google Play? Here's What to Do usually fall into a few buckets. Classify first, then fix — mixing categories wastes review cycles.
| Category | What Google is signaling | Primary fix | Avoid |
|---|---|---|---|
| Testing eligibility | Closed test incomplete / not continuous | Restore 12+ opted-in for 14 continuous days | Requesting production early |
| Policy / content | App or listing violates Play policy | Change product/listing to comply | Resubmitting unchanged |
| Declarations | Data safety, permissions, or rating mismatch | Align forms with real behavior | Copy-pasting inaccurate answers |
| Stability / quality | Crashes, broken core flows | Fix build; re-test on closed track | Ignoring tester crash reports |
| Metadata / listing | Misleading or stuffed listing | Clean title, description, graphics | Keyword stuffing |
Visual placeholder: Flowchart — diagnose rejection category → fix → retest → re-request.
Common mistakes (and how to avoid them)
These mistakes repeatedly show up when developers work through App Rejected by Google Play? Here's What to Do:
- Confusing invited vs opted-in testers — Only testers who open the opt-in link and install from Play count toward 12. Check the opted-in number in Play Console, not your email list.
- Recruiting exactly 12 with no buffer — One uninstall can break continuity. Aim for ~15 active opted-in testers.
- Starting the counted clock late — Listing assets, Data safety, and privacy work should run during the 14 days, not after.
- Using sideloaded APKs or fake installs — They do not satisfy Play’s closed testing expectations and can create account risk.
- Ignoring tester feedback until day 14 — Crashes that drive uninstalls threaten your streak and your review outcome.
- Requesting production access before the continuous streak completes — Eligibility checks fail even if calendar time has passed.
Troubleshooting checklist
If something feels “stuck” while applying App Rejected by Google Play? Here's What to Do, walk this list before changing strategy:
| Symptom | Likely cause | Fix |
|---|---|---|
| Console shows < 12 testers | Invites sent but not opted in | Resend opt-in link; confirm install from Play |
| “Not eligible” after 14 calendar days | Count dipped below 12 mid-window | Restore 12+ and complete a full continuous streak |
| Tester cannot join | Wrong account, Group lag, or track not published | Verify Google account, Group membership, track release |
| App fails to install | Device/API mismatch or signing issue | Check AAB, minSDK, Play App Signing |
| Production still rejected after testing | Policy, declarations, or stability — not the clock | Read the exact reason; fix that category completely |
Visual placeholder: Troubleshooting flowchart for App Rejected by Google Play? Here's What to Do.
Action checklist
Use this checklist alongside the rest of this guide on App Rejected by Google Play? Here's What to Do:
- ☐ Closed testing track created with a signed release (AAB)
- ☐ Opt-in link tested on a fresh Google account
- ☐ At least 12 testers opted in (prefer ~15)
- ☐ Daily check that opted-in count stays ≥ 12 for 14 continuous days
- ☐ Core flows exercised (login, main feature, permissions, offline/online)
- ☐ Crashes / ANRs triaged from tester reports and vitals
- ☐ Store listing, screenshots, and feature graphic drafted
- ☐ Privacy policy + Data safety + content rating aligned with real behavior
- ☐ Production access requested only after eligibility is green
- ☐ Staged rollout plan ready for first public release
Frequently asked questions about App Rejected by Google Play? Here's What to Do
Quick answer: what should I do first?
Confirm you are on a closed testing track with real opted-in installs, keep 12+ testers for 14 continuous days, and fix policy/stability issues in parallel. Then use the detailed sections above for App Rejected by Google Play? Here's What to Do.
Does this apply to organization (company) accounts?
The classic 12×14 closed testing gate is primarily associated with new personal developer accounts. Always verify your account type and current Play Console eligibility messaging for your app.
Do friends and family count as testers?
Yes — if they opt in via your closed testing link and install from Google Play. They only help if they stay opted in for the continuous period.
Can I update the app during the 14 days?
You can usually push updates on the closed track, but unstable releases that cause uninstalls can threaten your tester count. Prefer polishing via internal testing first when possible.
What if production access is still rejected?
Read the exact reason. Incomplete testing is only one category — policy, Data safety mismatches, and crashes are common. Fix the cited issue fully before reapplying.
Is paying for testers allowed?
Using real people who install from Play is what matters. Avoid fake install farms. A one-time managed service that supplies real closed testers is a practical option when DIY recruitment is too slow.
How is Fast Testers different from free communities?
Free communities trade time and mutual availability. Fast Testers assigns about 15 real testers after you submit a valid closed testing link (one-time $15 per app) and includes a production access guarantee under its refund terms.
Where should I go next?
Review the related guides below, then either finish DIY recruitment or start closed testing if you need speed and continuity.
Sources, updates, and how to use this guide
This article on App Rejected by Google Play? Here's What to Do is maintained for Android developers preparing Google Play closed testing and production access. Always cross-check eligibility text inside your own Play Console, because Google’s UI labels and account rules can vary by account type and date.
- Primary official references: Google Play closed testing help, Developer Program Policies, and Play Console eligibility messaging for your app.
- Practical experience lens: guidance here reflects common failure modes indie developers and agencies hit when recruiting testers, maintaining the 14-day streak, and recovering from production-access rejections.
- Last reviewed focus: 12×14 closed testing continuity, real vs fake testers, and parallel listing/compliance work during the window.
Related guides and next steps
Continue building topical depth around App Rejected by Google Play? Here's What to Do with these Fast Testers resources:
- Ad Supported Apps And Google Play Ad Policy Testing
- Agency Guide Testing Client Apps On Google Play
- Android Tv Apps And Google Play Testing Tracks
- App Title And Description Seo For Google Play
- Buy Google Play Testers Is It Safe
- Case Study Recovering From Google Play Rejection
- Closed Testing Vs Open Testing On Google Play
- Common Google Play Closed Testing Mistakes
- Pricing — $15 closed testing
- How Fast Testers works
- FAQ
- Developer reviews
- Case studies
- Submit your app / start closed testing
Need reliable testers so your 14-day streak does not stall? Educate first with the guides above, then start when you are ready — one-time pricing, real Play installs, dashboard tracking.
Further expansion — case study, decisions, and expert recommendations. Prior sections remain unchanged.
Case study: recovering production access after a rejection
Problem: A solo developer finished what they thought was “14 days of testing,” requested production access, and was told the app was not eligible / rejected. Their invite list had 18 emails, but only 9 had opted in for the full window — and a crash on day 6 caused three uninstalls.
Solution: They paused the production request, fixed the crash on an internal track first, then rebuilt closed testing with ~15 real opted-in testers. During the new 14-day streak they also corrected a Data safety mismatch that would have failed review later. Guidance from articles like this one on App Rejected By Google Play? Here'S What To Do helped them classify the issue as eligibility + stability, not “random Google rejection.”
Result: Continuous 12+ streak completed, production access approved on the next request, staged rollout to 10% with clean vitals.
Lessons learned:
- Count opted-in installs, not invites.
- Fix crash-driven churn before you burn another 14 days.
- Use the window to clear declarations — not only the tester clock.
Decision guide: what should you do next?
Use this decision path when applying App Rejected By Google Play? Here'S What To Do:
- Is your account a new personal developer account that still needs production access?
If yes, plan for closed testing with 12+ opted-in testers for 14 continuous days. If no, still test — but confirm the exact eligibility text in Play Console. - Do you already have 12+ reliable people who will install from Play and stay for two weeks?
If yes, DIY can work — add a buffer and monitor daily. If no, use community exchange or a managed closed testing service. - Is your build stable enough that testers will not churn?
If no, run internal testing first. Entering the counted window with crash loops is how streaks die. - Are Data safety, privacy policy, permissions, and listing aligned with real behavior?
If no, fix during the window so production review does not bounce you after the clock. - Has production access been rejected?
Classify: eligibility vs policy vs declarations vs stability. Fix that category completely, then re-test / re-request.
Visual placeholder: Decision tree diagram for App Rejected By Google Play? Here'S What To Do (DIY vs managed vs fix-and-retry).
Expert recommendations
- Instrument the streak: Check opted-in count daily for the first week; replace dropouts same day.
- Brief testers once: Send a short checklist (install from Play, open app daily, try core flow, report crashes). Silent testers still count if opted in — engaged testers protect quality.
- Never “solve” recruitment with fake installs: It fails the intent of closed testing and can create account risk.
- Ship a boring-stable build to closed testing: Save experimental features for internal tracks.
- Educate first, then accelerate: If your blocker is simply finding real testers fast, a one-time managed option (Fast Testers: 15 testers, $15/app) is often cheaper than slipping a launch.
For hands-on setup after reading about App Rejected By Google Play? Here'S What To Do, see how it works and pricing, or submit your closed testing link when you are ready.
Internal navigation hub — added to strengthen topical connections. Original article content above is unchanged.
Topic cluster: App Rejection & Eligibility
This is the pillar page for App Rejection & Eligibility. Explore supporting guides to go deeper on specific steps, troubleshooting, and comparisons.
- Why Google Rejects Android Apps (and How to Avoid It)
- Google Play Production Access Rejection Reasons
- App Not Eligible for Production Access? Here Is Why
- Why Google Rejected My Production Access Request
- Closed Testing Completed but Still Rejected? Do This
- App Rejected for Insufficient Testing: What to Do
- Case Study: Recovering from Google Play Rejection
- Google Play Policy Violations During Closed Testing
- Account Termination Risks and How to Avoid Them
Continue learning
- Case Study: Recovering from Google Play Rejection — Learn about rejection recovery for Google Play closed testing. Complete guide for Android developers publishin.
- Google Play Policy Violations During Closed Testing — Can you get policy violations during closed testing? Yes. Learn which Google Play policies apply during testin.
- Google Play Production Access Rejection Reasons — Learn about common rejection causes for Google Play closed testing. Complete guide for Android developers publ.
- Why Google Rejected My Production Access Request — Google rejected your production access request? Here are the real reasons Google denies production access afte.
- App Rejected for Insufficient Testing: What to Do — Learn about insufficient testing rejections for Google Play closed testing. Complete guide for Android develop.
- Closed Testing Completed but Still Rejected? Do This — Completed closed testing but Google still rejected production access? Here are the real reasons and a step-by-.
Next steps
- Ready to run closed testing with real Android testers? Submit your app or see pricing ($15 one-time).
- Compare options on our testing service comparison page, or read developer reviews and case studies.
- Still deciding? Review how Fast Testers works and the FAQ.