
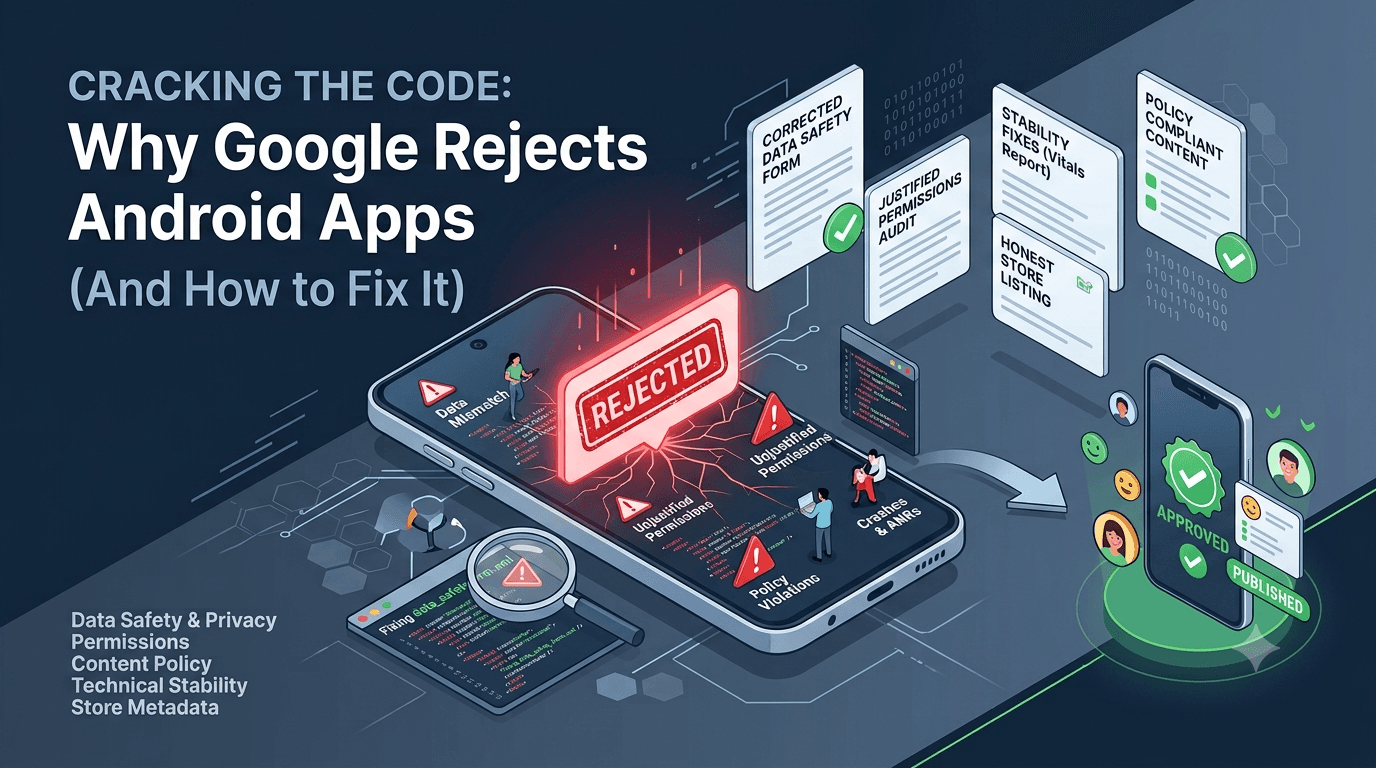
Getting an app rejected by Google is discouraging, but it is rarely random. Rejections almost always map to a specific, fixable cause. Understanding why Google rejects Android apps lets you prevent problems before you submit — saving days of back-and-forth. This guide covers the top reasons and how to avoid each.
Contents
Quick answer
Featured answer: Google most commonly rejects Android apps for policy violations, inaccurate data safety declarations, unjustified permissions, crashes and broken features, and misleading store listings. Fixing these before submission is the fastest route to approval.
Policy and content
- Restricted or prohibited content.
- Deceptive behavior or impersonation.
- Intellectual property issues.
- Policy violations that appear even during testing — policy violations during closed testing.
Data safety and privacy
- Data safety form does not match actual behavior — fix the form.
- Missing or invalid privacy policy — requirements.
- Undisclosed third-party SDK data collection.
Permissions
Requesting sensitive permissions (location, SMS, camera) without a clear, user-facing need is a frequent rejection cause. Remove what you do not need and justify the rest — see background location review and camera and microphone checklist.
Technical and stability
- Crashes and ANRs during review — fix crashes.
- Broken core features on reviewer devices.
- Outdated target API level — 2026 requirements.
- Login walls without reviewer credentials.
Tip: Real testers catch crashes and broken flows before Google does. Submit your app to get real testers and feedback reports that harden your build before review.
Metadata and listing
- Screenshots or descriptions that misrepresent the app.
- Keyword stuffing in the title or description.
- Incorrect content rating or category.
How to prevent rejection
- Audit permissions and remove anything unjustified.
- Make the data safety form and privacy policy accurate.
- Fix crashes and verify core flows on multiple devices.
- Match your listing to the real app.
- Complete a clean closed test with real testers.
- Provide reviewer credentials for any login.
How to read and respond to a rejection
A rejection notice is more helpful than it first appears — it usually names the exact policy or issue. Turn it into an action plan:
- Read the message carefully in Play Console and identify the specific policy referenced.
- Reproduce the problem on a real device — a crash, a permission prompt, or a broken flow.
- Fix the root cause rather than the symptom. If a permission is flagged, remove or justify it; if data safety is flagged, align the form with actual behavior.
- Document the change in your release notes so the reviewer can see what you addressed.
- Resubmit once with confidence — never resubmit the same build repeatedly.
Most developers who feel "stuck" are actually reacting to the wrong cause. Slow down, classify the rejection as policy, technical, data, or metadata, and fix that specific category. This disciplined approach usually clears the issue on the next attempt. For a real recovery example, see recovering from a rejection.
The main categories of rejection
Rejections feel random when you do not understand them, but they almost always fall into a small set of categories, and recognizing which one applies is the key to fixing it. The main buckets are data and privacy issues, permission problems, policy and content violations, technical and stability failures, misleading store listings, and account or verification issues. A separate category — testing-related rejections — applies specifically to the closed testing requirement. Each category has different triggers and different fixes, so the first job after any rejection is to classify it correctly rather than guessing.
The value of thinking in categories is that it turns a vague, discouraging "your app was rejected" into a specific, solvable problem. Developers who thrash — changing random things and resubmitting — tend to stay stuck, while those who calmly identify the category and address that specific cause usually clear review on the next attempt. Read the exact rejection message in Play Console first, because Google almost always names the policy or issue, which tells you immediately which category you are dealing with.
Data safety and privacy rejections
Among the most common causes is a mismatch between what your app declares and what it actually does with data. Your data safety form must exactly reflect the data your app and all its third-party SDKs collect and share. This trips up well-meaning developers constantly, because libraries for analytics, ads, or crash reporting quietly collect data that never gets declared. To Google's review, that discrepancy reads as a policy violation regardless of intent. A missing or invalid privacy policy URL is another frequent trigger in this category.
The fix is a thorough audit: list every dependency, determine what data each one touches, and make your data safety declaration and privacy policy reflect the complete reality. Then treat the form as a living document, updating it whenever you add or change a library. Getting this right resolves a large share of rejections and is one of the highest-value things you can do before submitting. See the data safety form guide for a full walkthrough.
Permission and content violations
Permission problems arise when your app requests sensitive access — location, camera, microphone, contacts, SMS — without a clear, visible feature that justifies it. Reviewers scrutinize sensitive permissions closely, and an unjustified request is a common rejection. Background location is especially sensitive with its own strict requirements. The remedy is minimalism: request only what a visible feature genuinely needs, and remove anything speculative or unused. If you cannot point to a feature that requires a permission, drop it.
Content violations cover what your app actually contains and does — restricted categories, unmoderated user-generated content, intellectual property you lack rights to, and similar concerns. Content policy applies during testing as well as at production, so your build should comply from the first upload. Aligning your content and permissions with policy before you submit removes an entire class of rejections. See background location and Play Store review for the sensitive-permission specifics.
Technical, listing, and account issues
Technical rejections stem from instability: crashes, ANRs, or broken core features encountered during review. A reviewer who hits a crash or a dead-end login sees an unfinished app. Fix these using Android vitals and the pre-launch report, and verify your core flows from a fresh install, providing test credentials if a login is required. Misleading-listing rejections come from screenshots or descriptions that misrepresent the app; keep your listing honest as well as compelling. Account issues — incomplete identity verification, payment or tax profile gaps, or prior policy strikes — can block approval independently of your app, so resolve them early.
These categories share a theme: reviewers reward apps that are stable, honest, and backed by a verified, compliant account. Addressing them is less about cleverness than diligence — stabilize the build, tell the truth in your listing, and keep your account in good standing. Each resolved issue removes a reason for rejection.
Testing-related rejections
A distinct category applies to new personal accounts: rejections tied to the closed testing requirement. If your test did not genuinely meet the 12-tester, 14-day rule — because you used the wrong track, never truly reached 12 testers, dropped below the minimum, or relied on installs Google flagged as non-genuine — the requirement is considered unmet and you are blocked. Unlike policy rejections, the fix here is not in your app but in your testing: run a clean closed test with real, active testers over a full continuous window.
This is precisely the problem a professional testing service solves, by supplying real testers and maintaining your count so your testing signal is unambiguous. If your rejection was testing-related, strengthening your test with genuine testers before reapplying removes the cause directly. See real testers vs fake testers to understand why only genuine engagement counts.
How to recover from a rejection
A rejection is a checklist item, not a catastrophe, and a calm recovery process resolves most cases quickly. Begin by reading the exact rejection message in Play Console, which almost always names the specific policy or issue — this tells you which category you are dealing with. Next, reproduce or locate the problem: if it is a crash, trigger it on a device; if it is a permission or data issue, find where in your app or declarations it originates. Then fix the root cause rather than a symptom, and document precisely what you changed in your release notes so both you and the reviewer can see it addressed.
Finally, resubmit once, deliberately. Make a single well-understood change per resubmission rather than altering many things at once, so you can tell what worked if a problem remains. Avoid the resubmission loop of pushing an unchanged build repeatedly, which never resolves the issue and can erode your account standing. With a clear diagnosis and a targeted fix, most rejections are cleared on the next attempt. If the rejection was testing-related, the fix lives in your testing — run a clean test with real, active testers before reapplying. See recovering from a Google Play rejection.
Preventing rejection before you submit
The best way to handle rejection is to prevent it with a pre-submission self-audit. Spend ten minutes reviewing your app as if you were the reviewer: launch from a fresh install and confirm it does not crash; walk through core flows including any login, providing test credentials; verify your data safety form matches what the app and its SDKs actually do; confirm every permission maps to a visible feature; and check that your listing honestly represents the app. Each question maps to a common rejection cause, so answering them truthfully beforehand catches most issues before Google does.
This preventive habit is the single highest-return activity in the whole submission process, because it converts reactive firefighting into proactive quality control. Developers who run this audit consistently reach production with far fewer round-trips, while those who skip it learn each lesson the hard way through rejections. Building the self-audit into your routine means that by the time you submit, you have already caught the problems a reviewer would have flagged — turning review into a formality rather than a hurdle.
The right mindset about rejections
Perhaps the most useful thing to internalize about rejections is that they are normal, specific, and fixable — not verdicts on your worth as a developer. Even experienced publishers get rejected occasionally, because policies are detailed and easy to trip over inadvertently. A rejection is simply Google pointing at one issue and saying "address this." When you treat it as a discrete problem to solve rather than a failure, the emotional charge disappears and you can work the problem methodically.
This mindset matters because the wrong response — panic, frustration, or repeated blind resubmissions — makes things worse and can harm your account standing. The right response is calm diagnosis: read the exact reason, classify it, fix the specific cause, document the change, and resubmit once. Developers who approach rejections this way clear them quickly and move on; those who take them personally or thrash tend to stay stuck. Adopting a problem-solving mindset from the outset turns rejections from demoralizing setbacks into routine, solvable steps on the way to launch.
Key takeaways
- Classify the rejection first — data, permissions, content, technical, listing, account, or testing.
- Data safety mismatches are the top cause — audit your app and SDKs and declare accurately.
- Keep permissions minimal and justified and content policy-compliant.
- Stabilize the build and keep your listing honest to avoid technical and listing rejections.
- Testing-related rejections need a genuine test, not app changes.
Frequently asked questions
What is the most common rejection reason?
Inaccurate data safety declarations and unjustified permissions are among the most common.
Is a rejected app permanently blocked?
No. Fix the cited issue and resubmit.
Does closed testing prevent rejection?
It satisfies the testing requirement but does not exempt you from policy review.
How do I find the exact reason?
Play Console shows the reason with your rejected release.
Can permissions alone cause rejection?
Yes — sensitive permissions without justification are a frequent cause.
Will fixing and resubmitting hurt my account?
Fixing and resubmitting is normal; repeatedly resubmitting without changes is what causes problems.
Key takeaways
- Rejections map to specific, fixable causes — they are rarely random.
- Data safety mismatches and unjustified permissions are among the most common.
- Crashes and broken features on reviewer devices trigger technical rejections.
- Misleading listings and incorrect ratings cause metadata rejections.
- Fix the cited root cause, document it, and resubmit once — never resubmit unchanged.
Conclusion
Google rejects apps for specific, avoidable reasons: policy, data safety, permissions, stability, and metadata. Audit each area before submitting and most rejections never happen. To harden your build with real-world testing first, submit your app and get real testers today.
Expanded for topical authority — additional practical sections below. Original guide content above is unchanged.
Real-world scenarios: who this matters for
The guidance in this article on Why Google Rejects Android Apps (and How to Avoid It) applies across many Android product types. Use these scenarios to map the advice to your situation.
| Developer type | Typical challenge | Practical focus |
|---|---|---|
| Indie / solo | Limited tester network and time | Start closed testing early; keep a buffer above 12 opted-in testers; parallelize listing + Data safety work |
| Startup | Launch deadline vs 14-day rule | Treat the window as fixed; recruit in parallel with QA; avoid last-minute track setup |
| Agency / white-label | Multiple client apps, each needing its own test | One closed test per app; standardize opt-in onboarding; track eligibility dates per client |
| Flutter / React Native | Cross-platform build + Play Console quirks | Ship a signed AAB to closed testing; verify installs from Play, not sideload; watch vitals on mid-range devices |
| Native Kotlin | Device/API fragmentation | Cover API levels and OEMs in your tester mix; fix crashes before requesting production |
| Game / Unity | Performance + retention during 14 days | Keep testers engaged so count never dips below 12; monitor ANRs and battery |
| E-commerce / fintech | Policy + payment flows | Test checkout, permissions, and declarations carefully before production access |
| Healthcare / kids / education | Sensitive policies (Families, data) | Align listing, privacy, and content rating with real app behavior during the test window |
Visual placeholder: Scenario matrix infographic — Indie / Startup / Agency / Cross-platform paths for Why Google Rejects Android Apps (and How to Avoid It).
Comparison: rejection / eligibility categories
Problems related to Why Google Rejects Android Apps (and How to Avoid It) usually fall into a few buckets. Classify first, then fix — mixing categories wastes review cycles.
| Category | What Google is signaling | Primary fix | Avoid |
|---|---|---|---|
| Testing eligibility | Closed test incomplete / not continuous | Restore 12+ opted-in for 14 continuous days | Requesting production early |
| Policy / content | App or listing violates Play policy | Change product/listing to comply | Resubmitting unchanged |
| Declarations | Data safety, permissions, or rating mismatch | Align forms with real behavior | Copy-pasting inaccurate answers |
| Stability / quality | Crashes, broken core flows | Fix build; re-test on closed track | Ignoring tester crash reports |
| Metadata / listing | Misleading or stuffed listing | Clean title, description, graphics | Keyword stuffing |
Visual placeholder: Flowchart — diagnose rejection category → fix → retest → re-request.
Common mistakes (and how to avoid them)
These mistakes repeatedly show up when developers work through Why Google Rejects Android Apps (and How to Avoid It):
- Confusing invited vs opted-in testers — Only testers who open the opt-in link and install from Play count toward 12. Check the opted-in number in Play Console, not your email list.
- Recruiting exactly 12 with no buffer — One uninstall can break continuity. Aim for ~15 active opted-in testers.
- Starting the counted clock late — Listing assets, Data safety, and privacy work should run during the 14 days, not after.
- Using sideloaded APKs or fake installs — They do not satisfy Play’s closed testing expectations and can create account risk.
- Ignoring tester feedback until day 14 — Crashes that drive uninstalls threaten your streak and your review outcome.
- Requesting production access before the continuous streak completes — Eligibility checks fail even if calendar time has passed.
Troubleshooting checklist
If something feels “stuck” while applying Why Google Rejects Android Apps (and How to Avoid It), walk this list before changing strategy:
| Symptom | Likely cause | Fix |
|---|---|---|
| Console shows < 12 testers | Invites sent but not opted in | Resend opt-in link; confirm install from Play |
| “Not eligible” after 14 calendar days | Count dipped below 12 mid-window | Restore 12+ and complete a full continuous streak |
| Tester cannot join | Wrong account, Group lag, or track not published | Verify Google account, Group membership, track release |
| App fails to install | Device/API mismatch or signing issue | Check AAB, minSDK, Play App Signing |
| Production still rejected after testing | Policy, declarations, or stability — not the clock | Read the exact reason; fix that category completely |
Visual placeholder: Troubleshooting flowchart for Why Google Rejects Android Apps (and How to Avoid It).
Action checklist
Use this checklist alongside the rest of this guide on Why Google Rejects Android Apps (and How to Avoid It):
- ☐ Closed testing track created with a signed release (AAB)
- ☐ Opt-in link tested on a fresh Google account
- ☐ At least 12 testers opted in (prefer ~15)
- ☐ Daily check that opted-in count stays ≥ 12 for 14 continuous days
- ☐ Core flows exercised (login, main feature, permissions, offline/online)
- ☐ Crashes / ANRs triaged from tester reports and vitals
- ☐ Store listing, screenshots, and feature graphic drafted
- ☐ Privacy policy + Data safety + content rating aligned with real behavior
- ☐ Production access requested only after eligibility is green
- ☐ Staged rollout plan ready for first public release
Additional FAQs developers ask about Why Google Rejects Android Apps (and How to Avoid It)
Quick answer: what should I do first?
Confirm you are on a closed testing track with real opted-in installs, keep 12+ testers for 14 continuous days, and fix policy/stability issues in parallel. Then use the detailed sections above for Why Google Rejects Android Apps (and How to Avoid It).
Does this apply to organization (company) accounts?
The classic 12×14 closed testing gate is primarily associated with new personal developer accounts. Always verify your account type and current Play Console eligibility messaging for your app.
Do friends and family count as testers?
Yes — if they opt in via your closed testing link and install from Google Play. They only help if they stay opted in for the continuous period.
Can I update the app during the 14 days?
You can usually push updates on the closed track, but unstable releases that cause uninstalls can threaten your tester count. Prefer polishing via internal testing first when possible.
What if production access is still rejected?
Read the exact reason. Incomplete testing is only one category — policy, Data safety mismatches, and crashes are common. Fix the cited issue fully before reapplying.
Is paying for testers allowed?
Using real people who install from Play is what matters. Avoid fake install farms. A one-time managed service that supplies real closed testers is a practical option when DIY recruitment is too slow.
How is Fast Testers different from free communities?
Free communities trade time and mutual availability. Fast Testers assigns about 15 real testers after you submit a valid closed testing link (one-time $15 per app) and includes a production access guarantee under its refund terms.
Where should I go next?
Review the related guides below, then either finish DIY recruitment or start closed testing if you need speed and continuity.
Sources, updates, and how to use this guide
This article on Why Google Rejects Android Apps (and How to Avoid It) is maintained for Android developers preparing Google Play closed testing and production access. Always cross-check eligibility text inside your own Play Console, because Google’s UI labels and account rules can vary by account type and date.
- Primary official references: Google Play closed testing help, Developer Program Policies, and Play Console eligibility messaging for your app.
- Practical experience lens: guidance here reflects common failure modes indie developers and agencies hit when recruiting testers, maintaining the 14-day streak, and recovering from production-access rejections.
- Last reviewed focus: 12×14 closed testing continuity, real vs fake testers, and parallel listing/compliance work during the window.
Related guides and next steps
Continue building topical depth around Why Google Rejects Android Apps (and How to Avoid It) with these Fast Testers resources:
- Android Tv Apps And Google Play Testing Tracks
- Gdpr Compliance For Android Apps On Google Play
- Google Play Closed Testing For Saas Android Apps
- Terms Of Service For Android Apps On Google Play
- Ad Supported Apps And Google Play Ad Policy Testing
- Agency Guide Testing Client Apps On Google Play
- Ar Vr Android Apps And Closed Testing Requirements
- Coppa And Kids Apps On Google Play Store
- Pricing — $15 closed testing
- How Fast Testers works
- FAQ
- Developer reviews
- Case studies
- Submit your app / start closed testing
Need reliable testers so your 14-day streak does not stall? Educate first with the guides above, then start when you are ready — one-time pricing, real Play installs, dashboard tracking.
Further expansion — case study, decisions, and expert recommendations. Prior sections remain unchanged.
Case study: recovering production access after a rejection
Problem: A solo developer finished what they thought was “14 days of testing,” requested production access, and was told the app was not eligible / rejected. Their invite list had 18 emails, but only 9 had opted in for the full window — and a crash on day 6 caused three uninstalls.
Solution: They paused the production request, fixed the crash on an internal track first, then rebuilt closed testing with ~15 real opted-in testers. During the new 14-day streak they also corrected a Data safety mismatch that would have failed review later. Guidance from articles like this one on Why Google Rejects Android Apps (And How To Avoid It) helped them classify the issue as eligibility + stability, not “random Google rejection.”
Result: Continuous 12+ streak completed, production access approved on the next request, staged rollout to 10% with clean vitals.
Lessons learned:
- Count opted-in installs, not invites.
- Fix crash-driven churn before you burn another 14 days.
- Use the window to clear declarations — not only the tester clock.
Decision guide: what should you do next?
Use this decision path when applying Why Google Rejects Android Apps (And How To Avoid It):
- Is your account a new personal developer account that still needs production access?
If yes, plan for closed testing with 12+ opted-in testers for 14 continuous days. If no, still test — but confirm the exact eligibility text in Play Console. - Do you already have 12+ reliable people who will install from Play and stay for two weeks?
If yes, DIY can work — add a buffer and monitor daily. If no, use community exchange or a managed closed testing service. - Is your build stable enough that testers will not churn?
If no, run internal testing first. Entering the counted window with crash loops is how streaks die. - Are Data safety, privacy policy, permissions, and listing aligned with real behavior?
If no, fix during the window so production review does not bounce you after the clock. - Has production access been rejected?
Classify: eligibility vs policy vs declarations vs stability. Fix that category completely, then re-test / re-request.
Visual placeholder: Decision tree diagram for Why Google Rejects Android Apps (And How To Avoid It) (DIY vs managed vs fix-and-retry).
Expert recommendations
- Instrument the streak: Check opted-in count daily for the first week; replace dropouts same day.
- Brief testers once: Send a short checklist (install from Play, open app daily, try core flow, report crashes). Silent testers still count if opted in — engaged testers protect quality.
- Never “solve” recruitment with fake installs: It fails the intent of closed testing and can create account risk.
- Ship a boring-stable build to closed testing: Save experimental features for internal tracks.
- Educate first, then accelerate: If your blocker is simply finding real testers fast, a one-time managed option (Fast Testers: 15 testers, $15/app) is often cheaper than slipping a launch.
For hands-on setup after reading about Why Google Rejects Android Apps (And How To Avoid It), see how it works and pricing, or submit your closed testing link when you are ready.
Internal navigation hub — added to strengthen topical connections. Original article content above is unchanged.
Topic cluster: App Rejection & Eligibility
Pillar guide: Start with App Rejected by Google Play? Here's What to Do for the full overview, then use the supporting guides below.
- App Rejected by Google Play? Here's What to Do (pillar)
- Google Play Production Access Rejection Reasons
- App Not Eligible for Production Access? Here Is Why
- Why Google Rejected My Production Access Request
- Closed Testing Completed but Still Rejected? Do This
- App Rejected for Insufficient Testing: What to Do
- Case Study: Recovering from Google Play Rejection
- Google Play Policy Violations During Closed Testing
- Account Termination Risks and How to Avoid Them
Continue learning
- Google Play Production Access Rejection Reasons — Learn about common rejection causes for Google Play closed testing. Complete guide for Android developers publ.
- App Rejected by Google Play? Here's What to Do — Got your app rejected? This guide walks you through the most common rejection reasons..
- Case Study: Recovering from Google Play Rejection — Learn about rejection recovery for Google Play closed testing. Complete guide for Android developers publishin.
- Google Play Policy Violations During Closed Testing — Can you get policy violations during closed testing? Yes. Learn which Google Play policies apply during testin.
- Why Google Rejected My Production Access Request — Google rejected your production access request? Here are the real reasons Google denies production access afte.
- Android TV Apps and Google Play Testing Tracks — Learn about Android TV testing for Google Play closed testing. Complete guide for Android developers publishin.
Next steps
- Ready to run closed testing with real Android testers? Submit your app or see pricing ($15 one-time).
- Compare options on our testing service comparison page, or read developer reviews and case studies.
- Still deciding? Review how Fast Testers works and the FAQ.