
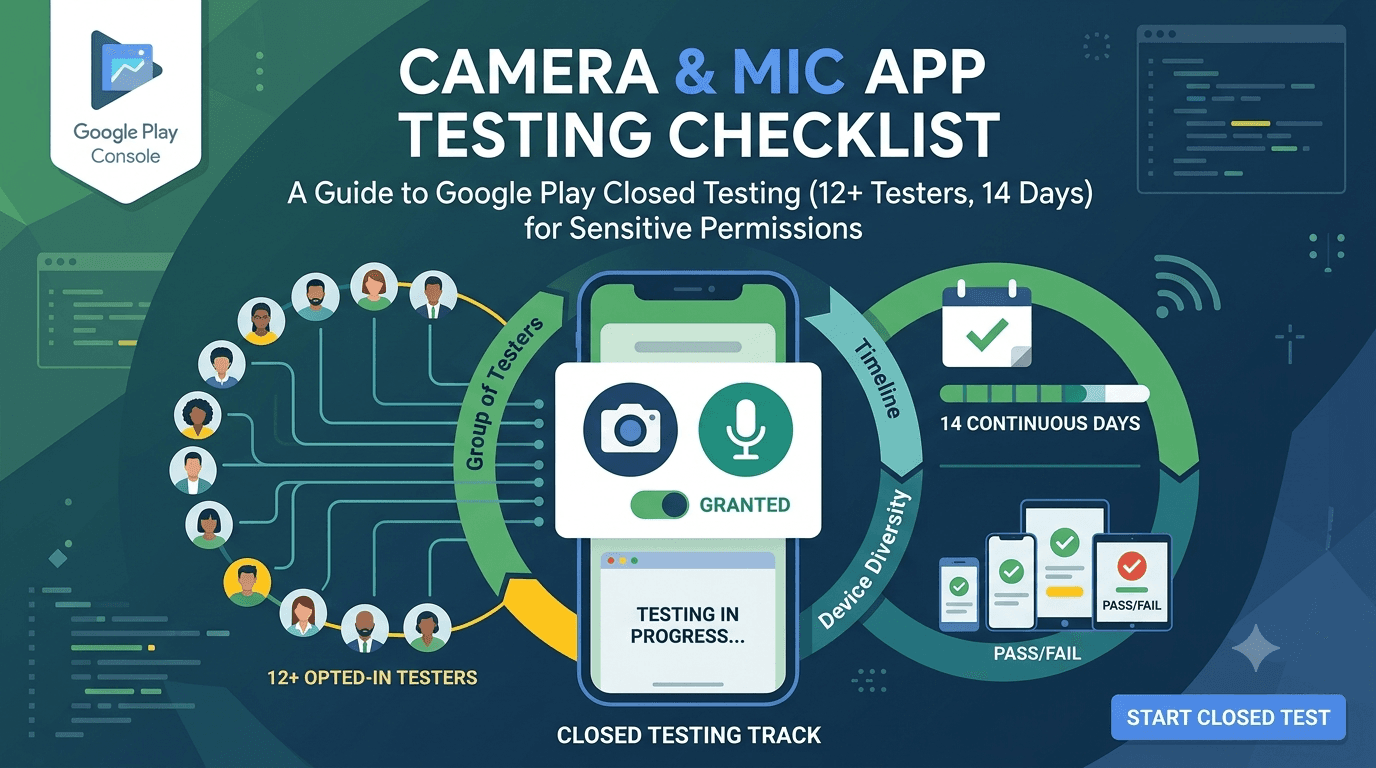
Camera and microphone access are powerful capabilities and sensitive permissions, and apps that use them must handle the permission flow correctly, respect user privacy, and work reliably across an enormous range of camera and audio hardware. Whether your app scans documents, makes video calls, records audio, or captures photos, getting camera and mic behavior right is essential — and, like any app published from a new personal account, yours must complete a closed test with at least 12 testers opted in for 14 continuous days before production access. This guide is a testing checklist for camera and microphone apps to run during your window.
The closed-testing process is the same as for any app, but camera and microphone hardware varies dramatically across devices, and permission handling is scrutinized for privacy. Using your window to validate both across real devices turns the mandatory wait into genuine quality assurance for hardware-dependent features.
The requirement and sensitive permissions
The closed-testing requirement is tied to your developer account type, so any app on a new personal account must complete a closed test with 12+ testers for 14 continuous days before production access, regardless of permissions. See the closed testing guide. The window is a natural opportunity to validate your camera and mic permission flows and hardware behavior across real devices.
Standard advice applies: recruit committed, device-diverse testers, keep your count above 12, and prepare your listing in parallel. Camera and mic apps benefit especially from device diversity, since hardware and quality vary so widely.
Requesting camera and mic permissions
Camera and microphone are runtime permissions that must be requested in context, with a clear explanation of why you need them, and handled gracefully when denied. Request them at the moment the feature is used rather than on first launch, so the user understands the reason. Your Data safety form must accurately declare how you use captured data, and if you access these sensitive capabilities you should be prepared to justify them. Follow Google's runtime permissions guidance.
Test the full permission flow: the request appears in context, granting enables the feature, and denying degrades gracefully without crashing. Also handle the case where the user permanently denies and must re-enable in settings. Because camera and mic are privacy-sensitive, mishandling them is both a user-trust and a review concern, so validating the flow across devices during your window is important. See the data safety form guide.
Testing across camera hardware
Camera hardware varies enormously: different sensors, resolutions, multiple lenses, autofocus behavior, and manufacturer camera implementations. An app that captures perfect photos on your device may misbehave on another — wrong orientation, poor focus, incorrect aspect ratios, or crashes on unusual camera configurations. Test capture, focus, orientation, resolution handling, and any advanced features across as many real devices as you can, since the camera is one of the most fragmented areas of Android.
| Camera/mic test focus | Why it matters |
|---|---|
| Permission flow | In-context request; graceful denial |
| Capture & orientation | Varies across sensors and devices |
| Focus & resolution | Quality differs by hardware |
| Audio input quality | Mic hardware and noise vary |
| Front/back & multi-lens | Switching must work everywhere |
Device-diverse testing is the only reliable way to validate camera behavior. See low-end device testing.
Testing microphone and audio
Microphone behavior also varies by device, and audio bugs are common: wrong input source selected, low or distorted recording levels, background noise, latency in real-time audio, and conflicts with other apps using audio. Test recording and any real-time audio features across devices, checking quality, levels, and behavior when interrupted by calls or other audio apps. For communication apps, echo cancellation and latency are critical and hardware-dependent.
Have testers record and play back audio, make calls if applicable, and report quality issues or failures on their devices. Test what happens when a phone call interrupts your audio, when Bluetooth headsets are connected, and when another app grabs the microphone. These real-world audio scenarios only surface with real testers on varied hardware, and getting them right is what makes an audio feature dependable. Poor audio quality is a frequent, harshly reviewed problem, so validate it thoroughly. See network condition testing for calls.
Setting up your closed-testing track
Once your signed release build is ready, create a closed-testing track in the Play Console and upload it, add testers by email or Google Group, and share the opt-in link each tester must use before installing. Correct configuration matters because the 14-day clock counts only opted-in testers, and a misconfigured track is a common reason developers realize late that their timer never started. Install from the listing on a real device and confirm capture and the permission flow work before inviting your full group. See how to create a closed testing track.
Give testers clear onboarding instructions and ask them to grant and deny permissions and to exercise camera and audio features on their devices. Every failed opt-in is a tester who does not count toward your 12, so smooth guidance maximizes active testers from day one and gives you the device-diverse hardware coverage camera and mic testing needs.
Recruiting and managing the window
You need 12+ committed, device-diverse testers for 14 continuous days, and for camera and mic apps, varied hardware is especially valuable. Recruit a buffer above 12, keep testers engaged with clear tasks and quick responses, and direct them to exercise capture, focus, and audio on their devices. Monitor your active count in the Play Console and recruit replacements early if it slips.
If assembling a device-diverse group is your bottleneck, a service that supplies verified real testers on varied hardware solves it quickly. You can submit your app to get started, and read where to find real testers and how to keep testers engaged.
Why real-device testing matters here
Camera and microphone are among the most hardware-fragmented parts of Android, and their behavior simply cannot be validated on an emulator or a single device. Sensor differences, lens configurations, autofocus, mic quality, and manufacturer implementations all vary, and bugs cluster exactly where your development device differs from the market. Only real testers on varied devices reveal the orientation glitches, focus failures, and audio problems that would otherwise reach your users.
This is why the closed-testing window, built on real opt-in testers, is genuinely valuable for camera and mic apps. Real testers capturing photos and recording audio across diverse hardware surface the issues that define whether these features work in practice. The window is your structured chance to validate hardware behavior before launch, and device diversity in your tester group is what makes that validation meaningful. See performance testing.
Making the 14-day window count
Because the requirement forces you to test anyway, use the window to validate camera and mic behavior across the hardware your users actually have. Brief testers to exercise capture, focus, orientation, and audio, and treat their device-specific reports as a chance to harden features that are notoriously fragmented. A well-run window turns a mandatory delay into a materially more reliable product.
Enter production having confirmed your permission flow is clean and your capture and audio work across diverse hardware, and you avoid the harsh reviews that camera and audio bugs generate. The 14 days are an investment in features that are hard to get right without broad device coverage. See the testing checklist.
Turning tester feedback into fixes
Give testers a frictionless way to report problems and ask specific questions: did the permission prompt appear in context, did photos capture with correct orientation and focus, was audio clear, did switching cameras work, did anything crash? Concrete questions produce the actionable reports that let you fix the hardware-specific issues most likely to hurt a camera or mic app.
Then close the loop: when you ship a build addressing reported issues, tell testers what changed and ask them to reconfirm on their device. This validates fixes across diverse camera and audio hardware and keeps testers engaged. An app that enters production having already resolved its capture and audio problems launches ready to perform across the market. See fixing crashes before production.
A realistic timeline and next steps
Plan backward from the 14-day minimum: a few days to finalize your build and recruit device-diverse testers, the continuous 14-day window, then production review, for roughly three to four weeks end to end. Front-load recruitment so nothing blocks you when the window closes, and if finding varied hardware is your bottleneck, resolve it early through your network or a service supplying verified real testers. When your window completes, request production access with your listing prepared in parallel. See what happens after 14 days and internal vs closed testing.
Use internal testing before your closed test
The Play Console's internal testing track is faster than the closed track and ideal for a first pass. For a camera or mic app, use it to shake out the permission flow and basic capture on a couple of devices before your counted 14-day window begins. Catching a crash on capture or a permission bug privately, rather than during your closed test, protects your testers' goodwill and prevents losing days of your continuous window to a build with fundamental problems.
A practical rhythm is to validate each release candidate on the internal track, confirm capture and audio on a couple of real devices, then promote it to the closed track where your counted testers live. This staging discipline keeps the closed track stable and your feedback focused on the hardware-specific issues that need broad device coverage. Treating internal testing as staging and closed testing as the requirement keeps your window productive. See internal vs closed testing.
After launch: monitoring capture quality
Your closed test is the start of quality assurance, not the end. After launch, keep watching Android vitals and reviews, which for camera and mic apps often center on capture quality, orientation, and audio problems on specific devices. New device models with new camera configurations appear constantly, so treat monitoring as ongoing and ship fixes when a particular device shows problems. An app that stays reliable across the evolving hardware landscape keeps its users; one that breaks on popular new devices loses them. See post-launch monitoring.
Key takeaways
- The 12-tester, 14-day requirement applies regardless of permissions.
- Request camera and mic in context and handle denial gracefully.
- Test capture, focus, and orientation across varied camera hardware.
- Validate audio quality and interruptions across devices.
- Device diversity is essential — camera and mic are highly fragmented.
Frequently asked questions
Do camera/mic apps need closed testing?
Yes. On a new personal account, the 12-tester, 14-day requirement applies regardless of the permissions used.
When should I request camera or mic permission?
In context, at the moment the feature is used, with a clear explanation — not on first launch — and handle denial gracefully.
Why does my camera app behave differently across devices?
Camera hardware, sensors, lenses, and manufacturer implementations vary widely, so orientation, focus, and capture can differ. Test broadly.
What audio scenarios should I test?
Recording quality and levels, interruptions from calls, Bluetooth headsets, other apps grabbing the mic, and latency for real-time audio.
How do I get diverse camera hardware for testing?
Recruit device-diverse testers through your network or a service, since camera and mic behavior is highly hardware-dependent.
Should I use internal testing first?
Yes. Confirm capture and the permission flow on the faster internal track before your counted closed-testing window begins, so you do not waste days on a build that crashes on capture.
What if a user permanently denies camera access?
Handle it gracefully — explain why the feature needs it and offer a path to app settings, rather than crashing or repeatedly prompting.
Do I need to declare captured data?
Yes. Your Data safety form must accurately describe how captured photos or audio are used, stored, and shared, matching your app's real behavior.
Why does camera orientation come out wrong on some phones?
Sensor orientation and manufacturer implementations differ, so images can appear rotated. Test orientation handling across varied devices and correct it per device where needed.
Expanded for topical authority — additional practical sections below. Original guide content above is unchanged.
Quick answer
Camera and Microphone Apps: Testing Checklist matters because Google Play production access for many new personal developer accounts depends on a successful closed test: at least 12 real testers opted in for 14 continuous days, plus a policy-compliant, stable app. Use this guide to execute the steps correctly, avoid streak-breaking mistakes, and decide whether DIY recruitment or a managed closed testing service is the better path for your deadline.
Real-world scenarios: who this matters for
The guidance in this article on Camera and Microphone Apps: Testing Checklist applies across many Android product types. Use these scenarios to map the advice to your situation.
| Developer type | Typical challenge | Practical focus |
|---|---|---|
| Indie / solo | Limited tester network and time | Start closed testing early; keep a buffer above 12 opted-in testers; parallelize listing + Data safety work |
| Startup | Launch deadline vs 14-day rule | Treat the window as fixed; recruit in parallel with QA; avoid last-minute track setup |
| Agency / white-label | Multiple client apps, each needing its own test | One closed test per app; standardize opt-in onboarding; track eligibility dates per client |
| Flutter / React Native | Cross-platform build + Play Console quirks | Ship a signed AAB to closed testing; verify installs from Play, not sideload; watch vitals on mid-range devices |
| Native Kotlin | Device/API fragmentation | Cover API levels and OEMs in your tester mix; fix crashes before requesting production |
| Game / Unity | Performance + retention during 14 days | Keep testers engaged so count never dips below 12; monitor ANRs and battery |
| E-commerce / fintech | Policy + payment flows | Test checkout, permissions, and declarations carefully before production access |
| Healthcare / kids / education | Sensitive policies (Families, data) | Align listing, privacy, and content rating with real app behavior during the test window |
Visual placeholder: Scenario matrix infographic — Indie / Startup / Agency / Cross-platform paths for Camera and Microphone Apps: Testing Checklist.
Closed testing vs other Play tracks (quick reference)
Context for Camera and Microphone Apps: Testing Checklist: choose the right track so you do not waste the 14-day window on the wrong workflow.
| Track | Purpose | Counts toward 12×14? | Typical use |
|---|---|---|---|
| Internal testing | Fast private builds | No | Shake out bugs before the counted window |
| Closed testing | Private / invite testers | Yes (for new personal accounts) | Meet production-access requirement + QA |
| Open testing | Public beta | Not a substitute for the closed requirement | Broader feedback after closed eligibility |
| Production | Public release | N/A | After access approved + review |
Visual placeholder: Timeline — Internal → Closed (14 days) → Production request → Staged rollout.
Common mistakes (and how to avoid them)
These mistakes repeatedly show up when developers work through Camera and Microphone Apps: Testing Checklist:
- Confusing invited vs opted-in testers — Only testers who open the opt-in link and install from Play count toward 12. Check the opted-in number in Play Console, not your email list.
- Recruiting exactly 12 with no buffer — One uninstall can break continuity. Aim for ~15 active opted-in testers.
- Starting the counted clock late — Listing assets, Data safety, and privacy work should run during the 14 days, not after.
- Using sideloaded APKs or fake installs — They do not satisfy Play’s closed testing expectations and can create account risk.
- Ignoring tester feedback until day 14 — Crashes that drive uninstalls threaten your streak and your review outcome.
- Requesting production access before the continuous streak completes — Eligibility checks fail even if calendar time has passed.
Troubleshooting checklist
If something feels “stuck” while applying Camera and Microphone Apps: Testing Checklist, walk this list before changing strategy:
| Symptom | Likely cause | Fix |
|---|---|---|
| Console shows < 12 testers | Invites sent but not opted in | Resend opt-in link; confirm install from Play |
| “Not eligible” after 14 calendar days | Count dipped below 12 mid-window | Restore 12+ and complete a full continuous streak |
| Tester cannot join | Wrong account, Group lag, or track not published | Verify Google account, Group membership, track release |
| App fails to install | Device/API mismatch or signing issue | Check AAB, minSDK, Play App Signing |
| Production still rejected after testing | Policy, declarations, or stability — not the clock | Read the exact reason; fix that category completely |
Visual placeholder: Troubleshooting flowchart for Camera and Microphone Apps: Testing Checklist.
Action checklist
Use this checklist alongside the rest of this guide on Camera and Microphone Apps: Testing Checklist:
- ☐ Closed testing track created with a signed release (AAB)
- ☐ Opt-in link tested on a fresh Google account
- ☐ At least 12 testers opted in (prefer ~15)
- ☐ Daily check that opted-in count stays ≥ 12 for 14 continuous days
- ☐ Core flows exercised (login, main feature, permissions, offline/online)
- ☐ Crashes / ANRs triaged from tester reports and vitals
- ☐ Store listing, screenshots, and feature graphic drafted
- ☐ Privacy policy + Data safety + content rating aligned with real behavior
- ☐ Production access requested only after eligibility is green
- ☐ Staged rollout plan ready for first public release
Additional FAQs developers ask about Camera and Microphone Apps: Testing Checklist
Quick answer: what should I do first?
Confirm you are on a closed testing track with real opted-in installs, keep 12+ testers for 14 continuous days, and fix policy/stability issues in parallel. Then use the detailed sections above for Camera and Microphone Apps: Testing Checklist.
Does this apply to organization (company) accounts?
The classic 12×14 closed testing gate is primarily associated with new personal developer accounts. Always verify your account type and current Play Console eligibility messaging for your app.
Do friends and family count as testers?
Yes — if they opt in via your closed testing link and install from Google Play. They only help if they stay opted in for the continuous period.
Can I update the app during the 14 days?
You can usually push updates on the closed track, but unstable releases that cause uninstalls can threaten your tester count. Prefer polishing via internal testing first when possible.
What if production access is still rejected?
Read the exact reason. Incomplete testing is only one category — policy, Data safety mismatches, and crashes are common. Fix the cited issue fully before reapplying.
Is paying for testers allowed?
Using real people who install from Play is what matters. Avoid fake install farms. A one-time managed service that supplies real closed testers is a practical option when DIY recruitment is too slow.
How is Fast Testers different from free communities?
Free communities trade time and mutual availability. Fast Testers assigns about 15 real testers after you submit a valid closed testing link (one-time $15 per app) and includes a production access guarantee under its refund terms.
Where should I go next?
Review the related guides below, then either finish DIY recruitment or start closed testing if you need speed and continuity.
Sources, updates, and how to use this guide
This article on Camera and Microphone Apps: Testing Checklist is maintained for Android developers preparing Google Play closed testing and production access. Always cross-check eligibility text inside your own Play Console, because Google’s UI labels and account rules can vary by account type and date.
- Primary official references: Google Play closed testing help, Developer Program Policies, and Play Console eligibility messaging for your app.
- Practical experience lens: guidance here reflects common failure modes indie developers and agencies hit when recruiting testers, maintaining the 14-day streak, and recovering from production-access rejections.
- Last reviewed focus: 12×14 closed testing continuity, real vs fake testers, and parallel listing/compliance work during the window.
Related guides and next steps
Continue building topical depth around Camera and Microphone Apps: Testing Checklist with these Fast Testers resources:
- Ad Supported Apps And Google Play Ad Policy Testing
- Agency Guide Testing Client Apps On Google Play
- Analytics Sdk Testing During Closed Testing
- Android Tv Apps And Google Play Testing Tracks
- App Testing Checklist Before Release
- Ar Vr Android Apps And Closed Testing Requirements
- Closed Testing Vs Open Testing On Google Play
- E Commerce Android Apps Play Store Testing Tips
- Pricing — $15 closed testing
- How Fast Testers works
- FAQ
- Developer reviews
- Case studies
- Submit your app / start closed testing
Need reliable testers so your 14-day streak does not stall? Educate first with the guides above, then start when you are ready — one-time pricing, real Play installs, dashboard tracking.
Further expansion — case study, decisions, and expert recommendations. Prior sections remain unchanged.
Case study: first Play launch planned around the closed testing window
Problem: A small SaaS team treated Google Play publishing like iOS TestFlight — they expected to upload and go public the same week. They discovered the personal-account closed testing gate mid-sprint.
Solution: They reframed the sprint around Camera And Microphone Apps: Testing Checklist: internal testing for crash triage first, then closed testing with a buffer of testers, while design finished screenshots and legal finished privacy/Data safety in parallel.
Result: The 14-day requirement stopped feeling like “dead time.” When eligibility flipped green, listing and declarations were already ready, so production review was the only remaining gate.
Lessons learned:
- Start the closed track as soon as the build is stable enough to keep installed.
- Parallelize compliance work inside the window.
- Protect the streak like a production SLA.
Decision guide: what should you do next?
Use this decision path when applying Camera And Microphone Apps: Testing Checklist:
- Is your account a new personal developer account that still needs production access?
If yes, plan for closed testing with 12+ opted-in testers for 14 continuous days. If no, still test — but confirm the exact eligibility text in Play Console. - Do you already have 12+ reliable people who will install from Play and stay for two weeks?
If yes, DIY can work — add a buffer and monitor daily. If no, use community exchange or a managed closed testing service. - Is your build stable enough that testers will not churn?
If no, run internal testing first. Entering the counted window with crash loops is how streaks die. - Are Data safety, privacy policy, permissions, and listing aligned with real behavior?
If no, fix during the window so production review does not bounce you after the clock. - Has production access been rejected?
Classify: eligibility vs policy vs declarations vs stability. Fix that category completely, then re-test / re-request.
Visual placeholder: Decision tree diagram for Camera And Microphone Apps: Testing Checklist (DIY vs managed vs fix-and-retry).
Expert recommendations
- Instrument the streak: Check opted-in count daily for the first week; replace dropouts same day.
- Brief testers once: Send a short checklist (install from Play, open app daily, try core flow, report crashes). Silent testers still count if opted in — engaged testers protect quality.
- Never “solve” recruitment with fake installs: It fails the intent of closed testing and can create account risk.
- Ship a boring-stable build to closed testing: Save experimental features for internal tracks.
- Educate first, then accelerate: If your blocker is simply finding real testers fast, a one-time managed option (Fast Testers: 15 testers, $15/app) is often cheaper than slipping a launch.
For hands-on setup after reading about Camera And Microphone Apps: Testing Checklist, see how it works and pricing, or submit your closed testing link when you are ready.
Internal navigation hub — added to strengthen topical connections. Original article content above is unchanged.
Continue learning
- Ad-Supported Apps and Google Play Ad Policy Testing — Learn about ad policy compliance for Google Play closed testing. Complete guide for Android developers publish.
- Accessibility Testing Before Play Store Launch — Learn about a11y compliance for Google Play closed testing. Complete guide for Android developers publishing o.
- Background Location Apps and Play Store Review — Learn about location permission apps for Google Play closed testing. Complete guide for Android developers pub.
- Google Play Console Permissions and Closed Testing — Learn about permission declarations for Google Play closed testing. Complete guide for Android developers publ.
- Privacy Policy Requirements for Google Play Apps — Learn about privacy policy setup for Google Play closed testing. Complete guide for Android developers publish.
- Agency Guide: Testing Client Apps on Google Play — Learn about agency multi-app testing for Google Play closed testing. Complete guide for Android developers pub.
Next steps
- Ready to run closed testing with real Android testers? Submit your app or see pricing ($15 one-time).
- Compare options on our testing service comparison page, or read developer reviews and case studies.
- Still deciding? Review how Fast Testers works and the FAQ.