
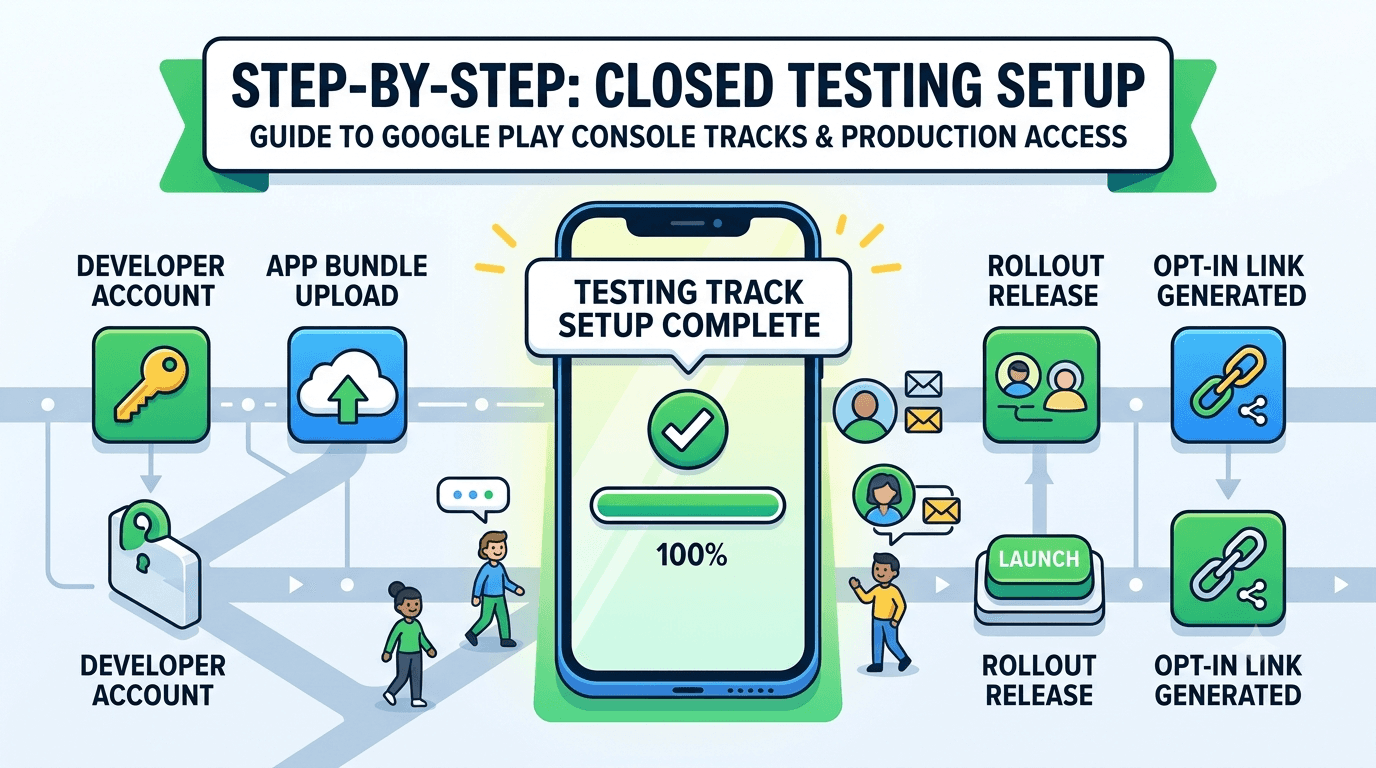
Setting up a closed testing track in the Google Play Console is the practical first step toward meeting the production-access requirement. It is not difficult, but doing it correctly the first time saves you from confusing errors, testers who cannot join, and wasted days. This step-by-step guide walks you through creating a closed testing track and starting your 14-day window on the right foot.
By the end you will know how to upload your build, configure your tester list, generate a working opt-in link, and avoid the setup mistakes that trip up most first-time publishers.
Before you start
You need a Google Play developer account (the one-time $25 registration paid), a signed release build of your app (an AAB is recommended), and your app's basic store presence configured enough to publish to a test track. If you have not set up your account yet, see the developer account guide. Make sure your build is stable — starting the clock with a crashing build wastes the window.
It also helps to have your list of testers ready before you begin, so they can opt in on day one. Recruiting after setup adds delay; having testers lined up lets the 14-day clock start immediately at full strength.
Step-by-step setup
In the Play Console, open your app, then go to Testing → Closed testing. Create a new track (or use the default closed track), then create a new release, upload your signed app bundle, add release notes, and save. Next, configure your testers on the track's Testers tab: you can add testers by email list or by linking a Google Group. Finally, save and roll out the release to the closed track.
| Step | Where |
|---|---|
| Create/select closed track | Testing → Closed testing |
| Create release, upload AAB | Track → Create new release |
| Add release notes | Release details |
| Add testers (email list or Group) | Testers tab |
| Roll out to closed track | Review and roll out |
| Share opt-in link | Testers tab → copy link |
For the official reference, see Google's set up an open, closed, or internal test documentation and the Play Console overview.
Configuring your testers
You have two ways to manage testers: an email list you maintain directly in the Console, or a Google Group whose membership controls access. Email lists are simple for small, static groups. Google Groups are more flexible for larger or changing rosters because you manage membership in the group rather than editing the Console each time. See how to use Google Groups for closed testing for the group approach.
Whichever you choose, every tester must be a real Google account that opts in via your link and stays opted in. Add a buffer above 12 to absorb dropouts. If assembling a reliable roster is your bottleneck, you can submit your app to get verified real testers who understand the 14-day requirement.
Generating and sharing the opt-in link
Once your track is live and testers are configured, the Console provides an opt-in URL (a "web link" to join the test). Testers open this link, accept becoming a tester, and are then able to install your app from Google Play. Share the correct link and clear instructions, because the most common tester complaint is "the link does not work" — which is almost always an opt-in or propagation issue rather than a broken link.
If testers report problems joining, see opt-in link not working and testers can't join closed testing. Also allow a little time after rollout for the release to propagate before expecting installs to work.
Setup mistakes to avoid
Avoid these common errors: uploading an unstable build (fix crashes first), forgetting to actually roll out the release (creating a release is not the same as rolling it out), misconfiguring the Google Group so testers lack access, and under-recruiting testers. Each of these can silently stall your 14-day window or make testers unable to install.
Another subtle mistake is not verifying the flow yourself: opt in with a spare account and confirm you can install from Play before inviting everyone. Catching a setup problem on day zero is far better than discovering it on day five. If your track does not appear for testers, see closed testing track not showing.
After setup: starting the clock
Once testers begin opting in and installing, your 14-day window is effectively running. From here, keep the count above 12, monitor for crashes, and prepare your launch materials in parallel. When the 14 days complete cleanly, you can apply for production access. For what comes next, read what happens after 14 days.
Setting up the track correctly is the foundation; a clean setup means a clean 14 days and a smooth path to launch.
Key takeaways
- Create the track under Testing → Closed testing, upload a signed AAB, and roll it out.
- Configure testers by email list or Google Group, with a buffer above 12.
- Share the correct opt-in link and clear instructions.
- Verify the flow yourself before inviting everyone.
- Avoid unstable builds and un-rolled-out releases that stall the window.
Verify the full flow before inviting everyone
One habit separates smooth closed tests from chaotic ones: verifying the entire tester flow yourself before you invite your real testers. Use a spare Google account that is not your developer account, add it to your tester list, open the opt-in link, accept becoming a tester, and confirm you can actually install the app from Google Play. This end-to-end check catches configuration mistakes — an un-rolled-out release, a misconfigured Google Group, a wrong link — on day zero, when fixing them costs nothing.
Skipping this step is how developers end up with a dozen confused testers messaging "it doesn't work" on day one, burning goodwill and time while the clock ticks. Five minutes of self-verification prevents hours of support and protects the momentum of your test's crucial opening days. Treat it as a mandatory pre-flight check, not an optional extra.
Managing builds during the test
You are allowed to push new builds to your closed track during the 14 days, which is useful for fixing bugs your testers find. When you do, write clear release notes so testers know what changed and what to re-check. Be thoughtful about update frequency, though — shipping constantly can annoy testers and introduce new instability, while never updating wastes the feedback loop. A steady cadence, fixing meaningful issues as they surface, keeps testers engaged and your app improving.
| Update practice | Effect |
|---|---|
| Clear release notes | Testers know what to check |
| Fix real issues promptly | Keeps testers engaged |
| Avoid constant churn | Prevents tester fatigue |
| Never leave crashes unfixed | Protects the value of the test |
Updating mid-test does not reset your 14-day clock as long as your tester count stays above the minimum. For related guidance, see how to write release notes.
Track hygiene and monitoring
Throughout the window, keep an eye on your closed track in the Play Console. Watch your opted-in tester count so you notice immediately if it drifts toward the minimum, and monitor crash reports and ANRs so you can fix stability problems before they matter at launch. Good track hygiene means you are never surprised — you know your count is healthy and your app is stable well before you apply for production access.
If your count starts slipping, act early: remind testers, or top up with additional testers to restore your buffer. Waiting until you are already below 12 is riskier than proactively maintaining margin. If maintaining a reliable count is proving difficult with a self-recruited group, a service that supplies committed, buffered testers removes the worry entirely — you can submit your app to get started.
Email list vs Google Group in depth
Choosing how to manage your testers is a small decision with real day-to-day consequences, so it is worth understanding both options properly. With an email list, you add and remove individual tester addresses directly in the Play Console for the track. It is simple and immediate for a small, stable group, but every change means editing the Console, which becomes tedious as your roster grows or churns.
With a Google Group, you link the group's address to your track, and anyone who is a member of that group gains tester access. You then manage membership in the group itself rather than in the Console. This is far more convenient for larger or changing rosters, because adding a tester is just adding a group member, and it scales without repeatedly editing your release configuration.
| Method | Best for | Trade-off |
|---|---|---|
| Email list | Small, static groups | Tedious to edit at scale |
| Google Group | Larger or changing rosters | Slight setup overhead |
Whichever you pick, the golden rule is that the account which opens the opt-in link must be on the list or in the group. Most "the link doesn't work" reports trace back to a tester using an account you never added. If you use a Google Group, double-check membership when a tester reports trouble. For the group-specific setup, see how to use Google Groups for closed testing and, if members hit issues, Google Groups not working.
For developers using a testing service, this decision is often handled for you — the service coordinates how its testers join, removing the management overhead entirely. If you would rather not maintain lists or groups at all, you can submit your app and let verified testers handle the joining process.
Getting the setup right the first time
The reason so many developers struggle with closed testing setup is not that any single step is hard, but that a small mistake at any point produces a confusing symptom much later, when it is harder to diagnose. A release you created but forgot to roll out, a Google Group whose sharing settings block your testers, a country restriction you did not notice, or an unstable build all manifest as "my testers can't install" — a vague symptom with many possible causes. Getting the setup right the first time, methodically, saves you from hours of confused troubleshooting during the pressure of your opening days.
Work through the setup as an ordered sequence, confirming each step before moving on. Upload a stable, signed build and confirm it processed without errors. Create the release, add clear release notes, and — critically — actually roll it out to the closed track, because creating a release is not the same as releasing it. Configure your testers, whether by email list or Google Group, and if you use a group, verify its membership and sharing settings so members truly have access. Then copy the opt-in link and, before sending it to anyone, walk the entire flow yourself with a spare account that is on your tester list.
That self-verification step is the highest-value habit in the entire process, and it is the one most often skipped. By opting in with a spare account and confirming you can install from Google Play end to end, you catch virtually every configuration mistake on day zero, when fixing it is trivial. The alternative — discovering the problem when a dozen real testers report failure on day one — costs you goodwill, time, and momentum precisely when your window has just started. Five minutes of verification prevents hours of firefighting.
Beyond the mechanics, think about the human side of setup. Your testers, especially first-timers, do not know the closed-testing flow, so pair your technically correct configuration with clear, friendly instructions: which account to use, the steps to opt in, and a heads-up that installation may take a little time to become available after opting in. A correctly configured track plus clear instructions resolves the overwhelming majority of joining problems before they occur, keeping your support burden low and your 14-day window running smoothly.
If maintaining lists, groups, and instructions feels like overhead you would rather avoid, remember that this coordination is exactly what a testing service handles on your behalf. The service manages how its verified testers join, removing the setup-and-support burden and letting you focus on your app rather than on troubleshooting opt-in flows. You can submit your app to work with testers who already understand the process, and consult how to use Google Groups for closed testing if you prefer to manage it yourself.
Frequently asked questions
Email list or Google Group for testers?
Email lists suit small static groups; Google Groups are better for larger or changing rosters.
Why can't my testers install the app?
Usually an opt-in or propagation issue. See our guides on opt-in links and testers who can't join.
Do I need an AAB or APK?
An Android App Bundle (AAB) is recommended for Play releases. See app bundle vs APK for details.
When does the 14-day clock start?
Effectively once testers are opted in and the release is live to them. Have testers ready to start immediately.
Expanded for topical authority — additional practical sections below. Original guide content above is unchanged.
Quick answer
How to Create a Closed Testing Track in Play Console matters because Google Play production access for many new personal developer accounts depends on a successful closed test: at least 12 real testers opted in for 14 continuous days, plus a policy-compliant, stable app. Use this guide to execute the steps correctly, avoid streak-breaking mistakes, and decide whether DIY recruitment or a managed closed testing service is the better path for your deadline.
Real-world scenarios: who this matters for
The guidance in this article on How to Create a Closed Testing Track in Play Console applies across many Android product types. Use these scenarios to map the advice to your situation.
| Developer type | Typical challenge | Practical focus |
|---|---|---|
| Indie / solo | Limited tester network and time | Start closed testing early; keep a buffer above 12 opted-in testers; parallelize listing + Data safety work |
| Startup | Launch deadline vs 14-day rule | Treat the window as fixed; recruit in parallel with QA; avoid last-minute track setup |
| Agency / white-label | Multiple client apps, each needing its own test | One closed test per app; standardize opt-in onboarding; track eligibility dates per client |
| Flutter / React Native | Cross-platform build + Play Console quirks | Ship a signed AAB to closed testing; verify installs from Play, not sideload; watch vitals on mid-range devices |
| Native Kotlin | Device/API fragmentation | Cover API levels and OEMs in your tester mix; fix crashes before requesting production |
| Game / Unity | Performance + retention during 14 days | Keep testers engaged so count never dips below 12; monitor ANRs and battery |
| E-commerce / fintech | Policy + payment flows | Test checkout, permissions, and declarations carefully before production access |
| Healthcare / kids / education | Sensitive policies (Families, data) | Align listing, privacy, and content rating with real app behavior during the test window |
Visual placeholder: Scenario matrix infographic — Indie / Startup / Agency / Cross-platform paths for How to Create a Closed Testing Track in Play Console.
Comparison: DIY recruitment vs managed closed testing
When your goal is Google Play production access, the path you choose for testers affects time, risk, and feedback quality. Use this comparison while deciding how to apply How to Create a Closed Testing Track in Play Console.
| Approach | Time to 12 opted-in | Cost | Dropout risk | Feedback quality | Best when |
|---|---|---|---|---|---|
| Friends & family | Days–weeks | $0 | High | Mixed | Tiny MVP, flexible timeline |
| Reddit / Discord / Telegram | Unpredictable | $0–low | High | Variable | You can manage onboarding daily |
| Peer community exchange | Variable | $0 | Medium | Developer-biased | You can test others’ apps in return |
| Managed closed testing (e.g. Fast Testers) | ~1 hour after valid link | $15 one-time / app | Low (buffer of 15) | Real Play installs | You need speed + continuity for 14 days |
Decision tip: If a broken streak would delay revenue or a client deadline, prioritize reliability over $0 recruitment. DIY is fine when you already have engaged testers and can monitor Play Console daily.
Visual placeholder: Comparison diagram — DIY vs community vs managed testing for How to Create a Closed Testing Track in Play Console.
Common mistakes (and how to avoid them)
These mistakes repeatedly show up when developers work through How to Create a Closed Testing Track in Play Console:
- Confusing invited vs opted-in testers — Only testers who open the opt-in link and install from Play count toward 12. Check the opted-in number in Play Console, not your email list.
- Recruiting exactly 12 with no buffer — One uninstall can break continuity. Aim for ~15 active opted-in testers.
- Starting the counted clock late — Listing assets, Data safety, and privacy work should run during the 14 days, not after.
- Using sideloaded APKs or fake installs — They do not satisfy Play’s closed testing expectations and can create account risk.
- Ignoring tester feedback until day 14 — Crashes that drive uninstalls threaten your streak and your review outcome.
- Requesting production access before the continuous streak completes — Eligibility checks fail even if calendar time has passed.
Action checklist
Use this checklist alongside the rest of this guide on How to Create a Closed Testing Track in Play Console:
- ☐ Closed testing track created with a signed release (AAB)
- ☐ Opt-in link tested on a fresh Google account
- ☐ At least 12 testers opted in (prefer ~15)
- ☐ Daily check that opted-in count stays ≥ 12 for 14 continuous days
- ☐ Core flows exercised (login, main feature, permissions, offline/online)
- ☐ Crashes / ANRs triaged from tester reports and vitals
- ☐ Store listing, screenshots, and feature graphic drafted
- ☐ Privacy policy + Data safety + content rating aligned with real behavior
- ☐ Production access requested only after eligibility is green
- ☐ Staged rollout plan ready for first public release
Additional FAQs developers ask about How to Create a Closed Testing Track in Play Console
Quick answer: what should I do first?
Confirm you are on a closed testing track with real opted-in installs, keep 12+ testers for 14 continuous days, and fix policy/stability issues in parallel. Then use the detailed sections above for How to Create a Closed Testing Track in Play Console.
Does this apply to organization (company) accounts?
The classic 12×14 closed testing gate is primarily associated with new personal developer accounts. Always verify your account type and current Play Console eligibility messaging for your app.
Do friends and family count as testers?
Yes — if they opt in via your closed testing link and install from Google Play. They only help if they stay opted in for the continuous period.
Can I update the app during the 14 days?
You can usually push updates on the closed track, but unstable releases that cause uninstalls can threaten your tester count. Prefer polishing via internal testing first when possible.
What if production access is still rejected?
Read the exact reason. Incomplete testing is only one category — policy, Data safety mismatches, and crashes are common. Fix the cited issue fully before reapplying.
Is paying for testers allowed?
Using real people who install from Play is what matters. Avoid fake install farms. A one-time managed service that supplies real closed testers is a practical option when DIY recruitment is too slow.
How is Fast Testers different from free communities?
Free communities trade time and mutual availability. Fast Testers assigns about 15 real testers after you submit a valid closed testing link (one-time $15 per app) and includes a production access guarantee under its refund terms.
Where should I go next?
Review the related guides below, then either finish DIY recruitment or start closed testing if you need speed and continuity.
Sources, updates, and how to use this guide
This article on How to Create a Closed Testing Track in Play Console is maintained for Android developers preparing Google Play closed testing and production access. Always cross-check eligibility text inside your own Play Console, because Google’s UI labels and account rules can vary by account type and date.
- Primary official references: Google Play closed testing help, Developer Program Policies, and Play Console eligibility messaging for your app.
- Practical experience lens: guidance here reflects common failure modes indie developers and agencies hit when recruiting testers, maintaining the 14-day streak, and recovering from production-access rejections.
- Last reviewed focus: 12×14 closed testing continuity, real vs fake testers, and parallel listing/compliance work during the window.
Related guides and next steps
Continue building topical depth around How to Create a Closed Testing Track in Play Console with these Fast Testers resources:
- Closed Testing Vs Open Testing On Google Play
- Google Play Console Permissions And Closed Testing
- Google Play Internal Testing Vs Closed Testing
- How To Monitor Closed Testing Progress In Play Console
- Analytics Sdk Testing During Closed Testing
- Closed Testing Track Not Showing
- Common Google Play Closed Testing Mistakes
- Google Play Android Vitals During Closed Testing
- Pricing — $15 closed testing
- How Fast Testers works
- FAQ
- Developer reviews
- Case studies
- Submit your app / start closed testing
Need reliable testers so your 14-day streak does not stall? Educate first with the guides above, then start when you are ready — one-time pricing, real Play installs, dashboard tracking.
Internal navigation hub — added to strengthen topical connections. Original article content above is unchanged.
Topic cluster: Google Play Closed Testing
Pillar guide: Start with Google Play Closed Testing Complete Guide for the full overview, then use the supporting guides below.
- Google Play Closed Testing Complete Guide (pillar)
- Google Play Closed Testing Guide: How to Get 12 Testers for 14 Days
- Google Play Closed Testing Requirements in 2026
- Google Play Closed Testing Opt-In Link Setup
- How Long Does Google Play Closed Testing Take?
- Common Google Play Closed Testing Mistakes to Avoid
- How to Pass Google Play Closed Testing on the First Try
- Updating Your App Mid Closed Testing Period
- Google Play Closed Testing FAQ: 50 Answers
- Avoiding Tester Dropout During 14-Day Testing
Continue learning
- How to Monitor Closed Testing Progress in Play Console — Learn about Play Console metrics for Google Play closed testing. Complete guide for Android developers publish.
- Closed Testing Track Not Showing in Play Console? — Closed testing track not showing in Google Play Console? Learn why the track or tab is missing and how to crea.
- Common Google Play Closed Testing Mistakes to Avoid — The most common Google Play closed testing mistakes — wrong track, too few testers, dropouts, sideloading — an.
- Google Play Android Vitals During Closed Testing — Learn about vitals monitoring for Google Play closed testing. Complete guide for Android developers publishing.
- Google Play Closed Testing Complete Guide — A comprehensive walkthrough of the entire closed testing process..
- Google Play Closed Testing Dashboard Metrics Explained — Learn about dashboard analytics for Google Play closed testing. Complete guide for Android developers publishi.
Next steps
- Ready to run closed testing with real Android testers? Submit your app or see pricing ($15 one-time).
- Compare options on our testing service comparison page, or read developer reviews and case studies.
- Still deciding? Review how Fast Testers works and the FAQ.