
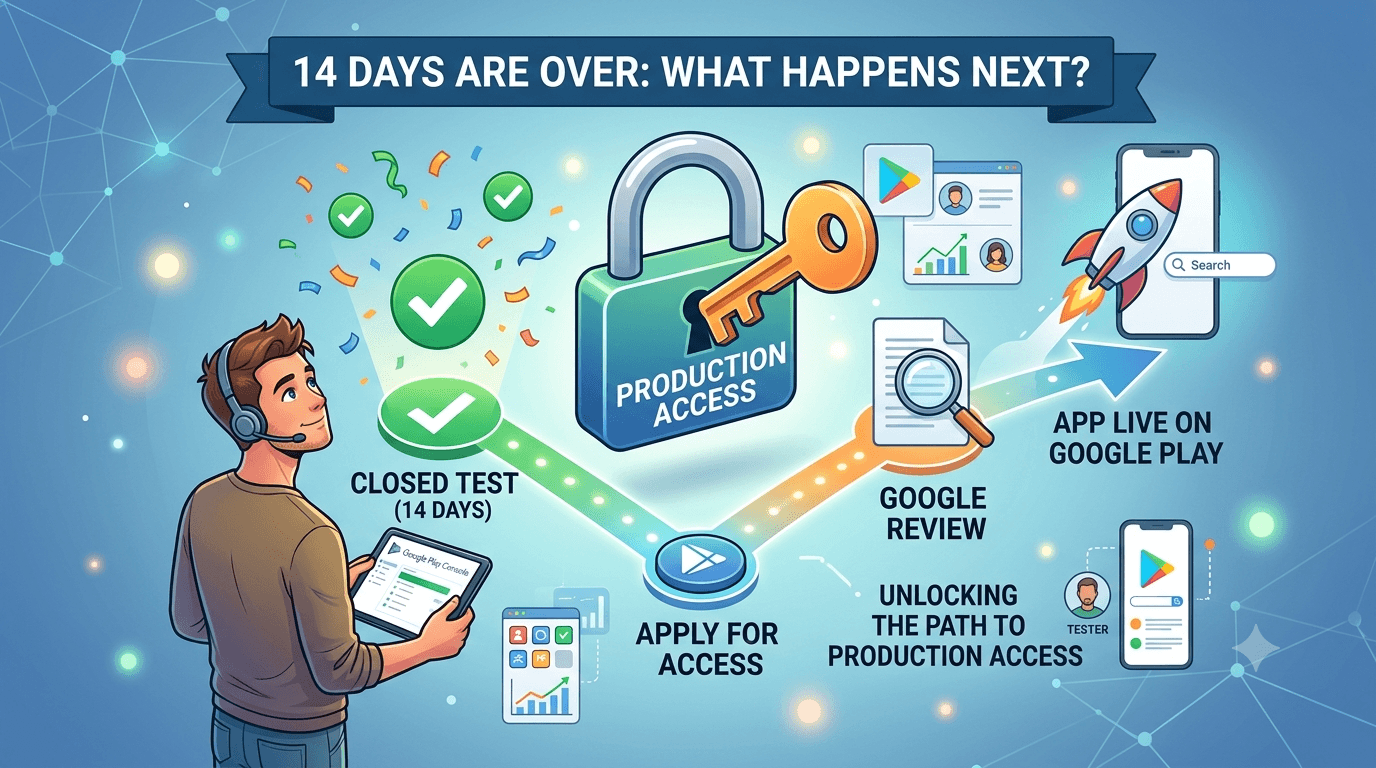
You have run your closed test, kept 12+ testers opted in for 14 continuous days, and the countdown is finally over. So what happens next? Many developers reach this point unsure whether they are automatically live, whether they need to do something, or how long until their app is public. This guide walks through exactly what happens after the 14 days end.
The key thing to understand is that finishing the 14 days does not publish your app — it unlocks the ability to apply for production access. There are still a few concrete steps between completing testing and seeing your app live on Google Play.
Step one: apply for production access
Once you have met the requirement, the Play Console lets you apply for production access. This is an explicit action, not automatic — you request access and Google evaluates your account and app. The application may ask about your testing, your app, and your plans. Answer accurately and completely, because vague or inconsistent answers can slow the process.
At this stage, having run a genuine test with engaged, real testers helps, since the process is designed to confirm legitimate developer activity. If you used unreliable or fake testers, this is where thin participation can become a problem. For context, see why professional testers improve approval chances.
Step two: Google reviews your request
After you apply, Google reviews your request and your app for policy compliance. Review time is typically a few days for a compliant app but can take longer if your app requests sensitive permissions, targets sensitive categories, or triggers deeper checks. This review is where policy issues surface, so it pays to have addressed compliance in advance.
| After 14 days | What to do |
|---|---|
| Apply for production access | Submit the request in Play Console |
| Wait for review | Usually a few days; keep testers opted in |
| Fix any issues raised | Address feedback and resubmit if needed |
| Get approved | Publish to production and go live |
To minimize review friction, confirm your app follows the Google Play developer policies and that your Data Safety section is accurate. See also closed testing completed but still rejected.
Keep your test active during review
A common mistake is disbanding your testers the moment the 14 days end. Do not tear down your closed test until you are safely approved and live. If Google needs to re-verify participation or you must make changes, having your test intact avoids scrambling to re-recruit. Keep your testers opted in through the review period as insurance.
This is another reason a stable, committed group of testers is valuable through the whole process, not just the 14-day count. If your group was fragile, this is where gaps show. Reliable testers — such as those from a service — stay put through review; you can submit your app if you need dependable participants.
Step three: approval and going live
When your production access is approved, you can publish your app to the production track and it becomes available to the public on Google Play. From here you manage your live app: monitoring reviews, watching Android vitals, and shipping updates. Your first days live are important for reviews and ranking, so launch with a stable, tested build — which is exactly what a good closed test helps ensure.
After launch, shift focus to post-launch care: responding to reviews, fixing crashes surfaced by real users, and iterating. For guidance, see the Android app release checklist and the store submission guide.
What if you are rejected?
Rejection at the production-access stage is not the end. Google typically explains the reason, and you can address it and reapply. Common causes include policy violations, inaccurate declarations, or an app that appears incomplete. Fix the specific issue, make sure your app genuinely complies, and resubmit. Read why Google rejected my production access request and app not eligible for production access for targeted help.
The best defense against rejection is preparation: a compliant, complete app, accurate declarations, and a genuine test. Get those right and approval is usually straightforward.
Key takeaways
- Finishing 14 days unlocks the ability to apply — it does not auto-publish.
- You must apply for production access and pass Google's review.
- Keep your testers opted in through review as insurance.
- Review is usually a few days for a compliant app.
- Rejections can be fixed and reapplied — address the specific reason.
Use the review window productively
The gap between finishing your 14-day test and getting approved is not dead time — it is an opportunity to strengthen your launch. While Google reviews your request, finalize anything you deferred: polish your store listing copy, refine screenshots, double-check your Data Safety declarations against your app's actual behavior, and prepare your launch announcements. If you enter this window with everything else done, approval flips your app live and you are immediately ready to promote it rather than scrambling to finish basics.
This is also a good moment to review the feedback your testers gave during the 14 days. If they surfaced non-blocking issues you postponed, plan a quick post-launch update to address them. Launching with a stable build and a clear follow-up plan sets you up for good early reviews, which matter enormously for your app's initial trajectory on the Play Store.
Preparing for your first days live
Your app's first days on production disproportionately shape its future, because early reviews and early stability data influence ranking and the impression future visitors form. That is why a genuine closed test pays off here: entering production with a build already validated by real testers on diverse devices means fewer nasty surprises when the general public arrives. The crashes and layout issues that would have generated one-star reviews were caught and fixed while your test was still private.
| First-week priority | Why it matters |
|---|---|
| Monitor crashes/ANRs | Fix stability issues fast |
| Respond to reviews | Shows care; improves perception |
| Watch Android vitals | Protects ranking and visibility |
| Ship a quick fix update | Addresses early feedback |
Set up your monitoring before you go live so you can react quickly. For guidance, see the release checklist and the review process explained.
Why not to tear down your test immediately
It is tempting to thank your testers and close the test the moment the countdown ends, but hold off. Until you are approved and live on production, keeping your closed test intact is cheap insurance. If Google needs to re-verify participation, or if you discover an issue that requires shipping a new build for review, having your testers still opted in saves you from re-recruiting under pressure. Once you are safely live, you can wind the test down at leisure.
This is another argument for a stable, committed tester group over a fragile one. Testers who stay put through review — as professional testers reliably do — give you flexibility and peace of mind at the most sensitive moment. If your group was assembled from casual volunteers who scattered on day 15, you lose that safety margin. For dependable participants who remain through the process, you can submit your app.
Handling a rejection calmly and effectively
If your production-access request is rejected, it is easy to panic — but rejection at this stage is common, usually fixable, and rarely fatal to your launch. Google typically provides a reason, and your job is to read it carefully, address the specific issue, and reapply. Reacting emotionally or resubmitting without changes only wastes time; a calm, methodical response gets you approved.
Start by identifying the category of the problem. Is it a policy violation, such as an undisclosed data practice or a prohibited content issue? Is it an incomplete or inaccurate declaration, like a Data Safety form that does not match your app's behavior? Is it a quality or completeness concern, where the app appears unfinished? Each category has a different fix, and matching your response to the actual cause is what makes reapplication succeed.
| Rejection type | Typical fix |
|---|---|
| Policy violation | Bring the app into compliance |
| Inaccurate declaration | Correct Data Safety / content rating |
| Appears incomplete | Finish core features and listing |
| Sensitive permissions | Justify or remove them |
Once you have genuinely resolved the stated issue — not just superficially, but actually bringing the app into compliance — resubmit with confidence. Keep your testers opted in during this process so participation remains verifiable and you are not scrambling to re-recruit. For targeted guidance, see why Google rejected my production access request, closed testing completed but still rejected, and the official developer policies.
Transitioning smoothly from testing to production
The transition from a completed closed test to a live production app is a distinct phase that rewards deliberate handling, yet many developers stumble through it because they assumed finishing the 14 days was the finish line. In reality it is a handoff, and how cleanly you manage that handoff determines whether your launch is smooth or chaotic. The transition involves applying for access, surviving review, and publishing — and each step benefits from preparation you should ideally have done during the testing window rather than scrambling to complete afterward.
Start the transition by treating your production application as a deliberate submission rather than a formality. Answer any questions accurately and completely, because inconsistent or vague responses can slow review or invite scrutiny. Ensure the build you intend to publish is the one you actually tested, or a close, stable iteration of it — publishing a substantially different, untested build undermines the entire point of the closed test and reintroduces the launch-day risk you worked to eliminate. Consistency between what you tested and what you ship is a quiet but important quality signal.
During review, resist the urge to make sweeping changes to your app or listing unless required, since churn during review can complicate the process. Instead, use this waiting period productively: finalize your launch marketing, prepare your support channels, set up your monitoring dashboards for crashes and Android vitals, and draft responses for the reviews you anticipate. Entering your first day live with all of this ready means you can focus entirely on responding to real users rather than assembling basic infrastructure while your app is already public and being judged.
When approval arrives and you publish to production, your app becomes available to everyone, and the first days matter disproportionately. Early reviews and early stability data shape your ranking and the impression future visitors form, which is exactly why a genuine closed test is such a strong foundation: you arrive at this high-stakes moment with a build already validated by real testers on diverse hardware, so the crashes and confusing flows that would have generated one-star reviews were caught while your test was still private. This is the payoff of treating the 14 days as real testing rather than a checkbox.
Keep your testing infrastructure intact until you are safely live and stable, because the transition is precisely when you might need to ship a corrective build for re-review or re-verify participation. Tearing down your test the moment the countdown ended, only to need it again days later, is a common and avoidable source of stress. Reliable testers who remain available through this window give you flexibility at the most sensitive moment; if your group was fragile, this is where the gaps show. For dependable participants who stay through the transition, you can submit your app, and see the release checklist for a full pre-launch runthrough.
Frequently asked questions
Is my app live automatically after 14 days?
No. You must apply for production access and be approved before your app goes public.
Do I have to keep the same build I tested?
You should publish the build you tested or a close, stable iteration of it. Publishing a substantially different, untested build reintroduces the launch-day risk your closed test was meant to eliminate.
How will I know why I was rejected?
Google typically states a reason. Read it carefully, address the specific issue genuinely rather than superficially, and reapply once the app truly complies.
How long does approval take after applying?
Usually a few days for a compliant app, though it can take longer with deeper policy checks.
Should I keep testers after 14 days?
Yes, keep them opted in until you are approved and live, in case re-verification or changes are needed.
What if I get rejected?
Address the stated reason, ensure genuine compliance, and reapply. Most rejections are fixable.
Expanded for topical authority — additional practical sections below. Original guide content above is unchanged.
Quick answer
What Happens After 14 Days of Closed Testing? matters because Google Play production access for many new personal developer accounts depends on a successful closed test: at least 12 real testers opted in for 14 continuous days, plus a policy-compliant, stable app. Use this guide to execute the steps correctly, avoid streak-breaking mistakes, and decide whether DIY recruitment or a managed closed testing service is the better path for your deadline.
Real-world scenarios: who this matters for
The guidance in this article on What Happens After 14 Days of Closed Testing? applies across many Android product types. Use these scenarios to map the advice to your situation.
| Developer type | Typical challenge | Practical focus |
|---|---|---|
| Indie / solo | Limited tester network and time | Start closed testing early; keep a buffer above 12 opted-in testers; parallelize listing + Data safety work |
| Startup | Launch deadline vs 14-day rule | Treat the window as fixed; recruit in parallel with QA; avoid last-minute track setup |
| Agency / white-label | Multiple client apps, each needing its own test | One closed test per app; standardize opt-in onboarding; track eligibility dates per client |
| Flutter / React Native | Cross-platform build + Play Console quirks | Ship a signed AAB to closed testing; verify installs from Play, not sideload; watch vitals on mid-range devices |
| Native Kotlin | Device/API fragmentation | Cover API levels and OEMs in your tester mix; fix crashes before requesting production |
| Game / Unity | Performance + retention during 14 days | Keep testers engaged so count never dips below 12; monitor ANRs and battery |
| E-commerce / fintech | Policy + payment flows | Test checkout, permissions, and declarations carefully before production access |
| Healthcare / kids / education | Sensitive policies (Families, data) | Align listing, privacy, and content rating with real app behavior during the test window |
Visual placeholder: Scenario matrix infographic — Indie / Startup / Agency / Cross-platform paths for What Happens After 14 Days of Closed Testing?.
Closed testing vs other Play tracks (quick reference)
Context for What Happens After 14 Days of Closed Testing?: choose the right track so you do not waste the 14-day window on the wrong workflow.
| Track | Purpose | Counts toward 12×14? | Typical use |
|---|---|---|---|
| Internal testing | Fast private builds | No | Shake out bugs before the counted window |
| Closed testing | Private / invite testers | Yes (for new personal accounts) | Meet production-access requirement + QA |
| Open testing | Public beta | Not a substitute for the closed requirement | Broader feedback after closed eligibility |
| Production | Public release | N/A | After access approved + review |
Visual placeholder: Timeline — Internal → Closed (14 days) → Production request → Staged rollout.
Common mistakes (and how to avoid them)
These mistakes repeatedly show up when developers work through What Happens After 14 Days of Closed Testing?:
- Confusing invited vs opted-in testers — Only testers who open the opt-in link and install from Play count toward 12. Check the opted-in number in Play Console, not your email list.
- Recruiting exactly 12 with no buffer — One uninstall can break continuity. Aim for ~15 active opted-in testers.
- Starting the counted clock late — Listing assets, Data safety, and privacy work should run during the 14 days, not after.
- Using sideloaded APKs or fake installs — They do not satisfy Play’s closed testing expectations and can create account risk.
- Ignoring tester feedback until day 14 — Crashes that drive uninstalls threaten your streak and your review outcome.
- Requesting production access before the continuous streak completes — Eligibility checks fail even if calendar time has passed.
Troubleshooting checklist
If something feels “stuck” while applying What Happens After 14 Days of Closed Testing?, walk this list before changing strategy:
| Symptom | Likely cause | Fix |
|---|---|---|
| Console shows < 12 testers | Invites sent but not opted in | Resend opt-in link; confirm install from Play |
| “Not eligible” after 14 calendar days | Count dipped below 12 mid-window | Restore 12+ and complete a full continuous streak |
| Tester cannot join | Wrong account, Group lag, or track not published | Verify Google account, Group membership, track release |
| App fails to install | Device/API mismatch or signing issue | Check AAB, minSDK, Play App Signing |
| Production still rejected after testing | Policy, declarations, or stability — not the clock | Read the exact reason; fix that category completely |
Visual placeholder: Troubleshooting flowchart for What Happens After 14 Days of Closed Testing?.
Action checklist
Use this checklist alongside the rest of this guide on What Happens After 14 Days of Closed Testing?:
- ☐ Closed testing track created with a signed release (AAB)
- ☐ Opt-in link tested on a fresh Google account
- ☐ At least 12 testers opted in (prefer ~15)
- ☐ Daily check that opted-in count stays ≥ 12 for 14 continuous days
- ☐ Core flows exercised (login, main feature, permissions, offline/online)
- ☐ Crashes / ANRs triaged from tester reports and vitals
- ☐ Store listing, screenshots, and feature graphic drafted
- ☐ Privacy policy + Data safety + content rating aligned with real behavior
- ☐ Production access requested only after eligibility is green
- ☐ Staged rollout plan ready for first public release
Additional FAQs developers ask about What Happens After 14 Days of Closed Testing?
Quick answer: what should I do first?
Confirm you are on a closed testing track with real opted-in installs, keep 12+ testers for 14 continuous days, and fix policy/stability issues in parallel. Then use the detailed sections above for What Happens After 14 Days of Closed Testing?.
Does this apply to organization (company) accounts?
The classic 12×14 closed testing gate is primarily associated with new personal developer accounts. Always verify your account type and current Play Console eligibility messaging for your app.
Do friends and family count as testers?
Yes — if they opt in via your closed testing link and install from Google Play. They only help if they stay opted in for the continuous period.
Can I update the app during the 14 days?
You can usually push updates on the closed track, but unstable releases that cause uninstalls can threaten your tester count. Prefer polishing via internal testing first when possible.
What if production access is still rejected?
Read the exact reason. Incomplete testing is only one category — policy, Data safety mismatches, and crashes are common. Fix the cited issue fully before reapplying.
Is paying for testers allowed?
Using real people who install from Play is what matters. Avoid fake install farms. A one-time managed service that supplies real closed testers is a practical option when DIY recruitment is too slow.
How is Fast Testers different from free communities?
Free communities trade time and mutual availability. Fast Testers assigns about 15 real testers after you submit a valid closed testing link (one-time $15 per app) and includes a production access guarantee under its refund terms.
Where should I go next?
Review the related guides below, then either finish DIY recruitment or start closed testing if you need speed and continuity.
Sources, updates, and how to use this guide
This article on What Happens After 14 Days of Closed Testing? is maintained for Android developers preparing Google Play closed testing and production access. Always cross-check eligibility text inside your own Play Console, because Google’s UI labels and account rules can vary by account type and date.
- Primary official references: Google Play closed testing help, Developer Program Policies, and Play Console eligibility messaging for your app.
- Practical experience lens: guidance here reflects common failure modes indie developers and agencies hit when recruiting testers, maintaining the 14-day streak, and recovering from production-access rejections.
- Last reviewed focus: 12×14 closed testing continuity, real vs fake testers, and parallel listing/compliance work during the window.
Related guides and next steps
Continue building topical depth around What Happens After 14 Days of Closed Testing? with these Fast Testers resources:
- Analytics Sdk Testing During Closed Testing
- Closed Testing Vs Open Testing On Google Play
- Google Play Closed Testing Guide How To Get 12 Testers For 14 Days
- Google Play Internal Testing Vs Closed Testing
- App Bundle Vs Apk For Closed Testing Releases
- App Rejected For Insufficient Testing What To Do
- Ar Vr Android Apps And Closed Testing Requirements
- Closed Testing Completed But Still Rejected
- Pricing — $15 closed testing
- How Fast Testers works
- FAQ
- Developer reviews
- Case studies
- Submit your app / start closed testing
Need reliable testers so your 14-day streak does not stall? Educate first with the guides above, then start when you are ready — one-time pricing, real Play installs, dashboard tracking.
Further expansion — case study, decisions, and expert recommendations. Prior sections remain unchanged.
Case study: first Play launch planned around the closed testing window
Problem: A small SaaS team treated Google Play publishing like iOS TestFlight — they expected to upload and go public the same week. They discovered the personal-account closed testing gate mid-sprint.
Solution: They reframed the sprint around What Happens After 14 Days Of Closed Testing?: internal testing for crash triage first, then closed testing with a buffer of testers, while design finished screenshots and legal finished privacy/Data safety in parallel.
Result: The 14-day requirement stopped feeling like “dead time.” When eligibility flipped green, listing and declarations were already ready, so production review was the only remaining gate.
Lessons learned:
- Start the closed track as soon as the build is stable enough to keep installed.
- Parallelize compliance work inside the window.
- Protect the streak like a production SLA.
Decision guide: what should you do next?
Use this decision path when applying What Happens After 14 Days Of Closed Testing?:
- Is your account a new personal developer account that still needs production access?
If yes, plan for closed testing with 12+ opted-in testers for 14 continuous days. If no, still test — but confirm the exact eligibility text in Play Console. - Do you already have 12+ reliable people who will install from Play and stay for two weeks?
If yes, DIY can work — add a buffer and monitor daily. If no, use community exchange or a managed closed testing service. - Is your build stable enough that testers will not churn?
If no, run internal testing first. Entering the counted window with crash loops is how streaks die. - Are Data safety, privacy policy, permissions, and listing aligned with real behavior?
If no, fix during the window so production review does not bounce you after the clock. - Has production access been rejected?
Classify: eligibility vs policy vs declarations vs stability. Fix that category completely, then re-test / re-request.
Visual placeholder: Decision tree diagram for What Happens After 14 Days Of Closed Testing? (DIY vs managed vs fix-and-retry).
Expert recommendations
- Instrument the streak: Check opted-in count daily for the first week; replace dropouts same day.
- Brief testers once: Send a short checklist (install from Play, open app daily, try core flow, report crashes). Silent testers still count if opted in — engaged testers protect quality.
- Never “solve” recruitment with fake installs: It fails the intent of closed testing and can create account risk.
- Ship a boring-stable build to closed testing: Save experimental features for internal tracks.
- Educate first, then accelerate: If your blocker is simply finding real testers fast, a one-time managed option (Fast Testers: 15 testers, $15/app) is often cheaper than slipping a launch.
For hands-on setup after reading about What Happens After 14 Days Of Closed Testing?, see how it works and pricing, or submit your closed testing link when you are ready.
Internal navigation hub — added to strengthen topical connections. Original article content above is unchanged.
Topic cluster: 12 Testers & Production Access
Pillar guide: Start with Google Play – 12 Testers for 14 Days for the full overview, then use the supporting guides below.
- Google Play – 12 Testers for 14 Days (pillar)
- Google Play 12 Testers Explained for Indie Developers
- How Many Testers Do You Need for Google Play?
- Need 12 Testers for Google Play? Here's the Fastest Solution
- How to Get 12 Testers Without Friends or Family
- Do Friends Count as Google Play Testers?
- When Can You Request Google Play Production Access?
- The Fastest Way to Get Google Play Production Access
- Google Play Says Not Enough Testers? Do This
Continue learning
- Case Study: First App Published in 16 Days with Fast Testers — Learn about success case study for Google Play closed testing. Complete guide for Android developers publishin.
- Closed Testing vs Open Testing on Google Play — Learn about testing track differences for Google Play closed testing. Complete guide for Android developers pu.
- Launch Day Checklist After Production Access — Learn about launch day planning for Google Play closed testing. Complete guide for Android developers publishi.
- Updating Your App After Production Release — Learn about post-launch updates for Google Play closed testing. Complete guide for Android developers publishi.
- Analytics SDK Testing During Closed Testing — Learn about analytics integration QA for Google Play closed testing. Complete guide for Android developers pub.
- Android App Release Checklist (2026) — A complete Android app release checklist for 2026 — from build signing and store listing to closed testing and.
Next steps
- Ready to run closed testing with real Android testers? Submit your app or see pricing ($15 one-time).
- Compare options on our testing service comparison page, or read developer reviews and case studies.
- Still deciding? Review how Fast Testers works and the FAQ.