
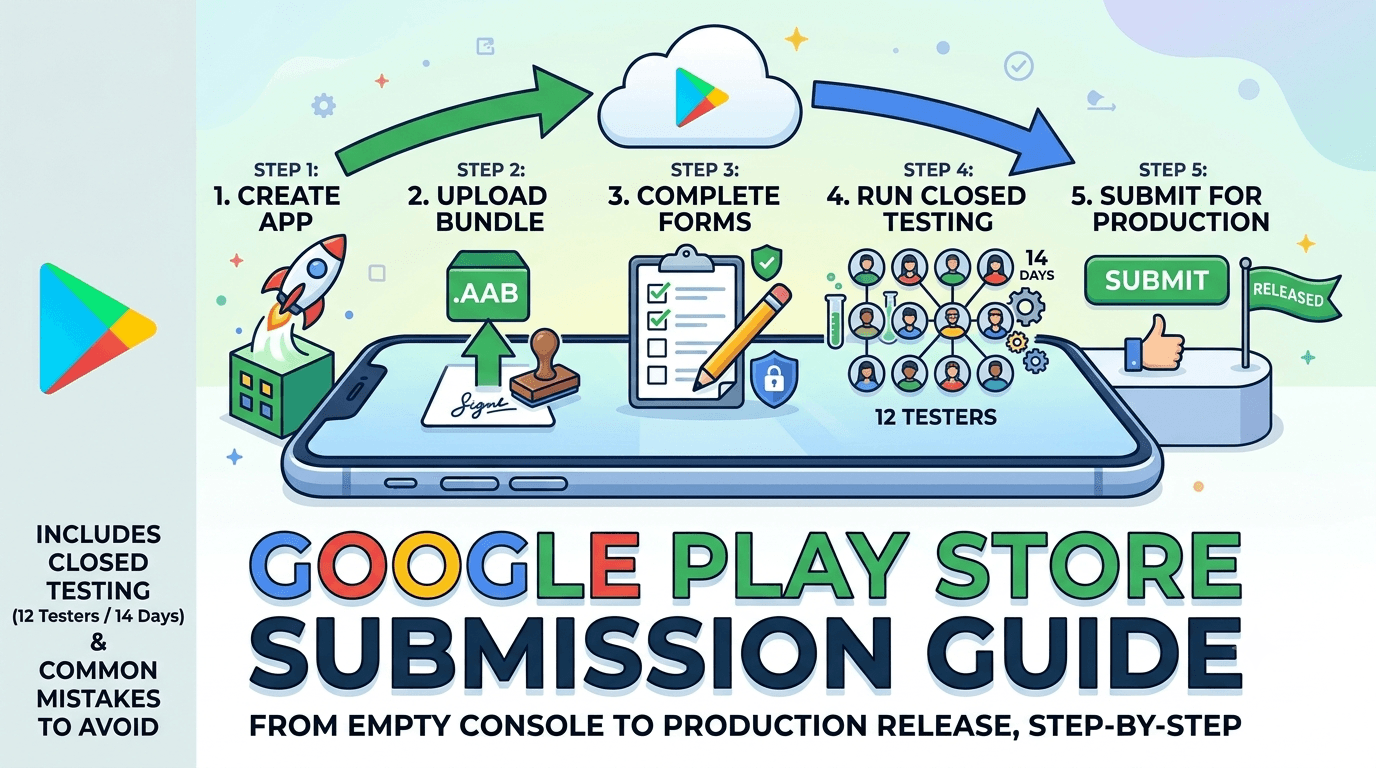
Submitting an app to the Google Play Store is straightforward once you know the order of operations. Skip a step, though, and you can stall for days. This Google Play Store submission guide takes you from an empty console to a submitted production release, with the closed testing requirement built into the flow.
Contents
Before you submit
Featured answer: Before submitting to Google Play, you need a registered developer account with verified identity, a signed Android App Bundle, a complete store listing, and — for new personal accounts — a completed closed test with 12 testers over 14 days. Prepare these and submission is quick.
New to the console? Start with the Play Console beginner guide and the developer account guide.
Step 1 — Create your app
- In Play Console, click Create app.
- Enter the app name, default language, and app/game type.
- Confirm free or paid and accept the declarations.
Step 2 — Upload your bundle
- Prepare a signed AAB — see AAB vs APK.
- Enroll in Play App Signing.
- Create a release on a testing track and upload the bundle.
- Add clear release notes.
Step 3 — Complete required forms
- Store listing: title, descriptions, screenshots, feature graphic, icon.
- Data safety form — guide.
- Privacy policy — requirements.
- Content rating and app content declarations.
- Target audience and ads declarations.
Warning: Inaccurate declarations — especially the data safety form — are a leading cause of rejection. Make every form match your app's real behavior.
Step 4 — Run closed testing
For new personal accounts, this is mandatory before production:
- Create the closed testing track.
- Add 12+ testers via a Google Group and share the opt-in link.
- Run 14 consecutive days with 12+ active testers.
No testers lined up? Submit your app to FastTesters and get real testers assigned within about an hour, with a buffer against dropouts.
Step 5 — Submit for production
- After the 14-day window, open Production and create a release.
- Set country availability and pricing.
- Review all warnings on the dashboard and resolve them.
- Submit — then Google reviews before your app goes public. See the review process.
Common submission mistakes to avoid
Most stalled submissions trace back to a small set of avoidable errors. Watch for these before you click submit:
- Submitting on the wrong track. Internal testing does not satisfy the production requirement — only closed testing does. See internal vs closed testing.
- Leaving forms in draft. An unsaved data safety form or content rating quietly blocks production.
- Uploading an unsigned or debug build. Ship a signed, release-configured AAB.
- Mismatched declarations. If your app collects data your form does not mention, expect a rejection.
- No reviewer access. Apps behind a login must include working test credentials.
A useful final habit is to open your Play Console dashboard and clear every warning and task before submitting. Google surfaces most blockers there, so an empty task list is a strong sign your submission will go through cleanly. Spending ten minutes on this review saves days of rejection cycles.
Step 1: Set up and verify your account
Every submission begins with a properly set up developer account, and getting this right first prevents blockers later. Create your Google Play developer account, pay the one-time registration fee, and — critically — complete identity verification promptly. Verification can take time to confirm, and an unverified account can prevent you from publishing even after everything else is ready. Because it runs on its own timeline, the smart move is to start verification at the very beginning so it is never the thing holding up your launch. Decide early, too, whether a personal or organization account fits your situation, since new personal accounts are subject to the closed testing requirement while verified organizations often are not.
Treating account setup as a deliberate first phase, rather than a formality to rush through, pays dividends. A verified account with your payment and tax details in order (if you plan to charge for anything) means that when your app is ready, nothing administrative stands between you and submission. Many first-time developers discover verification requirements only at the finish line and lose days as a result — an entirely avoidable delay.
Step 2: Create your app and build the listing
With your account ready, create your app in the Play Console and fill in its basic details — name, default language, and whether it is an app or a game, free or paid. Then build out your store listing, which is what potential users actually see. Craft a clear, searchable title, a compelling short description, and a full description that explains the app's value while naturally including relevant terms. Prepare high-quality screenshots and a feature graphic that showcase your key screens, since these visuals drive install decisions more than text does.
Keep your listing accurate as well as attractive. Misleading screenshots or overstated claims can cause a rejection for a deceptive listing, so represent the app honestly. A listing that is both compelling and truthful converts browsers into users and sails through review. Investing effort here early means your listing is polished and ready the moment you apply for production, rather than something you assemble in a rush at the end.
Step 3: Complete the required forms
Google requires several declarations before your app can go live, and completing them accurately is essential. The data safety form is the most important: it must exactly match what your app and its third-party SDKs collect and share. Audit every dependency to understand what data it touches, and make your declaration reflect reality — mismatches here are a leading cause of rejection. You also need a valid privacy policy URL, a completed content rating questionnaire, and appropriate target audience settings.
Treat these forms as gates rather than busywork, because an incomplete or inaccurate form will block your submission regardless of how good your app is. Work through every task on your Play Console dashboard until nothing outstanding remains. Doing this early — ideally during your testing window — means the paperwork is never what delays your launch. For depth, see the data safety form guide.
Step 4: Upload your build and complete testing
Next, upload your app as a signed Android App Bundle (AAB), not a debug APK, since Google Play distributes optimized bundles. Add clear release notes describing what testers and, later, users should expect. For a new personal account, this is also where the closed testing requirement enters: you must run a closed test with 12 testers for 14 consecutive days before you can apply for production. This is the step most likely to delay a first submission, because recruiting and retaining a dozen real testers is genuinely hard for many developers.
Plan for it deliberately. Set up your closed testing track, recruit your testers early, and start the 14-day window as soon as your build is stable, using that time to finish everything else in parallel. If sourcing testers is your obstacle, a professional service can assign real testers within about an hour so your clock starts immediately. See how to create a closed testing track for the setup walkthrough.
Step 5: Submit for production review
Once your closed test is complete and your compliance is clean, create a production release and submit it for review. Include clear release notes summarizing what your app does and what testers validated. After you submit, Google reviews your app against its policies — a process that is often a few days but can vary by app and region. Keep your testers enrolled until production access is granted, and resist the urge to make sweeping changes while review is pending.
If your submission is rejected, read the exact reason carefully, fix that specific issue, document the change in your release notes, and resubmit once. Avoid resubmitting an unchanged build, which wastes time and can harm your standing. With a stable app, an accurate listing, clean forms, and a completed test, most first submissions clear review without drama. See what happens after 14 days for what to expect next.
What happens after you submit
Once you submit your production release, your app enters Google's review queue, and knowing what to expect reduces anxiety during the wait. Automated checks run first, scanning for malware, policy violations, and technical issues, followed by human review of policy-sensitive areas. During this period, keep your testers enrolled until production access is confirmed, and resist making sweeping changes while review is pending, since new uploads can restart or complicate the process. Review time varies but is often a few days for a straightforward app, though new accounts and sensitive categories may take longer.
If your app is approved, it goes live according to your rollout settings, and your focus shifts to monitoring reviews and Android vitals in those crucial first days. If it is rejected, read the exact reason carefully — Google names the policy or issue — then fix that specific cause, document the change in your release notes, and resubmit once. Avoid the trap of resubmitting an unchanged build hoping for a different result, which wastes time and can harm your standing. With a stable app, accurate forms, an honest listing, and a genuine completed test, most submissions clear review without drama. See what happens after 14 days.
Submission mistakes that cause delays
Several avoidable mistakes routinely slow down submissions. Uploading a debug APK instead of a signed Android App Bundle causes immediate problems. Leaving the data safety form inaccurate or incomplete is a leading rejection cause. Requesting sensitive permissions without justification invites scrutiny. Submitting with an app that crashes on a reviewer's device, or that hides behind a login with no test credentials, reads as unfinished. And for new personal accounts, applying for production before completing a genuine 12-tester, 14-day closed test simply will not succeed. Reviewing your submission against these pitfalls before you click submit is the single best way to clear review on the first attempt rather than looping through rejections.
First submission versus future updates
It is worth understanding that your first submission is the most involved one you will make, and later updates are considerably simpler. The first time through, you complete account verification, build your listing from scratch, fill in every compliance form, and — for a new personal account — satisfy the closed testing requirement before you can apply for production. Once you have production access, subsequent updates go through the normal review process without repeating the full 14-day closed test, so your release cadence can be much faster.
This means the effort you invest in getting your first submission right pays off repeatedly. Your listing, forms, and account setup carry forward, needing only maintenance rather than re-creation. Knowing that the first launch is the steep part of the curve should encourage you to push through it thoroughly rather than dreading a permanent slog. After the initial gate, publishing becomes routine, and the discipline you build on your first submission — accurate forms, honest listing, genuine testing — makes every future release smoother and faster.
Key takeaways
- Verify your account first so administrative steps never block your launch.
- Build an accurate, compelling listing early rather than at the last minute.
- Complete every form accurately, especially the data safety declaration.
- Upload a signed AAB and complete closed testing — plan the 12-tester requirement ahead.
- Submit with clear release notes and fix any rejection by its specific cause.
Frequently asked questions
How do I submit an app to Google Play?
Create the app, upload a signed AAB, complete all forms, pass closed testing, then submit a production release for review.
Do I need closed testing to submit?
New personal accounts must complete it before the production option unlocks.
How long does submission review take?
Often a few days, though it varies — see approval time.
Can I edit after submitting?
You can update your listing and ship new releases after launch.
What if my submission is rejected?
Read the reason, fix it, and resubmit — see why Google rejects apps.
Do I need a company to submit?
No, a personal account works but is subject to the closed testing requirement.
Conclusion
Google Play submission is a clear five-step flow: create, upload, complete forms, test, and submit. The closed testing step is the one that catches new developers off guard, so plan for it. Ready to clear it fast? Submit your app and get real testers today.
Expanded for topical authority — additional practical sections below. Original guide content above is unchanged.
Quick answer
Google Play Store Submission Guide matters because Google Play production access for many new personal developer accounts depends on a successful closed test: at least 12 real testers opted in for 14 continuous days, plus a policy-compliant, stable app. Use this guide to execute the steps correctly, avoid streak-breaking mistakes, and decide whether DIY recruitment or a managed closed testing service is the better path for your deadline.
Real-world scenarios: who this matters for
The guidance in this article on Google Play Store Submission Guide applies across many Android product types. Use these scenarios to map the advice to your situation.
| Developer type | Typical challenge | Practical focus |
|---|---|---|
| Indie / solo | Limited tester network and time | Start closed testing early; keep a buffer above 12 opted-in testers; parallelize listing + Data safety work |
| Startup | Launch deadline vs 14-day rule | Treat the window as fixed; recruit in parallel with QA; avoid last-minute track setup |
| Agency / white-label | Multiple client apps, each needing its own test | One closed test per app; standardize opt-in onboarding; track eligibility dates per client |
| Flutter / React Native | Cross-platform build + Play Console quirks | Ship a signed AAB to closed testing; verify installs from Play, not sideload; watch vitals on mid-range devices |
| Native Kotlin | Device/API fragmentation | Cover API levels and OEMs in your tester mix; fix crashes before requesting production |
| Game / Unity | Performance + retention during 14 days | Keep testers engaged so count never dips below 12; monitor ANRs and battery |
| E-commerce / fintech | Policy + payment flows | Test checkout, permissions, and declarations carefully before production access |
| Healthcare / kids / education | Sensitive policies (Families, data) | Align listing, privacy, and content rating with real app behavior during the test window |
Visual placeholder: Scenario matrix infographic — Indie / Startup / Agency / Cross-platform paths for Google Play Store Submission Guide.
Closed testing vs other Play tracks (quick reference)
Context for Google Play Store Submission Guide: choose the right track so you do not waste the 14-day window on the wrong workflow.
| Track | Purpose | Counts toward 12×14? | Typical use |
|---|---|---|---|
| Internal testing | Fast private builds | No | Shake out bugs before the counted window |
| Closed testing | Private / invite testers | Yes (for new personal accounts) | Meet production-access requirement + QA |
| Open testing | Public beta | Not a substitute for the closed requirement | Broader feedback after closed eligibility |
| Production | Public release | N/A | After access approved + review |
Visual placeholder: Timeline — Internal → Closed (14 days) → Production request → Staged rollout.
Common mistakes (and how to avoid them)
These mistakes repeatedly show up when developers work through Google Play Store Submission Guide:
- Confusing invited vs opted-in testers — Only testers who open the opt-in link and install from Play count toward 12. Check the opted-in number in Play Console, not your email list.
- Recruiting exactly 12 with no buffer — One uninstall can break continuity. Aim for ~15 active opted-in testers.
- Starting the counted clock late — Listing assets, Data safety, and privacy work should run during the 14 days, not after.
- Using sideloaded APKs or fake installs — They do not satisfy Play’s closed testing expectations and can create account risk.
- Ignoring tester feedback until day 14 — Crashes that drive uninstalls threaten your streak and your review outcome.
- Requesting production access before the continuous streak completes — Eligibility checks fail even if calendar time has passed.
Troubleshooting checklist
If something feels “stuck” while applying Google Play Store Submission Guide, walk this list before changing strategy:
| Symptom | Likely cause | Fix |
|---|---|---|
| Console shows < 12 testers | Invites sent but not opted in | Resend opt-in link; confirm install from Play |
| “Not eligible” after 14 calendar days | Count dipped below 12 mid-window | Restore 12+ and complete a full continuous streak |
| Tester cannot join | Wrong account, Group lag, or track not published | Verify Google account, Group membership, track release |
| App fails to install | Device/API mismatch or signing issue | Check AAB, minSDK, Play App Signing |
| Production still rejected after testing | Policy, declarations, or stability — not the clock | Read the exact reason; fix that category completely |
Visual placeholder: Troubleshooting flowchart for Google Play Store Submission Guide.
Action checklist
Use this checklist alongside the rest of this guide on Google Play Store Submission Guide:
- ☐ Closed testing track created with a signed release (AAB)
- ☐ Opt-in link tested on a fresh Google account
- ☐ At least 12 testers opted in (prefer ~15)
- ☐ Daily check that opted-in count stays ≥ 12 for 14 continuous days
- ☐ Core flows exercised (login, main feature, permissions, offline/online)
- ☐ Crashes / ANRs triaged from tester reports and vitals
- ☐ Store listing, screenshots, and feature graphic drafted
- ☐ Privacy policy + Data safety + content rating aligned with real behavior
- ☐ Production access requested only after eligibility is green
- ☐ Staged rollout plan ready for first public release
Additional FAQs developers ask about Google Play Store Submission Guide
Quick answer: what should I do first?
Confirm you are on a closed testing track with real opted-in installs, keep 12+ testers for 14 continuous days, and fix policy/stability issues in parallel. Then use the detailed sections above for Google Play Store Submission Guide.
Does this apply to organization (company) accounts?
The classic 12×14 closed testing gate is primarily associated with new personal developer accounts. Always verify your account type and current Play Console eligibility messaging for your app.
Do friends and family count as testers?
Yes — if they opt in via your closed testing link and install from Google Play. They only help if they stay opted in for the continuous period.
Can I update the app during the 14 days?
You can usually push updates on the closed track, but unstable releases that cause uninstalls can threaten your tester count. Prefer polishing via internal testing first when possible.
What if production access is still rejected?
Read the exact reason. Incomplete testing is only one category — policy, Data safety mismatches, and crashes are common. Fix the cited issue fully before reapplying.
Is paying for testers allowed?
Using real people who install from Play is what matters. Avoid fake install farms. A one-time managed service that supplies real closed testers is a practical option when DIY recruitment is too slow.
How is Fast Testers different from free communities?
Free communities trade time and mutual availability. Fast Testers assigns about 15 real testers after you submit a valid closed testing link (one-time $15 per app) and includes a production access guarantee under its refund terms.
Where should I go next?
Review the related guides below, then either finish DIY recruitment or start closed testing if you need speed and continuity.
Sources, updates, and how to use this guide
This article on Google Play Store Submission Guide is maintained for Android developers preparing Google Play closed testing and production access. Always cross-check eligibility text inside your own Play Console, because Google’s UI labels and account rules can vary by account type and date.
- Primary official references: Google Play closed testing help, Developer Program Policies, and Play Console eligibility messaging for your app.
- Practical experience lens: guidance here reflects common failure modes indie developers and agencies hit when recruiting testers, maintaining the 14-day streak, and recovering from production-access rejections.
- Last reviewed focus: 12×14 closed testing continuity, real vs fake testers, and parallel listing/compliance work during the window.
Related guides and next steps
Continue building topical depth around Google Play Store Submission Guide with these Fast Testers resources:
- Agency Guide Testing Client Apps On Google Play
- Coppa And Kids Apps On Google Play Store
- Google Play Closed Testing Guide How To Get 12 Testers For 14 Days
- Google Play Compliance Guide
- Google Play Console Beginner Guide
- Google Play Developer Account Guide
- Google Play Store Listing Optimization Before Launch
- Startup Guide Launch Android App On Play Store Fast
- Pricing — $15 closed testing
- How Fast Testers works
- FAQ
- Developer reviews
- Case studies
- Submit your app / start closed testing
Need reliable testers so your 14-day streak does not stall? Educate first with the guides above, then start when you are ready — one-time pricing, real Play installs, dashboard tracking.
Internal navigation hub — added to strengthen topical connections. Original article content above is unchanged.
Topic cluster: Publishing on Google Play
Pillar guide: Start with How to Publish an App on Google Play Store for the full overview, then use the supporting guides below.
- How to Publish an App on Google Play Store (pillar)
- First App on Google Play: Complete Checklist
- Android App Release Checklist (2026)
- Preparing Your App Before Publishing on Google Play
- Google Play Console Beginner Guide
- Google Play Review Process Explained
- Google Play Approval Time: How Long Does It Take?
- Launch Day Checklist After Production Access
- Staged Rollouts After Production Access Approval
Continue learning
- Google Play Console Beginner Guide — A beginner guide to Google Play Console: create your account, set up your first app, understand testing tracks.
- App Title and Description SEO for Google Play — Learn about Play Store ASO for Google Play closed testing. Complete guide for Android developers publishing on.
- Bootstrapped Developer Play Store Launch on $15 — Learn about budget-friendly testing for Google Play closed testing. Complete guide for Android developers publ.
- Customer Support Setup Before Play Store Launch — Learn about support preparation for Google Play closed testing. Complete guide for Android developers publishi.
- Feature Graphic Design Tips for Google Play — Learn about feature graphic design for Google Play closed testing. Complete guide for Android developers publi.
- First App on Google Play: Complete Checklist — Learn about first-time publishing for Google Play closed testing. Complete guide for Android developers publis.
Next steps
- Ready to run closed testing with real Android testers? Submit your app or see pricing ($15 one-time).
- Compare options on our testing service comparison page, or read developer reviews and case studies.
- Still deciding? Review how Fast Testers works and the FAQ.