
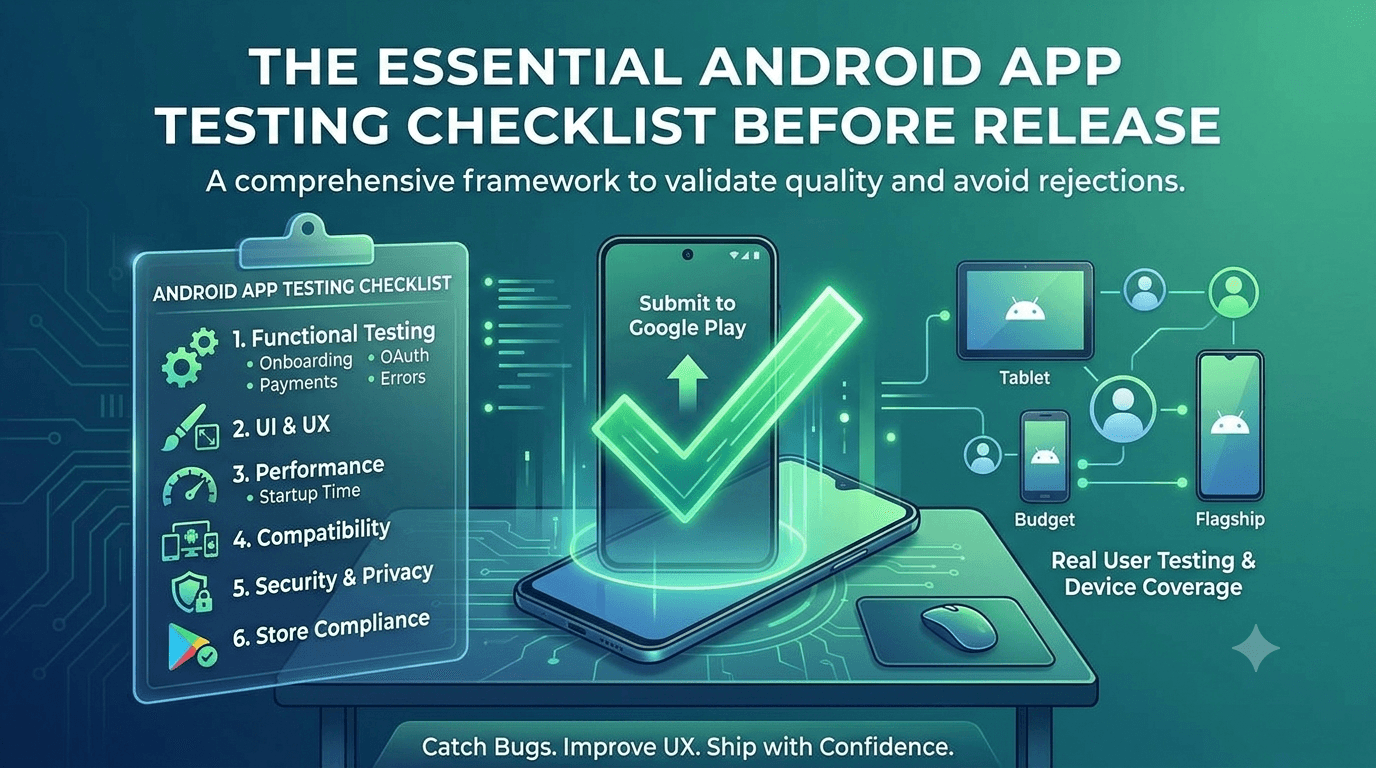
A structured test pass before release catches the bugs that cause bad reviews and rejections. Rather than clicking around at random, work through a repeatable list that covers every important dimension. This app testing checklist before release gives Android developers a practical, comprehensive framework to validate quality before submitting to Google Play.
Contents
Functional testing
Featured answer: Functional testing verifies that every feature works as intended — onboarding, login, core actions, payments, and error handling. It is the foundation of pre-release testing and should pass on multiple real devices before you submit.
- Onboarding and first-run experience.
- Authentication and account flows — OAuth login testing.
- Core features and edge cases.
- Payments and subscriptions — billing testing.
- Error states and offline behavior — offline apps.
UI and UX
- Layouts on different screen sizes — tablet layouts.
- Dark mode and themes — theme testing.
- Accessibility — a11y testing.
- RTL languages — RTL testing.
Performance
- Startup time and responsiveness.
- Battery usage — battery testing.
- Memory and stability under load.
- Android vitals — vitals monitoring.
Compatibility
- Multiple Android versions and OEM skins.
- Low-end and high-end devices — low-end testing.
- Various network conditions — network testing.
Security and privacy
- Secure data storage and transmission.
- Permission usage matches disclosures.
- Third-party SDK behavior reviewed.
Store compliance
- Data safety form matches behavior — guide.
- Privacy policy live and valid.
- Target API level current.
Tip: Real human testers cover device and usage diversity you cannot replicate alone. Submit your app to get manual testing and feedback reports before release.
The full checklist
| Area | Pass criteria |
|---|---|
| Functional | All core flows work on real devices |
| UI/UX | Correct on multiple sizes, themes, and languages |
| Performance | Fast startup, no excessive battery/memory use |
| Compatibility | Works across OS versions and device tiers |
| Security | Data protected, permissions justified |
| Compliance | Forms accurate, API level current |
How to run an efficient test pass
A checklist is only useful if you can work through it without burning days. Make your pre-release testing efficient with a repeatable routine:
- Prioritize by risk. Test the flows that would hurt most if broken — sign-up, payments, and core actions — before minor screens.
- Test on tiers, not every device. Cover a low-end, a mid-range, and a recent flagship rather than chasing every model.
- Log issues as you go. Capture steps, device, and severity so fixes are fast and verifiable.
- Re-test after fixes. Confirm each fix and check you did not introduce a regression.
- Bring in real users. Fresh eyes on real devices find issues your own testing misses.
The biggest gap in solo testing is device and behavior diversity — you simply cannot mimic dozens of real users on varied hardware. That is where real human testers add the most value, covering combinations you would never reproduce alone. Combined with your structured checklist, they give you both depth and breadth before you ever reach Google's review.
Functional testing: does everything work?
The foundation of any pre-release testing is functional testing — confirming that every feature does what it is supposed to do. Start with your core flows, the essential journeys that define your app: onboarding, account creation and login, the primary task users come to perform, and navigation between key screens. Test each of these deliberately, as a new user would, rather than in the practiced way you use the app as its developer. Then work outward to secondary features, edge cases, and error handling — what happens when input is invalid, the network drops, or a user does something unexpected.
Functional testing is where you catch the "it doesn't work" problems that would otherwise generate immediate negative reviews or reviewer rejections. Keep a written list of features and journeys so your testing is systematic rather than ad hoc; it is easy to overlook a flow you rarely use yourself. Anything gated behind a login deserves special attention, since a broken authentication path blocks everything after it. Solid functional testing ensures your real testers spend their time finding subtle issues, not reporting that the basics are broken.
Stability and performance
Beyond whether features work, you need to test how reliably and smoothly they work. Stability testing means exercising your app repeatedly and under varied conditions to surface crashes and ANRs. Use the pre-launch report, which runs your app on real devices in Google's infrastructure, and monitor Android vitals to catch crash patterns. A single reproducible crash on a common device can sink your launch, so treat stability as non-negotiable.
Performance testing examines responsiveness, load times, memory use, and battery impact. An app that works but feels sluggish, drains battery, or stutters on mid-range devices will frustrate users even if it never crashes. Test on lower-end and older devices, not just your flagship, because performance problems often only appear where resources are constrained. Users judge apps harshly on speed and smoothness, so catching performance issues before release protects your ratings. For a deeper treatment, see performance testing for Android apps.
Device and OS coverage
One of the most valuable and most neglected forms of testing is coverage across different devices and Android versions. The Android ecosystem is enormously fragmented — countless manufacturers, screen sizes, resolutions, hardware capabilities, and OS versions — and an app that is flawless on your device can break on others. Layouts can overflow on small screens, features can fail on specific manufacturer skins, and behavior can differ across Android versions. Testing on a variety of real devices is the only reliable way to catch these issues.
This is one of the underrated benefits of a genuine closed test with real, diverse testers: collectively, they exercise your app across a spread of devices you could never assemble yourself. Worldwide testers on varied hardware surface compatibility problems that a single-device test would miss entirely. When planning your testing, deliberately seek device diversity, because broad coverage is what turns "works for me" into "works for everyone."
Security, data, and user experience
Two further dimensions round out a thorough checklist. Security and data testing verifies that your app handles user data responsibly — transmitting sensitive information securely, storing it appropriately, and behaving consistently with your data safety declarations. Even if you are not building a security-critical app, basic data hygiene matters for both compliance and user trust. For depth, see security testing for Android apps.
User experience testing asks a different question: not "does it work" but "is it good?" Watch how testers actually use your app. Where do they hesitate, get confused, or give up? A feature that works technically can still fail if users cannot figure out how to use it. This kind of feedback is one of the greatest values of real human testers, who react like genuine users and reveal the friction points that data alone cannot show. Acting on UX feedback before launch is often the difference between an app people tolerate and one they love.
The closed testing requirement as your final gate
For a new personal account, your pre-release testing culminates in the mandatory closed test: 12 testers running your app for 14 consecutive days before you can apply for production. This is not just a compliance box but a genuine opportunity to run all the testing above with real users on real devices. Rather than treating it as a formality, use it as your final, comprehensive testing pass — collecting functional bugs, stability data, device coverage, and UX feedback all at once from a diverse group of real testers.
Because recruiting and retaining 12 reliable testers is hard, many developers use a professional service that assigns real testers within about an hour and manages retention across the full window. This both satisfies the requirement and delivers the diverse, real-world testing that hardens your app before launch. Approached this way, the requirement becomes the most valuable stage of your release rather than an obstacle. See where to find real testers.
Regression testing and updates
One form of testing that developers often overlook is regression testing — verifying that new changes have not broken existing functionality. Every time you fix a bug or add a feature, there is a chance you inadvertently break something that previously worked. This is especially relevant during your closed testing window, when you might push an update to address a tester-reported issue. A fix that introduces a new crash elsewhere can quietly undermine your test, so any mid-test change should be validated carefully before it reaches your testers.
The disciplined approach is to keep a list of your core flows and re-check them after any significant change, ensuring your fixes did not create new problems. This matters beyond launch, too: every post-launch update reaches your entire installed base, so a regression can affect all your users at once. Building a habit of regression checks — even a lightweight manual pass through your key journeys — protects the stability you worked to achieve. Stability is not a one-time accomplishment but something you maintain with each change, and regression testing is how you maintain it.
Tools that make testing easier
You do not have to test everything manually and unaided. Google provides several tools that strengthen your pre-release testing. The pre-launch report runs your app on real devices automatically, flagging crashes and issues before human testers begin. Android vitals tracks stability and performance over time, surfacing crash and ANR patterns from real usage. The testing tracks themselves — internal and closed — let you distribute builds to testers in a controlled way. Together, these turn testing from guesswork into a data-informed process.
The most powerful complement to these tools, though, is real human testers on diverse devices. Automated tools catch crashes and technical issues, but only real people reveal usability problems, confusing flows, and the subtle friction that drives users away. This is why the closed testing requirement, while mandatory, is also genuinely useful: it puts your app in front of real testers who exercise it as actual users would. Combining Google's automated tools with genuine human testing gives you the most complete picture of your app's readiness, catching both the technical and the human problems before launch. See where to find real testers.
Turning the checklist into a routine
The value of a testing checklist comes from using it consistently, not just once. Rather than treating testing as a frantic final step before launch, fold it into your development rhythm: test functionality as you build features, check stability continuously through the pre-launch report and vitals, and reserve a dedicated testing pass — your closed test — as the comprehensive final validation with real users. This layered approach catches problems early, when they are cheap to fix, instead of all at once at the end when time is short.
A repeatable testing routine also serves you across every release. Keep your list of core flows and essential checks handy, and run through it before each significant update, not just the initial launch. Because every update reaches your entire user base, the discipline of systematic testing protects your ratings over the long term. The developers who maintain strong reputations are rarely those who happen to write bug-free code; they are the ones who test methodically and consistently. Making the checklist a habit, and using your closed test as its centerpiece with real testers, is how you ship reliable apps release after release. See where to find real testers.
Key takeaways
- Start with functional testing of core flows, then edge cases and errors.
- Test stability and performance, including on lower-end and older devices.
- Cover diverse devices and OS versions — real testers provide this naturally.
- Check security, data handling, and UX, not just whether features work.
- Use the closed test as your comprehensive final pass with real testers.
Frequently asked questions
What should I test first?
Core functionality and stability — a crash-free, working app is the baseline.
How many devices should I test on?
As many tiers as possible; real testers help cover the range.
Is manual or automated testing better?
Both have roles — see manual vs automated testing.
Does this replace closed testing?
No. This is your own QA; closed testing is the Google requirement with 12 testers.
How do I test on devices I do not own?
Use a testing service or community of real testers on diverse hardware.
What is the fastest way to find bugs?
Real users on real devices exercising real flows.
Key takeaways
- Test in order: functionality, UI/UX, performance, compatibility, security, and compliance.
- Prioritize high-risk flows like sign-up, payments, and core actions first.
- Cover device tiers — low-end, mid-range, and flagship — rather than every model.
- Log issues with steps, device, and severity so fixes are fast and verifiable.
- Real human testers add the device and behavior diversity solo testing cannot.
Conclusion
A disciplined pre-release test pass — functional, UI, performance, compatibility, security, and compliance — catches problems before they reach reviewers or users. Pair your own QA with real human testers for full coverage. Submit your app to add real-device testing to your checklist.
Expanded for topical authority — additional practical sections below. Original guide content above is unchanged.
Quick answer
App Testing Checklist Before Release matters because Google Play production access for many new personal developer accounts depends on a successful closed test: at least 12 real testers opted in for 14 continuous days, plus a policy-compliant, stable app. Use this guide to execute the steps correctly, avoid streak-breaking mistakes, and decide whether DIY recruitment or a managed closed testing service is the better path for your deadline.
Real-world scenarios: who this matters for
The guidance in this article on App Testing Checklist Before Release applies across many Android product types. Use these scenarios to map the advice to your situation.
| Developer type | Typical challenge | Practical focus |
|---|---|---|
| Indie / solo | Limited tester network and time | Start closed testing early; keep a buffer above 12 opted-in testers; parallelize listing + Data safety work |
| Startup | Launch deadline vs 14-day rule | Treat the window as fixed; recruit in parallel with QA; avoid last-minute track setup |
| Agency / white-label | Multiple client apps, each needing its own test | One closed test per app; standardize opt-in onboarding; track eligibility dates per client |
| Flutter / React Native | Cross-platform build + Play Console quirks | Ship a signed AAB to closed testing; verify installs from Play, not sideload; watch vitals on mid-range devices |
| Native Kotlin | Device/API fragmentation | Cover API levels and OEMs in your tester mix; fix crashes before requesting production |
| Game / Unity | Performance + retention during 14 days | Keep testers engaged so count never dips below 12; monitor ANRs and battery |
| E-commerce / fintech | Policy + payment flows | Test checkout, permissions, and declarations carefully before production access |
| Healthcare / kids / education | Sensitive policies (Families, data) | Align listing, privacy, and content rating with real app behavior during the test window |
Visual placeholder: Scenario matrix infographic — Indie / Startup / Agency / Cross-platform paths for App Testing Checklist Before Release.
Comparison: DIY recruitment vs managed closed testing
When your goal is Google Play production access, the path you choose for testers affects time, risk, and feedback quality. Use this comparison while deciding how to apply App Testing Checklist Before Release.
| Approach | Time to 12 opted-in | Cost | Dropout risk | Feedback quality | Best when |
|---|---|---|---|---|---|
| Friends & family | Days–weeks | $0 | High | Mixed | Tiny MVP, flexible timeline |
| Reddit / Discord / Telegram | Unpredictable | $0–low | High | Variable | You can manage onboarding daily |
| Peer community exchange | Variable | $0 | Medium | Developer-biased | You can test others’ apps in return |
| Managed closed testing (e.g. Fast Testers) | ~1 hour after valid link | $15 one-time / app | Low (buffer of 15) | Real Play installs | You need speed + continuity for 14 days |
Decision tip: If a broken streak would delay revenue or a client deadline, prioritize reliability over $0 recruitment. DIY is fine when you already have engaged testers and can monitor Play Console daily.
Visual placeholder: Comparison diagram — DIY vs community vs managed testing for App Testing Checklist Before Release.
Common mistakes (and how to avoid them)
These mistakes repeatedly show up when developers work through App Testing Checklist Before Release:
- Confusing invited vs opted-in testers — Only testers who open the opt-in link and install from Play count toward 12. Check the opted-in number in Play Console, not your email list.
- Recruiting exactly 12 with no buffer — One uninstall can break continuity. Aim for ~15 active opted-in testers.
- Starting the counted clock late — Listing assets, Data safety, and privacy work should run during the 14 days, not after.
- Using sideloaded APKs or fake installs — They do not satisfy Play’s closed testing expectations and can create account risk.
- Ignoring tester feedback until day 14 — Crashes that drive uninstalls threaten your streak and your review outcome.
- Requesting production access before the continuous streak completes — Eligibility checks fail even if calendar time has passed.
Troubleshooting checklist
If something feels “stuck” while applying App Testing Checklist Before Release, walk this list before changing strategy:
| Symptom | Likely cause | Fix |
|---|---|---|
| Console shows < 12 testers | Invites sent but not opted in | Resend opt-in link; confirm install from Play |
| “Not eligible” after 14 calendar days | Count dipped below 12 mid-window | Restore 12+ and complete a full continuous streak |
| Tester cannot join | Wrong account, Group lag, or track not published | Verify Google account, Group membership, track release |
| App fails to install | Device/API mismatch or signing issue | Check AAB, minSDK, Play App Signing |
| Production still rejected after testing | Policy, declarations, or stability — not the clock | Read the exact reason; fix that category completely |
Visual placeholder: Troubleshooting flowchart for App Testing Checklist Before Release.
Action checklist
Use this checklist alongside the rest of this guide on App Testing Checklist Before Release:
- ☐ Closed testing track created with a signed release (AAB)
- ☐ Opt-in link tested on a fresh Google account
- ☐ At least 12 testers opted in (prefer ~15)
- ☐ Daily check that opted-in count stays ≥ 12 for 14 continuous days
- ☐ Core flows exercised (login, main feature, permissions, offline/online)
- ☐ Crashes / ANRs triaged from tester reports and vitals
- ☐ Store listing, screenshots, and feature graphic drafted
- ☐ Privacy policy + Data safety + content rating aligned with real behavior
- ☐ Production access requested only after eligibility is green
- ☐ Staged rollout plan ready for first public release
Additional FAQs developers ask about App Testing Checklist Before Release
Quick answer: what should I do first?
Confirm you are on a closed testing track with real opted-in installs, keep 12+ testers for 14 continuous days, and fix policy/stability issues in parallel. Then use the detailed sections above for App Testing Checklist Before Release.
Does this apply to organization (company) accounts?
The classic 12×14 closed testing gate is primarily associated with new personal developer accounts. Always verify your account type and current Play Console eligibility messaging for your app.
Do friends and family count as testers?
Yes — if they opt in via your closed testing link and install from Google Play. They only help if they stay opted in for the continuous period.
Can I update the app during the 14 days?
You can usually push updates on the closed track, but unstable releases that cause uninstalls can threaten your tester count. Prefer polishing via internal testing first when possible.
What if production access is still rejected?
Read the exact reason. Incomplete testing is only one category — policy, Data safety mismatches, and crashes are common. Fix the cited issue fully before reapplying.
Is paying for testers allowed?
Using real people who install from Play is what matters. Avoid fake install farms. A one-time managed service that supplies real closed testers is a practical option when DIY recruitment is too slow.
How is Fast Testers different from free communities?
Free communities trade time and mutual availability. Fast Testers assigns about 15 real testers after you submit a valid closed testing link (one-time $15 per app) and includes a production access guarantee under its refund terms.
Where should I go next?
Review the related guides below, then either finish DIY recruitment or start closed testing if you need speed and continuity.
Sources, updates, and how to use this guide
This article on App Testing Checklist Before Release is maintained for Android developers preparing Google Play closed testing and production access. Always cross-check eligibility text inside your own Play Console, because Google’s UI labels and account rules can vary by account type and date.
- Primary official references: Google Play closed testing help, Developer Program Policies, and Play Console eligibility messaging for your app.
- Practical experience lens: guidance here reflects common failure modes indie developers and agencies hit when recruiting testers, maintaining the 14-day streak, and recovering from production-access rejections.
- Last reviewed focus: 12×14 closed testing continuity, real vs fake testers, and parallel listing/compliance work during the window.
Related guides and next steps
Continue building topical depth around App Testing Checklist Before Release with these Fast Testers resources:
- Accessibility Testing Before Play Store Launch
- Analytics Sdk Testing During Closed Testing
- Android App Release Checklist
- Camera And Microphone Apps Testing Checklist
- Closed Testing Vs Open Testing On Google Play
- Crash Reports During Closed Testing Fix Before Production
- Deep Link Testing Before Google Play Production
- Google Play Internal Testing Vs Closed Testing
- Pricing — $15 closed testing
- How Fast Testers works
- FAQ
- Developer reviews
- Case studies
- Submit your app / start closed testing
Need reliable testers so your 14-day streak does not stall? Educate first with the guides above, then start when you are ready — one-time pricing, real Play installs, dashboard tracking.
Internal navigation hub — added to strengthen topical connections. Original article content above is unchanged.
Continue learning
- Google Play Internal Testing vs Closed Testing — Learn about internal vs closed tracks for Google Play closed testing. Complete guide for Android developers pu.
- Manual Testing vs Automated Testing for Android Apps — Manual testing vs automated testing for Android apps: what each is best at, where they overlap, costs, and how.
- UI Testing Before Publishing on Google Play — A practical UI testing guide before publishing: layouts, responsiveness, themes, accessibility, and languages .
- Battery Usage Testing and Play Store Vitals — Learn about battery optimization for Google Play closed testing. Complete guide for Android developers publish.
- Finance Apps: Google Play Testing and Compliance — Learn about finance app requirements for Google Play closed testing. Complete guide for Android developers pub.
- Functional Testing for Android Apps — A practical guide to functional testing for Android apps: what to test, how to structure test cases, common pi.
Next steps
- Ready to run closed testing with real Android testers? Submit your app or see pricing ($15 one-time).
- Compare options on our testing service comparison page, or read developer reviews and case studies.
- Still deciding? Review how Fast Testers works and the FAQ.