
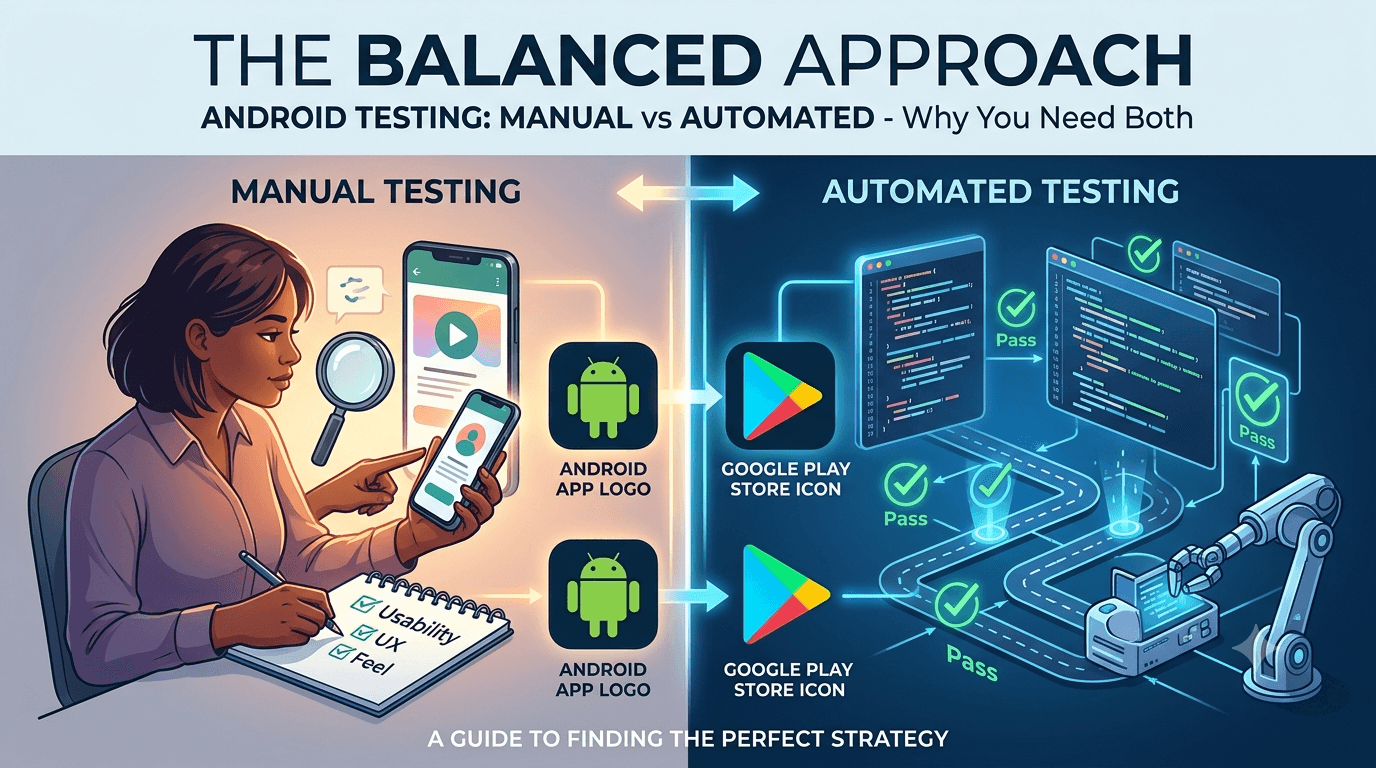
Every Android team eventually faces the same question: should you test by hand, write automated tests, or do both? The debate over manual testing vs automated testing is not really about which is "better" — each excels at different things, and the strongest quality strategies use them together. This guide explains what each approach does well, where it falls short, what it costs, and how to combine them before you ship to Google Play.
Contents
Quick answer
Featured answer: Manual testing is best for exploratory checks, usability, visual polish, and real-device behavior, while automated testing is best for fast, repeatable regression coverage of stable logic. Most successful Android teams automate stable, high-value paths and use human testers for judgment-based and real-world scenarios. Neither replaces the other.
What manual testing is best at
Manual testing means a real person using your app and evaluating it with human judgment. This is irreplaceable for anything that requires taste, intuition, or real-world context. A human notices that a button is technically tappable but awkwardly placed, that an animation feels sluggish, or that an error message is confusing — none of which an automated assertion would flag.
Manual testing also shines for exploratory testing, where a tester wanders through the app trying unexpected combinations that scripted tests never anticipate. It is the natural fit for usability evaluation, visual and layout review across devices, and one-off checks of brand-new features that are still changing too quickly to be worth automating. Crucially, manual testing on a diverse pool of real devices surfaces hardware- and OEM-specific issues that emulators routinely miss — which is exactly what Google's closed testing requirement is designed to encourage.
What automated testing is best at
Automated testing means code that exercises your app and asserts expected outcomes — unit tests, integration tests, and UI tests run by frameworks like Espresso or UI Automator. Its superpower is repetition: once written, a test can run thousands of times at near-zero marginal cost, catching regressions the moment they appear.
Automation is ideal for stable, well-defined logic: calculations, data transformations, API contracts, and critical flows that rarely change but must never break. It gives fast feedback in continuous integration, so a broken build is caught within minutes of a commit rather than days later by a human. The trade-off is upfront cost — tests take time to write and maintain, and they only verify what you explicitly told them to check. They cannot tell you whether your app feels good to use.
Side-by-side comparison
| Dimension | Manual testing | Automated testing |
|---|---|---|
| Best for | Usability, exploration, visuals, real devices | Regression, stable logic, repeatable flows |
| Speed per run | Slow | Very fast |
| Upfront cost | Low | Higher (writing tests) |
| Ongoing cost | Higher (people time) | Low (maintenance only) |
| Human judgment | Yes | No |
| Real-device coverage | Excellent | Limited |
Tip: Automation cannot satisfy Google's closed testing requirement — that needs real people. Submit your app to get real testers on real devices while your CI handles regression.
How to combine both
The most effective strategy is layered. Use automated tests as your safety net for stable, business-critical logic so regressions are caught instantly and cheaply in CI. Reserve human testing for what only people can evaluate: usability, visual correctness, exploratory edge cases, and behavior across the messy variety of real Android devices and networks. As a feature matures and stabilizes, migrate its most valuable manual checks into automated tests so your suite grows where it pays off most.
This layering also maps neatly onto your launch timeline. During development, automation gives fast feedback; before release, real human testers validate the experience end to end and satisfy the closed testing requirement. For the structured pre-launch pass itself, see the app testing checklist before release.
Key takeaways
- The question is not either/or — strong teams use both.
- Automate stable, high-value logic for fast, cheap regression coverage.
- Use manual testing for usability, visuals, exploration, and real devices.
- Automation cannot fulfill Google's closed testing requirement; real testers can.
- Migrate mature manual checks into automation over time.
What each approach really is
Before choosing between manual and automated testing, it helps to define each precisely, because the terms are often used loosely. Manual testing means a human being uses the app directly — tapping through flows, trying inputs, observing behavior, and judging whether the experience is correct and pleasant. It relies on human perception and intuition, which makes it uniquely good at catching things that are hard to specify in advance, like a layout that feels off or a flow that is technically correct but confusing. Automated testing, by contrast, means writing code that exercises your app programmatically and checks results against expected outcomes, running the same checks repeatedly and quickly without human effort each time.
These are not competing philosophies so much as complementary tools with different strengths. Manual testing excels at exploration, usability, and one-off verification; automated testing excels at repetition, regression safety, and scale. Understanding what each fundamentally is — human judgment versus programmatic repetition — is the foundation for deciding where to invest. Most successful teams do not choose one exclusively; they blend both according to where each delivers the most value.
The strengths of manual testing
Manual testing's greatest strength is that it catches what automation cannot easily specify. A human tester notices when a button is awkwardly placed, when an animation stutters, when copy is confusing, or when a flow that "works" is nonetheless frustrating. These usability and experiential problems are exactly the ones that generate negative reviews, and they are extremely difficult to encode in an automated test. Manual testing also has a low upfront cost — you do not need to build a test framework to start — which makes it the natural first choice for small teams and early-stage apps.
Manual testing is also indispensable for exploratory testing, where a tester follows their curiosity to probe edge cases and unexpected interactions that no one thought to script. Real human testers on real devices, as in a genuine closed test, bring this exploratory, experiential perspective at scale — collectively exercising your app across devices and usage patterns you could never anticipate. This is one reason the closed testing requirement, while mandatory, is genuinely valuable: it delivers real manual testing from diverse users right when your app needs it most, before public launch.
The strengths of automated testing
Automated testing shines wherever repetition and consistency matter. Once written, an automated test runs the same way every time, catching regressions the instant they appear and freeing humans from re-checking the same paths by hand after every change. For a growing codebase, this regression safety is invaluable — it lets you refactor and add features with confidence that you will be alerted if something previously working breaks. Automation also scales cheaply: running a thousand checks costs little more than running ten, which is impossible with manual effort.
Automated tests are especially well suited to stable, well-defined logic: business rules, data transformations, API contracts, and critical paths that must never break. They provide fast feedback in continuous-integration pipelines, flagging problems within minutes of a code change. The trade-off is the upfront investment to write and maintain them, plus their blindness to the experiential issues manual testing catches. Automation tells you whether the app does what you specified; it cannot tell you whether what you specified is actually good.
When to use each
| Situation | Lean manual | Lean automated |
|---|---|---|
| Usability and UX | Yes | No |
| Exploratory testing | Yes | No |
| Regression safety | Sometimes | Yes |
| Critical business logic | Sometimes | Yes |
| Early-stage, small team | Yes | Selectively |
| Large, mature codebase | For UX | For regressions |
The practical rule is to automate the stable, repetitive, high-risk paths and to test manually for usability, exploration, and anything still in flux. As your app matures, the balance shifts toward more automation for regression safety, but manual testing never disappears — because only humans can judge whether the experience is genuinely good.
Building a balanced testing strategy
A sound strategy for most teams starts with manual testing plus a thin layer of automation on the most critical paths, then expands automation over time as the codebase and team grow. Early on, manual testing gives you the fastest path to catching both bugs and usability issues with minimal setup. As you identify paths that must never break — login, payments, core data flows — you automate those first, getting the highest regression-safety return for your effort. Over time, you build out coverage for the stable parts of your app while continuing to test new and experiential features manually.
Crucially, your pre-launch testing should always include real human testing, because no automated suite can validate the actual user experience or catch the device-specific quirks that real testers on real hardware encounter. For a new personal account, your closed test is the perfect vehicle for this: 12+ real testers using your app across diverse devices for 14 days is comprehensive manual testing at exactly the right moment. If recruiting those testers is your obstacle, a professional service can supply real ones within about an hour, ensuring your app gets genuine human validation before it reaches the public. See where to find real testers.
Key takeaways
- Manual and automated testing are complementary, not competing.
- Manual excels at usability, exploration, and low-setup verification.
- Automated excels at regression safety, repetition, and scale.
- Automate stable, high-risk paths; test manually for UX and new features.
- Always include real human testing before launch — your closed test is ideal for it.
The cost and ROI of each approach
Thinking about testing purely in terms of technique misses the economic picture that ultimately drives the decision. Manual testing has almost no setup cost but a recurring per-run cost — every test cycle consumes human time, so the expense grows linearly with how often you test. Automated testing inverts this: a high upfront cost to write and stabilize tests, followed by a near-zero marginal cost per run. The break-even point depends on how many times you will run a given check. A test you run once is cheapest done manually; a test you run on every commit for a year is vastly cheaper automated.
This is why the right mix changes as your app matures. Early on, when the app is small and changing constantly, manual testing wins because automation would be obsolete before it paid back its cost. As the app stabilizes and you re-run the same critical checks endlessly, automation's low marginal cost makes it the clear economic choice for those paths. The goal is not to maximize automation for its own sake but to automate exactly the checks whose repetition justifies the investment, while keeping human testing for everything that changes often or requires judgment.
Frequently asked questions
Which should a small team start with?
Usually manual testing plus a thin layer of automation on the most critical paths. Manual has low upfront cost and catches usability issues immediately.
Can automation replace manual testing?
No. Automation cannot judge usability, visual quality, or real-world feel, and it cannot satisfy the closed testing requirement.
Is automated testing worth it for a simple app?
Yes for critical logic, but do not over-invest early. Automate the paths that would hurt most if they broke.
Does closed testing count as manual testing?
It is a form of real-user manual testing on real devices, and it is required for production access on new personal accounts.
What tools are common for Android automation?
Espresso and UI Automator for UI tests, plus JUnit for unit tests, typically run in CI.
How much of my suite should be automated?
There is no fixed number — automate what is stable and high value, and keep humans on judgment-based checks.
Conclusion
Manual and automated testing are partners, not rivals. Automate the stable, critical logic for speed and safety, and rely on real human testers for the judgment, exploration, and real-device coverage that machines cannot provide. For your launch, remember that only real testers satisfy Google's requirement. Submit your app to add real-device manual testing to your strategy.
Expanded for topical authority — additional practical sections below. Original guide content above is unchanged.
Comparison: DIY recruitment vs managed closed testing
When your goal is Google Play production access, the path you choose for testers affects time, risk, and feedback quality. Use this comparison while deciding how to apply Manual Testing vs Automated Testing for Android Apps.
| Approach | Time to 12 opted-in | Cost | Dropout risk | Feedback quality | Best when |
|---|---|---|---|---|---|
| Friends & family | Days–weeks | $0 | High | Mixed | Tiny MVP, flexible timeline |
| Reddit / Discord / Telegram | Unpredictable | $0–low | High | Variable | You can manage onboarding daily |
| Peer community exchange | Variable | $0 | Medium | Developer-biased | You can test others’ apps in return |
| Managed closed testing (e.g. Fast Testers) | ~1 hour after valid link | $15 one-time / app | Low (buffer of 15) | Real Play installs | You need speed + continuity for 14 days |
Decision tip: If a broken streak would delay revenue or a client deadline, prioritize reliability over $0 recruitment. DIY is fine when you already have engaged testers and can monitor Play Console daily.
Visual placeholder: Comparison diagram — DIY vs community vs managed testing for Manual Testing vs Automated Testing for Android Apps.
Common mistakes (and how to avoid them)
These mistakes repeatedly show up when developers work through Manual Testing vs Automated Testing for Android Apps:
- Confusing invited vs opted-in testers — Only testers who open the opt-in link and install from Play count toward 12. Check the opted-in number in Play Console, not your email list.
- Recruiting exactly 12 with no buffer — One uninstall can break continuity. Aim for ~15 active opted-in testers.
- Starting the counted clock late — Listing assets, Data safety, and privacy work should run during the 14 days, not after.
- Using sideloaded APKs or fake installs — They do not satisfy Play’s closed testing expectations and can create account risk.
- Ignoring tester feedback until day 14 — Crashes that drive uninstalls threaten your streak and your review outcome.
- Requesting production access before the continuous streak completes — Eligibility checks fail even if calendar time has passed.
Troubleshooting checklist
If something feels “stuck” while applying Manual Testing vs Automated Testing for Android Apps, walk this list before changing strategy:
| Symptom | Likely cause | Fix |
|---|---|---|
| Console shows < 12 testers | Invites sent but not opted in | Resend opt-in link; confirm install from Play |
| “Not eligible” after 14 calendar days | Count dipped below 12 mid-window | Restore 12+ and complete a full continuous streak |
| Tester cannot join | Wrong account, Group lag, or track not published | Verify Google account, Group membership, track release |
| App fails to install | Device/API mismatch or signing issue | Check AAB, minSDK, Play App Signing |
| Production still rejected after testing | Policy, declarations, or stability — not the clock | Read the exact reason; fix that category completely |
Visual placeholder: Troubleshooting flowchart for Manual Testing vs Automated Testing for Android Apps.
Action checklist
Use this checklist alongside the rest of this guide on Manual Testing vs Automated Testing for Android Apps:
- ☐ Closed testing track created with a signed release (AAB)
- ☐ Opt-in link tested on a fresh Google account
- ☐ At least 12 testers opted in (prefer ~15)
- ☐ Daily check that opted-in count stays ≥ 12 for 14 continuous days
- ☐ Core flows exercised (login, main feature, permissions, offline/online)
- ☐ Crashes / ANRs triaged from tester reports and vitals
- ☐ Store listing, screenshots, and feature graphic drafted
- ☐ Privacy policy + Data safety + content rating aligned with real behavior
- ☐ Production access requested only after eligibility is green
- ☐ Staged rollout plan ready for first public release
Additional FAQs developers ask about Manual Testing vs Automated Testing for Android Apps
Quick answer: what should I do first?
Confirm you are on a closed testing track with real opted-in installs, keep 12+ testers for 14 continuous days, and fix policy/stability issues in parallel. Then use the detailed sections above for Manual Testing vs Automated Testing for Android Apps.
Does this apply to organization (company) accounts?
The classic 12×14 closed testing gate is primarily associated with new personal developer accounts. Always verify your account type and current Play Console eligibility messaging for your app.
Do friends and family count as testers?
Yes — if they opt in via your closed testing link and install from Google Play. They only help if they stay opted in for the continuous period.
Can I update the app during the 14 days?
You can usually push updates on the closed track, but unstable releases that cause uninstalls can threaten your tester count. Prefer polishing via internal testing first when possible.
What if production access is still rejected?
Read the exact reason. Incomplete testing is only one category — policy, Data safety mismatches, and crashes are common. Fix the cited issue fully before reapplying.
Is paying for testers allowed?
Using real people who install from Play is what matters. Avoid fake install farms. A one-time managed service that supplies real closed testers is a practical option when DIY recruitment is too slow.
How is Fast Testers different from free communities?
Free communities trade time and mutual availability. Fast Testers assigns about 15 real testers after you submit a valid closed testing link (one-time $15 per app) and includes a production access guarantee under its refund terms.
Where should I go next?
Review the related guides below, then either finish DIY recruitment or start closed testing if you need speed and continuity.
Sources, updates, and how to use this guide
This article on Manual Testing vs Automated Testing for Android Apps is maintained for Android developers preparing Google Play closed testing and production access. Always cross-check eligibility text inside your own Play Console, because Google’s UI labels and account rules can vary by account type and date.
- Primary official references: Google Play closed testing help, Developer Program Policies, and Play Console eligibility messaging for your app.
- Practical experience lens: guidance here reflects common failure modes indie developers and agencies hit when recruiting testers, maintaining the 14-day streak, and recovering from production-access rejections.
- Last reviewed focus: 12×14 closed testing continuity, real vs fake testers, and parallel listing/compliance work during the window.
Related guides and next steps
Continue building topical depth around Manual Testing vs Automated Testing for Android Apps with these Fast Testers resources:
- Analytics Sdk Testing During Closed Testing
- Closed Testing Vs Open Testing On Google Play
- Google Play Internal Testing Vs Closed Testing
- Professional Testing Services Vs Community Testing
- Accessibility Testing Before Play Store Launch
- Ad Supported Apps And Google Play Ad Policy Testing
- Agency Guide Testing Client Apps On Google Play
- Android Beta Testing Best Practices
- Pricing — $15 closed testing
- How Fast Testers works
- FAQ
- Developer reviews
- Case studies
- Submit your app / start closed testing
Need reliable testers so your 14-day streak does not stall? Educate first with the guides above, then start when you are ready — one-time pricing, real Play installs, dashboard tracking.
Further expansion — case study, decisions, and expert recommendations. Prior sections remain unchanged.
Case study: first Play launch planned around the closed testing window
Problem: A small SaaS team treated Google Play publishing like iOS TestFlight — they expected to upload and go public the same week. They discovered the personal-account closed testing gate mid-sprint.
Solution: They reframed the sprint around Manual Testing Vs Automated Testing For Android Apps: internal testing for crash triage first, then closed testing with a buffer of testers, while design finished screenshots and legal finished privacy/Data safety in parallel.
Result: The 14-day requirement stopped feeling like “dead time.” When eligibility flipped green, listing and declarations were already ready, so production review was the only remaining gate.
Lessons learned:
- Start the closed track as soon as the build is stable enough to keep installed.
- Parallelize compliance work inside the window.
- Protect the streak like a production SLA.
Decision guide: what should you do next?
Use this decision path when applying Manual Testing Vs Automated Testing For Android Apps:
- Is your account a new personal developer account that still needs production access?
If yes, plan for closed testing with 12+ opted-in testers for 14 continuous days. If no, still test — but confirm the exact eligibility text in Play Console. - Do you already have 12+ reliable people who will install from Play and stay for two weeks?
If yes, DIY can work — add a buffer and monitor daily. If no, use community exchange or a managed closed testing service. - Is your build stable enough that testers will not churn?
If no, run internal testing first. Entering the counted window with crash loops is how streaks die. - Are Data safety, privacy policy, permissions, and listing aligned with real behavior?
If no, fix during the window so production review does not bounce you after the clock. - Has production access been rejected?
Classify: eligibility vs policy vs declarations vs stability. Fix that category completely, then re-test / re-request.
Visual placeholder: Decision tree diagram for Manual Testing Vs Automated Testing For Android Apps (DIY vs managed vs fix-and-retry).
Expert recommendations
- Instrument the streak: Check opted-in count daily for the first week; replace dropouts same day.
- Brief testers once: Send a short checklist (install from Play, open app daily, try core flow, report crashes). Silent testers still count if opted in — engaged testers protect quality.
- Never “solve” recruitment with fake installs: It fails the intent of closed testing and can create account risk.
- Ship a boring-stable build to closed testing: Save experimental features for internal tracks.
- Educate first, then accelerate: If your blocker is simply finding real testers fast, a one-time managed option (Fast Testers: 15 testers, $15/app) is often cheaper than slipping a launch.
For hands-on setup after reading about Manual Testing Vs Automated Testing For Android Apps, see how it works and pricing, or submit your closed testing link when you are ready.
Internal navigation hub — added to strengthen topical connections. Original article content above is unchanged.
Continue learning
- Google Play Internal Testing vs Closed Testing — Learn about internal vs closed tracks for Google Play closed testing. Complete guide for Android developers pu.
- App Testing Checklist Before Release — A practical app testing checklist before release — functionality, UI, performance, security, and compatibility.
- Battery Usage Testing and Play Store Vitals — Learn about battery optimization for Google Play closed testing. Complete guide for Android developers publish.
- Fast Testers vs Manual Tester Recruitment Cost Analysis — Learn about cost comparison for Google Play closed testing. Complete guide for Android developers publishing o.
- Finance Apps: Google Play Testing and Compliance — Learn about finance app requirements for Google Play closed testing. Complete guide for Android developers pub.
- Functional Testing for Android Apps — A practical guide to functional testing for Android apps: what to test, how to structure test cases, common pi.
Next steps
- Ready to run closed testing with real Android testers? Submit your app or see pricing ($15 one-time).
- Compare options on our testing service comparison page, or read developer reviews and case studies.
- Still deciding? Review how Fast Testers works and the FAQ.