

Successfully deploying an Android app to the global market requires passing a crucial regulatory and quality control step within the Google Play Console: the Closed Testing Track. Under rules established for newly created personal developer accounts, your application package (.aab) cannot be published to Production until it undergoes a rigorous, telemetry-monitored testing process.
This technical guide details the entire closed testing phase. It covers workspace architecture configuration, strategies to prevent track reset errors, user telemetry optimization, and how to successfully complete the human-reviewed production access questionnaire.
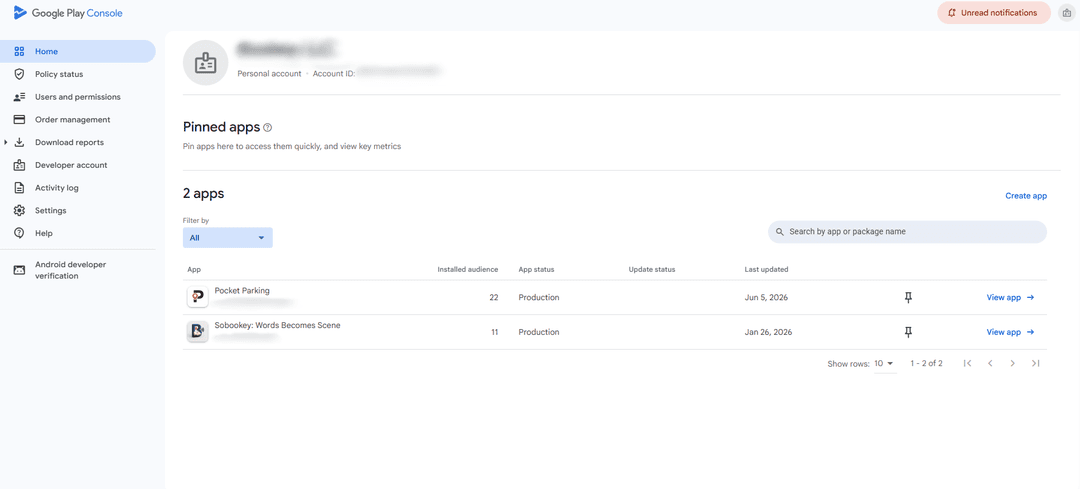
1. Technical Threshold Matrix: The Baseline Parameters
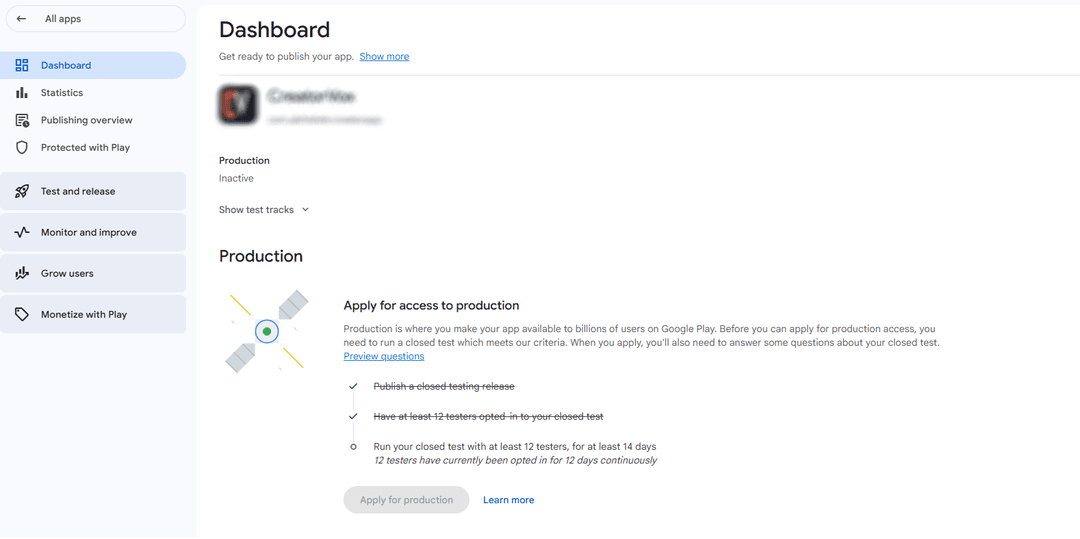
Google evaluates developer compliance through automated device fingerprinting and user interaction logs. The platform monitors incoming telemetry data from your closed track against strict validation criteria. If your track misses these baselines, your production access application will be blocked.
To pass this technical assessment, you must ensure your testing environment adheres to the following system requirements:
- Hardware Identity Validation: Google Play tracking relies on unique Google Mobile Services (GMS) device tokens. Cloud testing platforms, emulators, and multiple accounts logged into a single physical phone will fail these validation checks.
- Opt-In Persistence: Your 12 testers must remain continuously registered on your track. If an opted-in tester uninstalls the bundle or removes their account from the test group, the 14-day tracking system can pause or reset.
Core Deployment Tracks Compared
| Testing Track | Minimum User Count | Required Timeline | Store Discoverability | Strategic Use Case |
|---|---|---|---|---|
| Internal Testing | 0 to 100 configured profiles | Immediate execution | Completely hidden | Sanity testing, resolving compilation crashes, and validating code updates. |
| Closed Testing | 12 unique users minimum | 14 continuous days | Opt-in link access only | User experience logging, core compliance check, and production enablement. |
| Open Testing | Unlimited / Adjustable upper bounds | Configurable by admin | Publicly indexed visible beta | Regional stress-testing, marketing research, and localization tracking. |
2. Technical Pre-Flight Optimization Checklist
Before uploading your primary code asset to the Closed Testing track, optimize your build to ensure accurate telemetry collection and avoid app store rejections:
- Verify Target SDK Architecture: Ensure your manifest aligns with current Google Play requirements (Target SDK API Level 34 or higher).
- Configure R8 / ProGuard Optimization Rules: Run a full validation release check on your app bundle. Ensure that code minification does not strip out important lifecycle events or crash telemetry wrappers needed by Firebase Crashlytics or Android Vitals.
- Double-Check Keystore Integrity: Securely sign your app with an upload key, and confirm your app signature matches the criteria enabled in Google Play App Signing.
3. Step-by-Step Closed Testing Track Configuration
Setting up your workspace correctly inside the Google Play Console prevents common delivery errors, such as the HTTP 404 Item Not Found error that frequently breaks testing links.
-
1
Initialize the Technical Track Workspace
Navigate to your Google Play Console dashboard, select your application profile, and use the sidebar menu to scroll down to Release > Testing > Closed testing. Click the Create track option located in the upper workspace control bar, name your destination tracking node, and save your selection.
-
2
Define Geographic Target Regions
Select the Countries/regions sub-tab within your active track configuration dashboard. Click Add countries/regions. You must explicitly select the regions where your testing team resides. Omitting a user's home country will block their account from downloading the application package via their localized Play Store client.
-
3
Establish Access Groups
Move over to the Testers configuration panel. Under your choice of testing methods, select Email lists or choose Google Groups for easier management. Click Create email list, then add the exact Google account emails your testers use to access their mobile Android devices. Save the changes.
-
4
Upload and Submit Your Signed Android App Bundle (.aab)
Open the Releases section within your track control plane and click Create new release. Upload your compiled, signed
.aabartifact. Complete your localization release documentation notes, click Next, select Save, and then choose Review release. Click Start rollout to Closed testing to submit your bundle for Google's security review, which typically takes 24 to 48 hours. -
5
Distribute the App Onboarding Matrix Link
Once your track changes to an active status, return to the bottom of the Testers panel to find your access links. Copy the Join on the web invitation URL and distribute it directly to your registered testing pool. Your users must open this URL, click Become a Tester, and download your app from the link redirecting them to the Google Play Store.
⚠️ Troubleshooting 404 Link Invalidation: If your testers encounter an Item Not Found error screen when visiting the onboarding URL, verify that your build review is fully complete and active, that the tester's email address matches the one logged into their mobile browser session, and that their geographic location matches your configured target regions.
4. Managing Tester Engagement & Monitoring Crash Metrics
Treating the 14-day compliance phase as a static wait period frequently results in manual rejection upon submitting for production access. Google analyzes app engagement data to determine whether genuine human validation took place.
To maintain a healthy testing cycle, use these two developer practices:
Implement an Engagement Buffer Group (Target: 18-20 Users)
Relying on exactly 12 testers introduces a single point of failure. If one user clears their device profile or leaves the track on day 13, your tracking history will break. Maintaining an active pool of 18 to 20 users protects your timeline against unexpected dropouts.
Monitor Quality Metrics with Android Vitals
Regularly check your console's Android Vitals section during the testing phase. Google monitors crash rates and App Not Responding (ANR) errors. If your application exceeds the user-perceived crash rate threshold of 1.09% or the ANR rate threshold of 0.47% during testing, your production request may be denied due to stability concerns.
💡 Setting Up User Feedback Loops: Public reviews are disabled for applications running on closed testing tracks. You must provide an alternative feedback channel for your users, such as a centralized bug report form, an internal email address, or a secure Discord webhook link.
5. Completing the Production Access Application Questionnaire
Once your track crosses the 14-day threshold with 12 active users, a Apply for Production Access dashboard option will unlock. This application form is manually verified by human review teams. Using generic or single-word answers can trigger an immediate denial of production deployment rights.
Detail your specific tester sourcing methods. Avoid mentions of paid review networks or automated download services, which violate terms of service.
"I posted my app link to independent developer channels and tech groups to get downloads."
"We recruited 18 software QA professionals and target consumers from our internal user networks. Testers were chosen based on hardware diversity, spanning 5 distinct Android manufacturers and OS versions from Android 11 to 14, ensuring broad device compatibility coverage."
Explain the specific feature tasks and user journeys your testers were asked to complete within the app during the 14-day window.
"They ran the application on their phones to check features every day for two weeks."
"Testers followed a structured evaluation plan. They validated core feature interactions, including account creation routines, local room database caching operations, profile asset uploads, and network connectivity recovery during simulated offline modes."
Identify the technical bugs, rendering errors, or crashes caught during testing and detail the specific code fixes you applied.
"The app worked fine and we didn't experience any major bugs or interface issues."
"During testing on days 1–4, logs indicated an out-of-memory exception in our image rendering pipeline on lower-end devices. We refactored our image compression engine and pushed update build v1.0.4 on day 8. Subsequent tester logs confirmed complete resolution of the issue."
6. Navigating Post-Approval Deployment Steps
Google's review team generally processes production access applications within 3 to 7 business days. Once approved, your application's restrictions will lift, granting you full access to production releases.
You can then transition your verified testing build directly to the production track or upload a new release. Future updates will process through standard store review channels without requiring additional multi-user, multi-day testing blocks.
Putting closed testing into practice
The core of Google Play closed testing for new personal accounts is straightforward once stated plainly: at least 12 testers opted in for 14 continuous days before you can request production access. The details that trip developers up are that only opted-in testers count and that the 14 days must be continuous with 12+ testers throughout, so keep a buffer above 12 and monitor the count daily. Use the window as genuine QA, work your listing and declarations in parallel, and always use real testers rather than fake installs. If recruitment is your bottleneck, you can submit your app for verified real testers. See our closed testing guide and Google's closed testing documentation.
Related guides and resources
- The 12-testers policy explained
- Internal vs closed testing
- How to create a closed testing track
- What happens after 14 days
- Where to find real testers
- Google Play closed testing (official)
Expanded for topical authority — additional practical sections below. Original guide content above is unchanged.
Quick answer
Google Play Closed Testing Complete Guide matters because Google Play production access for many new personal developer accounts depends on a successful closed test: at least 12 real testers opted in for 14 continuous days, plus a policy-compliant, stable app. Use this guide to execute the steps correctly, avoid streak-breaking mistakes, and decide whether DIY recruitment or a managed closed testing service is the better path for your deadline.
Key takeaways
- Google Play Closed Testing Complete Guide should be treated as a practical Play Console workflow, not just theory.
- For many new personal accounts, 12 opted-in testers × 14 continuous days on closed testing gates production access.
- Opt-in + install from Play beats “emails invited” every time — verify counts in Console.
- Use the window for QA, listing, and compliance work so review is the only remaining gate.
- Prefer real testers and a buffer above 12; avoid anything that looks like fake engagement.
Real-world scenarios: who this matters for
The guidance in this article on Google Play Closed Testing Complete Guide applies across many Android product types. Use these scenarios to map the advice to your situation.
| Developer type | Typical challenge | Practical focus |
|---|---|---|
| Indie / solo | Limited tester network and time | Start closed testing early; keep a buffer above 12 opted-in testers; parallelize listing + Data safety work |
| Startup | Launch deadline vs 14-day rule | Treat the window as fixed; recruit in parallel with QA; avoid last-minute track setup |
| Agency / white-label | Multiple client apps, each needing its own test | One closed test per app; standardize opt-in onboarding; track eligibility dates per client |
| Flutter / React Native | Cross-platform build + Play Console quirks | Ship a signed AAB to closed testing; verify installs from Play, not sideload; watch vitals on mid-range devices |
| Native Kotlin | Device/API fragmentation | Cover API levels and OEMs in your tester mix; fix crashes before requesting production |
| Game / Unity | Performance + retention during 14 days | Keep testers engaged so count never dips below 12; monitor ANRs and battery |
| E-commerce / fintech | Policy + payment flows | Test checkout, permissions, and declarations carefully before production access |
| Healthcare / kids / education | Sensitive policies (Families, data) | Align listing, privacy, and content rating with real app behavior during the test window |
Visual placeholder: Scenario matrix infographic — Indie / Startup / Agency / Cross-platform paths for Google Play Closed Testing Complete Guide.
Comparison: DIY recruitment vs managed closed testing
When your goal is Google Play production access, the path you choose for testers affects time, risk, and feedback quality. Use this comparison while deciding how to apply Google Play Closed Testing Complete Guide.
| Approach | Time to 12 opted-in | Cost | Dropout risk | Feedback quality | Best when |
|---|---|---|---|---|---|
| Friends & family | Days–weeks | $0 | High | Mixed | Tiny MVP, flexible timeline |
| Reddit / Discord / Telegram | Unpredictable | $0–low | High | Variable | You can manage onboarding daily |
| Peer community exchange | Variable | $0 | Medium | Developer-biased | You can test others’ apps in return |
| Managed closed testing (e.g. Fast Testers) | ~1 hour after valid link | $15 one-time / app | Low (buffer of 15) | Real Play installs | You need speed + continuity for 14 days |
Decision tip: If a broken streak would delay revenue or a client deadline, prioritize reliability over $0 recruitment. DIY is fine when you already have engaged testers and can monitor Play Console daily.
Visual placeholder: Comparison diagram — DIY vs community vs managed testing for Google Play Closed Testing Complete Guide.
Common mistakes (and how to avoid them)
These mistakes repeatedly show up when developers work through Google Play Closed Testing Complete Guide:
- Confusing invited vs opted-in testers — Only testers who open the opt-in link and install from Play count toward 12. Check the opted-in number in Play Console, not your email list.
- Recruiting exactly 12 with no buffer — One uninstall can break continuity. Aim for ~15 active opted-in testers.
- Starting the counted clock late — Listing assets, Data safety, and privacy work should run during the 14 days, not after.
- Using sideloaded APKs or fake installs — They do not satisfy Play’s closed testing expectations and can create account risk.
- Ignoring tester feedback until day 14 — Crashes that drive uninstalls threaten your streak and your review outcome.
- Requesting production access before the continuous streak completes — Eligibility checks fail even if calendar time has passed.
Action checklist
Use this checklist alongside the rest of this guide on Google Play Closed Testing Complete Guide:
- ☐ Closed testing track created with a signed release (AAB)
- ☐ Opt-in link tested on a fresh Google account
- ☐ At least 12 testers opted in (prefer ~15)
- ☐ Daily check that opted-in count stays ≥ 12 for 14 continuous days
- ☐ Core flows exercised (login, main feature, permissions, offline/online)
- ☐ Crashes / ANRs triaged from tester reports and vitals
- ☐ Store listing, screenshots, and feature graphic drafted
- ☐ Privacy policy + Data safety + content rating aligned with real behavior
- ☐ Production access requested only after eligibility is green
- ☐ Staged rollout plan ready for first public release
Frequently asked questions about Google Play Closed Testing Complete Guide
Quick answer: what should I do first?
Confirm you are on a closed testing track with real opted-in installs, keep 12+ testers for 14 continuous days, and fix policy/stability issues in parallel. Then use the detailed sections above for Google Play Closed Testing Complete Guide.
Does this apply to organization (company) accounts?
The classic 12×14 closed testing gate is primarily associated with new personal developer accounts. Always verify your account type and current Play Console eligibility messaging for your app.
Do friends and family count as testers?
Yes — if they opt in via your closed testing link and install from Google Play. They only help if they stay opted in for the continuous period.
Can I update the app during the 14 days?
You can usually push updates on the closed track, but unstable releases that cause uninstalls can threaten your tester count. Prefer polishing via internal testing first when possible.
What if production access is still rejected?
Read the exact reason. Incomplete testing is only one category — policy, Data safety mismatches, and crashes are common. Fix the cited issue fully before reapplying.
Is paying for testers allowed?
Using real people who install from Play is what matters. Avoid fake install farms. A one-time managed service that supplies real closed testers is a practical option when DIY recruitment is too slow.
How is Fast Testers different from free communities?
Free communities trade time and mutual availability. Fast Testers assigns about 15 real testers after you submit a valid closed testing link (one-time $15 per app) and includes a production access guarantee under its refund terms.
Where should I go next?
Review the related guides below, then either finish DIY recruitment or start closed testing if you need speed and continuity.
Sources, updates, and how to use this guide
This article on Google Play Closed Testing Complete Guide is maintained for Android developers preparing Google Play closed testing and production access. Always cross-check eligibility text inside your own Play Console, because Google’s UI labels and account rules can vary by account type and date.
- Primary official references: Google Play closed testing help, Developer Program Policies, and Play Console eligibility messaging for your app.
- Practical experience lens: guidance here reflects common failure modes indie developers and agencies hit when recruiting testers, maintaining the 14-day streak, and recovering from production-access rejections.
- Last reviewed focus: 12×14 closed testing continuity, real vs fake testers, and parallel listing/compliance work during the window.
Related guides and next steps
Continue building topical depth around Google Play Closed Testing Complete Guide with these Fast Testers resources:
- Closed Testing Vs Open Testing On Google Play
- Google Play Internal Testing Vs Closed Testing
- Common Google Play Closed Testing Mistakes
- Google Play Android Vitals During Closed Testing
- Google Play Closed Testing Dashboard Metrics Explained
- Google Play Closed Testing Email Templates For Testers
- Google Play Closed Testing Faq 50 Answers
- Google Play Closed Testing For Flutter Apps
- Pricing — $15 closed testing
- How Fast Testers works
- FAQ
- Developer reviews
- Case studies
- Submit your app / start closed testing
Need reliable testers so your 14-day streak does not stall? Educate first with the guides above, then start when you are ready — one-time pricing, real Play installs, dashboard tracking.
Further expansion — case study, decisions, and expert recommendations. Prior sections remain unchanged.
Case study: first Play launch planned around the closed testing window
Problem: A small SaaS team treated Google Play publishing like iOS TestFlight — they expected to upload and go public the same week. They discovered the personal-account closed testing gate mid-sprint.
Solution: They reframed the sprint around Google Play Closed Testing Complete Guide: internal testing for crash triage first, then closed testing with a buffer of testers, while design finished screenshots and legal finished privacy/Data safety in parallel.
Result: The 14-day requirement stopped feeling like “dead time.” When eligibility flipped green, listing and declarations were already ready, so production review was the only remaining gate.
Lessons learned:
- Start the closed track as soon as the build is stable enough to keep installed.
- Parallelize compliance work inside the window.
- Protect the streak like a production SLA.
Decision guide: what should you do next?
Use this decision path when applying Google Play Closed Testing Complete Guide:
- Is your account a new personal developer account that still needs production access?
If yes, plan for closed testing with 12+ opted-in testers for 14 continuous days. If no, still test — but confirm the exact eligibility text in Play Console. - Do you already have 12+ reliable people who will install from Play and stay for two weeks?
If yes, DIY can work — add a buffer and monitor daily. If no, use community exchange or a managed closed testing service. - Is your build stable enough that testers will not churn?
If no, run internal testing first. Entering the counted window with crash loops is how streaks die. - Are Data safety, privacy policy, permissions, and listing aligned with real behavior?
If no, fix during the window so production review does not bounce you after the clock. - Has production access been rejected?
Classify: eligibility vs policy vs declarations vs stability. Fix that category completely, then re-test / re-request.
Visual placeholder: Decision tree diagram for Google Play Closed Testing Complete Guide (DIY vs managed vs fix-and-retry).
Expert recommendations
- Instrument the streak: Check opted-in count daily for the first week; replace dropouts same day.
- Brief testers once: Send a short checklist (install from Play, open app daily, try core flow, report crashes). Silent testers still count if opted in — engaged testers protect quality.
- Never “solve” recruitment with fake installs: It fails the intent of closed testing and can create account risk.
- Ship a boring-stable build to closed testing: Save experimental features for internal tracks.
- Educate first, then accelerate: If your blocker is simply finding real testers fast, a one-time managed option (Fast Testers: 15 testers, $15/app) is often cheaper than slipping a launch.
For hands-on setup after reading about Google Play Closed Testing Complete Guide, see how it works and pricing, or submit your closed testing link when you are ready.
Internal navigation hub — added to strengthen topical connections. Original article content above is unchanged.
Topic cluster: Google Play Closed Testing
This is the pillar page for Google Play Closed Testing. Explore supporting guides to go deeper on specific steps, troubleshooting, and comparisons.
- Google Play Closed Testing Guide: How to Get 12 Testers for 14 Days
- Google Play Closed Testing Requirements in 2026
- How to Create a Closed Testing Track in Play Console
- Google Play Closed Testing Opt-In Link Setup
- How Long Does Google Play Closed Testing Take?
- Common Google Play Closed Testing Mistakes to Avoid
- How to Pass Google Play Closed Testing on the First Try
- Updating Your App Mid Closed Testing Period
- Google Play Closed Testing FAQ: 50 Answers
- Avoiding Tester Dropout During 14-Day Testing
Continue learning
- Common Google Play Closed Testing Mistakes to Avoid — The most common Google Play closed testing mistakes — wrong track, too few testers, dropouts, sideloading — an.
- Google Play Android Vitals During Closed Testing — Learn about vitals monitoring for Google Play closed testing. Complete guide for Android developers publishing.
- Google Play Closed Testing Dashboard Metrics Explained — Learn about dashboard analytics for Google Play closed testing. Complete guide for Android developers publishi.
- Google Play Closed Testing Email Templates for Testers — Learn about tester communication for Google Play closed testing. Complete guide for Android developers publish.
- Google Play Closed Testing FAQ: 50 Answers — Learn about comprehensive FAQ for Google Play closed testing. Complete guide for Android developers publishing.
- Google Play Closed Testing for Flutter Apps — Learn about Flutter app testing for Google Play closed testing. Complete guide for Android developers publishi.
Next steps
- Ready to run closed testing with real Android testers? Submit your app or see pricing ($15 one-time).
- Compare options on our testing service comparison page, or read developer reviews and case studies.
- Still deciding? Review how Fast Testers works and the FAQ.