
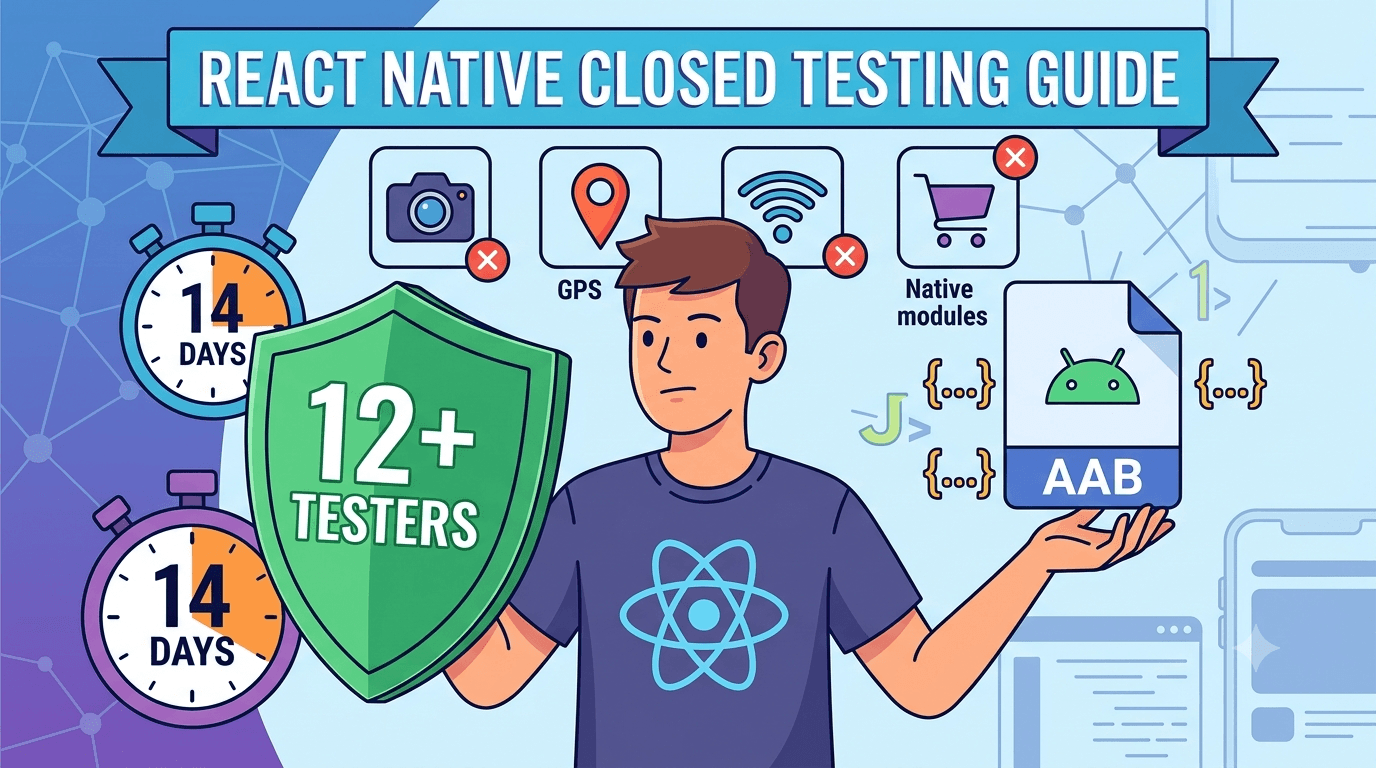
React Native lets web and mobile developers build Android apps using JavaScript and React, and it powers a huge share of the apps on Google Play. But like every other app published from a new personal account, a React Native app must clear the closed-testing requirement — at least 12 testers opted in for 14 continuous days — before it can reach production. This guide explains what React Native developers specifically need to know about closed testing, including release builds, the JavaScript-bridge and native-module issues to test for, and how to satisfy the requirement smoothly.
Because a compiled React Native app is an ordinary Android app, the closed-testing process itself is identical to any other. The React Native-specific considerations are in how you produce and sign your release build and in the classes of bugs that real-device testing tends to surface for JavaScript-driven apps. Handle those well and your launch is straightforward.
No framework exemption exists
There is no React Native carve-out from the closed-testing rule. Google's requirement is tied to your developer account type, not to the technology you used, so a React Native app on a new personal account faces the same 12-tester, 14-day gate as a native app. Do not waste time looking for a framework-based shortcut; there is none. See the closed testing guide for the complete requirement.
This means all the standard advice — recruiting committed testers, avoiding dropout, keeping your count above 12, preparing your listing in parallel — applies directly to your React Native app. Focus your effort on a solid release build and a reliable tester group rather than on the framework.
Producing a proper release build
React Native release builds require care. You must generate a signed release Android App Bundle (AAB), with the JavaScript bundle correctly embedded and the release configuration enabled so that development-only tooling is excluded. Uploading a debug build, or one where the JS bundle is misconfigured, leads to a slow or broken app for testers. The official React Native signed build documentation covers the exact steps.
Set up app signing before your first upload, ideally using Play App Signing so Google securely manages your key. Getting signing and the release bundle right up front avoids a frustrating category of upload and install errors during your closed test. See Play App Signing setup and app bundle vs APK.
React Native-specific issues to test
The bugs that surface in React Native apps often cluster around the JavaScript-to-native bridge and third-party native modules. Native modules for camera, notifications, payments, and device features can behave differently across manufacturers and Android versions, and the asynchronous bridge can introduce timing-related bugs that only appear under real-world conditions. Performance — particularly on lower-end devices and with large lists — is another common area, since JavaScript-driven rendering can lag if not optimized.
| React Native test focus | Why it matters |
|---|---|
| Native modules | Vary across devices and OS versions |
| JS bridge timing | Async behavior can cause subtle bugs |
| List performance | Large lists can lag without optimization |
| Release vs debug | Behavior and speed differ; test release |
| Permissions via modules | Module permission handling can differ |
Real, device-diverse testers are the reliable way to catch these before launch. See low-end device testing and performance testing.
Testing native modules and libraries
React Native apps typically depend on many third-party libraries with native components, and each is a potential source of device-specific problems. A push-notification library, an in-app-purchase module, or a camera package may work perfectly in your development environment yet fail on a particular device or OS version. Because these libraries bridge to native code whose behavior varies, real-device coverage is the only reliable way to validate them.
During your closed test, make sure testers exercise every flow that relies on a native module, and watch closely for crashes tied to specific libraries. Pay special attention to permissions requested through modules, since inconsistent permission handling is both a bug risk and a review concern. Confirm your app handles denied permissions gracefully across devices.
Performance and bundle considerations
JavaScript-driven rendering means performance deserves attention, especially on budget devices and in list-heavy screens. Test startup time, scroll smoothness, and responsiveness under realistic data, and use the Play Console's Android vitals to see real stability and performance data from your testers. Enabling optimizations like Hermes and using app bundles for optimized delivery can significantly improve the experience. See Android vitals.
App size and startup performance affect conversion and retention, so treat them as first-class concerns during testing. A React Native app that feels fast and light on real devices earns better reviews than one that lags, and your closed test is the ideal time to find and fix performance cliffs before the public arrives.
Finding testers for your React Native app
The recruitment challenge is identical to any app: you need 12+ committed, device-diverse testers for 14 continuous days. Because React Native apps benefit from broad device coverage (given native-module and performance variability), a varied group of real devices is especially valuable. Your options are your network, communities, freelance platforms, or a dedicated service.
If finding a reliable, diverse group is your obstacle, a service supplies verified real testers quickly with the device variety React Native apps need. You can submit your app to get started, and read where to find real testers.
Pre-launch checklist for React Native developers
Before testing: build a signed release AAB with the JS bundle embedded and release config enabled, configure Play App Signing, and confirm the app runs cleanly in release mode with all native modules working. During testing: have testers exercise module-driven features on diverse devices, monitor Android vitals, keep your count above 12 with a buffer, and prepare your listing and declarations in parallel. Then request production access the moment the 14 days complete.
Done this way, your React Native launch is as smooth as any native app's. The framework adds build and testing nuances, not a different requirement. See preparing your app before publishing.
Setting up your closed-testing track in Play Console
After building your signed release AAB, you create a closed-testing track in the Play Console and upload the bundle. You add testers by email or via a Google Group, and Play produces an opt-in link that each tester must use to join before installing your React Native app from the store. Configuring this correctly is important, because the 14-day clock counts only opted-in testers, and a misconfigured track is a frequent reason developers realize too late that their timer never truly began. See how to create a closed testing track.
React Native projects produce several build outputs, so confirm you are uploading the optimized release bundle with the JS bundle correctly embedded, not a debug artifact. Verify the version code increments on each upload and that the app installs cleanly from the Play listing on a real device before you invite your full group. A quick real-device install check catches misconfigured JS bundles — a classic React Native release problem — before they reach a single tester.
Write short, friendly onboarding instructions for testers covering the opt-in flow: click the link, accept the invitation, then install from Play. Non-technical testers stumble on this step often, and every tester who fails to complete it does not count toward your 12. Clear guidance meaningfully increases how many invitees become active, counted testers from day one, which protects your buffer above the minimum.
Managing the 14-day window without losing testers
The requirement is 14 continuous days with at least 12 opted-in testers maintained throughout — not merely 12 testers at some single moment. If testers drift away or uninstall partway through, Google may not treat the window as satisfied and you can effectively restart. This is why experienced React Native developers recruit a buffer, commonly aiming for 15 to 20 testers, so that ordinary attrition never drops them below the line during the fortnight.
Keep testers lightly engaged the whole time. A brief note when you ship an update, clear release notes describing what to try, and quick responses to feedback keep testers from losing interest and uninstalling. For a React Native app, point testers at the module-driven features most likely to differ across devices; this both sustains engagement and yields the most valuable bug reports about the native integrations that most often break in the wild.
Check your active tester count in the Play Console periodically rather than assuming it holds. If it slips toward the minimum, recruit replacements right away instead of waiting. Actively managing the window, rather than treating it as set-and-forget, is the biggest determinant of clearing it on the first try. See how to keep testers engaged.
Common React Native release errors and how to avoid them
Most first-upload trouble for React Native comes from a short list: a misconfigured or missing JS bundle, uploading a debug build, missing release signing, non-incrementing version codes, and ProGuard/R8 rules missing for native modules causing release-only crashes. Each is preventable once you know to check for it, and each is far cheaper to catch before the closed test than during it, where a broken build burns your testers' patience and your schedule.
Build and install your release AAB on a personal device before inviting testers, and use the app as a tester would. This catches the bulk of release-only issues — the crashes and missing behavior that only appear once release optimizations are active. If a native module works in debug but crashes in release, it is almost always a missing keep rule; testing the release build yourself reveals it immediately rather than through a puzzled tester days later.
From closed testing to production
Once your 14 continuous days with 12+ testers complete, you request production access in the Play Console. If you have prepared your store listing, screenshots, content rating, data-safety form, and declarations in parallel during the window, you can submit for production review immediately instead of starting that work only after the timer expires. This parallel preparation is what lets you launch the day your window closes rather than losing another week to listing tasks. See what happens after 14 days.
Why real testers beat emulators for React Native
It is tempting to lean on emulators for a JavaScript-driven app, since the development loop already runs on them constantly. But emulators cannot reproduce the conditions that break React Native apps in the wild: the specific native-module behavior of a given manufacturer's build, real memory pressure on a budget device, actual thermal throttling, genuine network variability, and the countless small OS customizations that vendors ship. A closed test with real testers on real devices is the only way to see your app as your users will, which is precisely why Google built the requirement around real opt-in testers rather than automated checks.
For React Native specifically, the gap between emulator and reality is widest exactly where your risk is highest — around the native modules bridging your JavaScript to device features. A camera or payments library that behaves flawlessly on an emulator can fail on a particular real handset, and only a real tester on that handset will ever tell you. Treating the 14-day window as genuine device-diverse QA, rather than a hoop to jump through, is how you convert the requirement into a materially more stable launch.
This also reframes recruitment: the value of a tester is proportional to how different their device and usage are from yours. Twelve testers on hardware identical to your development phone add little signal beyond one. A varied group — different manufacturers, Android versions, price tiers, and network conditions — is what makes the window worth the wait, and it is the reason a device-diverse tester source is so valuable for React Native apps.
A realistic timeline for your launch
Plan backward from the 14-day minimum. Realistically, expect a few days to finalize and validate your release build, recruit and onboard testers, and confirm everyone has opted in before your continuous window truly starts. Then the 14 days run, during which you fix issues and ship updates. Finally, production review after you request access typically takes some additional days. Budgeting three to four weeks end to end, rather than exactly 14 days, keeps your expectations aligned with reality and prevents the disappointment of assuming you will be live a fortnight from today.
The developers who hit their target dates are the ones who front-load recruitment and listing preparation so nothing blocks them the moment the window closes. If tester recruitment is your uncertain variable, resolving it early — through your own network or a service that supplies verified real testers — is the highest-leverage thing you can do to keep your React Native launch on schedule and free your attention for the app itself.
Key takeaways
- The closed-testing rule applies to React Native apps like any Android app.
- Build a signed release AAB with the JS bundle embedded and Play App Signing.
- Test native modules and the JS bridge on real, diverse devices.
- Optimize performance (e.g. Hermes) and watch app size.
- Device-diverse real testers catch module and performance issues before launch.
Frequently asked questions
Is closed testing different for React Native?
No. The requirement is based on your account type, not your framework. The same 12-tester, 14-day rule applies.
How do I build a release for React Native?
Generate a signed release AAB with the JS bundle embedded and release config enabled. Follow the official signed-build docs.
Why does a native module work in dev but fail live?
Native modules bridge to device-specific code that varies across manufacturers and OS versions. Real-device testing reveals it.
Does Hermes help my React Native app?
It can improve startup and performance. Test the effect on real devices during your closed test.
How many testers do React Native apps need?
The same minimum of 12 for 14 continuous days. Prioritize device diversity and recruit a buffer above 12.
Expanded for topical authority — additional practical sections below. Original guide content above is unchanged.
Quick answer
Google Play Closed Testing for React Native Apps matters because Google Play production access for many new personal developer accounts depends on a successful closed test: at least 12 real testers opted in for 14 continuous days, plus a policy-compliant, stable app. Use this guide to execute the steps correctly, avoid streak-breaking mistakes, and decide whether DIY recruitment or a managed closed testing service is the better path for your deadline.
Real-world scenarios: who this matters for
The guidance in this article on Google Play Closed Testing for React Native Apps applies across many Android product types. Use these scenarios to map the advice to your situation.
| Developer type | Typical challenge | Practical focus |
|---|---|---|
| Indie / solo | Limited tester network and time | Start closed testing early; keep a buffer above 12 opted-in testers; parallelize listing + Data safety work |
| Startup | Launch deadline vs 14-day rule | Treat the window as fixed; recruit in parallel with QA; avoid last-minute track setup |
| Agency / white-label | Multiple client apps, each needing its own test | One closed test per app; standardize opt-in onboarding; track eligibility dates per client |
| Flutter / React Native | Cross-platform build + Play Console quirks | Ship a signed AAB to closed testing; verify installs from Play, not sideload; watch vitals on mid-range devices |
| Native Kotlin | Device/API fragmentation | Cover API levels and OEMs in your tester mix; fix crashes before requesting production |
| Game / Unity | Performance + retention during 14 days | Keep testers engaged so count never dips below 12; monitor ANRs and battery |
| E-commerce / fintech | Policy + payment flows | Test checkout, permissions, and declarations carefully before production access |
| Healthcare / kids / education | Sensitive policies (Families, data) | Align listing, privacy, and content rating with real app behavior during the test window |
Visual placeholder: Scenario matrix infographic — Indie / Startup / Agency / Cross-platform paths for Google Play Closed Testing for React Native Apps.
Comparison: DIY recruitment vs managed closed testing
When your goal is Google Play production access, the path you choose for testers affects time, risk, and feedback quality. Use this comparison while deciding how to apply Google Play Closed Testing for React Native Apps.
| Approach | Time to 12 opted-in | Cost | Dropout risk | Feedback quality | Best when |
|---|---|---|---|---|---|
| Friends & family | Days–weeks | $0 | High | Mixed | Tiny MVP, flexible timeline |
| Reddit / Discord / Telegram | Unpredictable | $0–low | High | Variable | You can manage onboarding daily |
| Peer community exchange | Variable | $0 | Medium | Developer-biased | You can test others’ apps in return |
| Managed closed testing (e.g. Fast Testers) | ~1 hour after valid link | $15 one-time / app | Low (buffer of 15) | Real Play installs | You need speed + continuity for 14 days |
Decision tip: If a broken streak would delay revenue or a client deadline, prioritize reliability over $0 recruitment. DIY is fine when you already have engaged testers and can monitor Play Console daily.
Visual placeholder: Comparison diagram — DIY vs community vs managed testing for Google Play Closed Testing for React Native Apps.
Common mistakes (and how to avoid them)
These mistakes repeatedly show up when developers work through Google Play Closed Testing for React Native Apps:
- Confusing invited vs opted-in testers — Only testers who open the opt-in link and install from Play count toward 12. Check the opted-in number in Play Console, not your email list.
- Recruiting exactly 12 with no buffer — One uninstall can break continuity. Aim for ~15 active opted-in testers.
- Starting the counted clock late — Listing assets, Data safety, and privacy work should run during the 14 days, not after.
- Using sideloaded APKs or fake installs — They do not satisfy Play’s closed testing expectations and can create account risk.
- Ignoring tester feedback until day 14 — Crashes that drive uninstalls threaten your streak and your review outcome.
- Requesting production access before the continuous streak completes — Eligibility checks fail even if calendar time has passed.
Troubleshooting checklist
If something feels “stuck” while applying Google Play Closed Testing for React Native Apps, walk this list before changing strategy:
| Symptom | Likely cause | Fix |
|---|---|---|
| Console shows < 12 testers | Invites sent but not opted in | Resend opt-in link; confirm install from Play |
| “Not eligible” after 14 calendar days | Count dipped below 12 mid-window | Restore 12+ and complete a full continuous streak |
| Tester cannot join | Wrong account, Group lag, or track not published | Verify Google account, Group membership, track release |
| App fails to install | Device/API mismatch or signing issue | Check AAB, minSDK, Play App Signing |
| Production still rejected after testing | Policy, declarations, or stability — not the clock | Read the exact reason; fix that category completely |
Visual placeholder: Troubleshooting flowchart for Google Play Closed Testing for React Native Apps.
Action checklist
Use this checklist alongside the rest of this guide on Google Play Closed Testing for React Native Apps:
- ☐ Closed testing track created with a signed release (AAB)
- ☐ Opt-in link tested on a fresh Google account
- ☐ At least 12 testers opted in (prefer ~15)
- ☐ Daily check that opted-in count stays ≥ 12 for 14 continuous days
- ☐ Core flows exercised (login, main feature, permissions, offline/online)
- ☐ Crashes / ANRs triaged from tester reports and vitals
- ☐ Store listing, screenshots, and feature graphic drafted
- ☐ Privacy policy + Data safety + content rating aligned with real behavior
- ☐ Production access requested only after eligibility is green
- ☐ Staged rollout plan ready for first public release
Additional FAQs developers ask about Google Play Closed Testing for React Native Apps
Quick answer: what should I do first?
Confirm you are on a closed testing track with real opted-in installs, keep 12+ testers for 14 continuous days, and fix policy/stability issues in parallel. Then use the detailed sections above for Google Play Closed Testing for React Native Apps.
Does this apply to organization (company) accounts?
The classic 12×14 closed testing gate is primarily associated with new personal developer accounts. Always verify your account type and current Play Console eligibility messaging for your app.
Do friends and family count as testers?
Yes — if they opt in via your closed testing link and install from Google Play. They only help if they stay opted in for the continuous period.
Can I update the app during the 14 days?
You can usually push updates on the closed track, but unstable releases that cause uninstalls can threaten your tester count. Prefer polishing via internal testing first when possible.
What if production access is still rejected?
Read the exact reason. Incomplete testing is only one category — policy, Data safety mismatches, and crashes are common. Fix the cited issue fully before reapplying.
Is paying for testers allowed?
Using real people who install from Play is what matters. Avoid fake install farms. A one-time managed service that supplies real closed testers is a practical option when DIY recruitment is too slow.
How is Fast Testers different from free communities?
Free communities trade time and mutual availability. Fast Testers assigns about 15 real testers after you submit a valid closed testing link (one-time $15 per app) and includes a production access guarantee under its refund terms.
Where should I go next?
Review the related guides below, then either finish DIY recruitment or start closed testing if you need speed and continuity.
Sources, updates, and how to use this guide
This article on Google Play Closed Testing for React Native Apps is maintained for Android developers preparing Google Play closed testing and production access. Always cross-check eligibility text inside your own Play Console, because Google’s UI labels and account rules can vary by account type and date.
- Primary official references: Google Play closed testing help, Developer Program Policies, and Play Console eligibility messaging for your app.
- Practical experience lens: guidance here reflects common failure modes indie developers and agencies hit when recruiting testers, maintaining the 14-day streak, and recovering from production-access rejections.
- Last reviewed focus: 12×14 closed testing continuity, real vs fake testers, and parallel listing/compliance work during the window.
Related guides and next steps
Continue building topical depth around Google Play Closed Testing for React Native Apps with these Fast Testers resources:
- Closed Testing Vs Open Testing On Google Play
- Google Play Closed Testing For Flutter Apps
- Google Play Closed Testing For Saas Android Apps
- Google Play Closed Testing For White Label Apps
- Google Play Internal Testing Vs Closed Testing
- Multi Language Apps And Google Play Closed Testing
- Social Apps And Google Play Closed Testing Volume
- Vpn Apps And Google Play Closed Testing Challenges
- Pricing — $15 closed testing
- How Fast Testers works
- FAQ
- Developer reviews
- Case studies
- Submit your app / start closed testing
Need reliable testers so your 14-day streak does not stall? Educate first with the guides above, then start when you are ready — one-time pricing, real Play installs, dashboard tracking.
Internal navigation hub — added to strengthen topical connections. Original article content above is unchanged.
Continue learning
- Google Play Closed Testing for Flutter Apps — Learn about Flutter app testing for Google Play closed testing. Complete guide for Android developers publishi.
- Google Play Closed Testing for SaaS Android Apps — Learn about SaaS app testing for Google Play closed testing. Complete guide for Android developers publishing .
- Google Play Closed Testing for White-Label Apps — Learn about white-label testing for Google Play closed testing. Complete guide for Android developers publishi.
- VPN Apps and Google Play Closed Testing Challenges — Learn about VPN app testing for Google Play closed testing. Complete guide for Android developers publishing o.
- Common Google Play Closed Testing Mistakes to Avoid — The most common Google Play closed testing mistakes — wrong track, too few testers, dropouts, sideloading — an.
- Google Play Android Vitals During Closed Testing — Learn about vitals monitoring for Google Play closed testing. Complete guide for Android developers publishing.
Next steps
- Ready to run closed testing with real Android testers? Submit your app or see pricing ($15 one-time).
- Compare options on our testing service comparison page, or read developer reviews and case studies.
- Still deciding? Review how Fast Testers works and the FAQ.